Greetings, C. Latch! I've been PP'ing for some years now and can immediately recommend a stout, but thin paper which matches the composition of bank note paper of the late 1800's, which is 100% rag drafting vellum, still made in abundance and available in 8.5x11 to E-size sheets, or in rolls, if you're really ambitious. It has excellent wet strength and two wraps will add (4 x .0025)-.001 to the casting diameter. Not sure why it doesn't come out to a full .010, but that's the way it works out with most papers I've tried. Other papers I've had good results with are plain butcher paper (.0025-.003 thick, no plastic) dampened with a spray bottle, notebook filler (.002-.0025), copier-ream wrapper paper (.004 for patching .30 cal cast to 8mm). Most papers can be made to work, but I avoid those which are very delicate when wet. I've heard of using cigarette papers and other very thin types, but I'm too ham-handed for that. This brings up another point - can you just wrap a casting, size it to the finished diameter and get good results on target? Yes, you can. I've tried it this way as well as wrapping from bore size to finished diameter and gotten good results with both, though it helps when the wrapping and sizing is done on the day they're cast, before age-hardening sets in. It can still be done when they've been around a while, but the sizing is easier when they're still soft. Because of this, I own few molds specifically for PP. Most are conventional designs and I wrap and size to throat diameter. The hardest alloy I’ve successfully patched and sized down from full diameter is quenched WW’s. Linotype will cut through the paper at every driving band when sizing a wrapped full diameter cast, so they’d have to be sized to bore diameter first, then wrapped.
A note on alloy: You mention that you intend to use 70/30 COWW/SOWW for hunting. While perfectly acceptable for patching, I have doubts there will be any expansion on flesh. Even if there is, antimonial alloys above 3% tend to fracture as they deform. For good weight retention, my inclination would be to reverse the ratio at least and make them soft. Even plain lead PP’d can be driven at full velocities appropriate to the Marlin 1895 pressures.
Parallelogram or rectangle? Actually, either can work equally well with a little attention to some details. The twistier the rifling and more numerous the lands, the more likely the seam will be crossed by a land, thus assuring no leaks. With your micro-groove barrel, you have at least 12 lands, if not 16. I don't know the twist rate, but I have a hard time believing that the seam on a square-cut patch would fail to be crossed by a land as it engraves in that many grooves. If you want to use a parallelogram, all well and good, but it’s a good idea that the seam uses the opposite twist from the rifling. Right-hand rifling twist? Use a left-hand seam, to make sure your seam isn't parallel with the lands. What angle? It's not critical, but I tend to use a 15 or 20 degree cut on the patch ends. A 20 deg angle equates to 1 turn in 3.97” in a .46 cal, which guarantees it will never match the rifling regardless of direction. I've seen some people use patches of such extreme angles that their patches look like a long, narrow diamond. That looks like a PIA to work with. Not saying they shouldn't, but I'm not doing it. Never needed to. Your patch should look about like this:
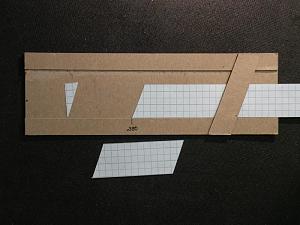
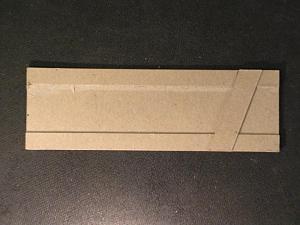
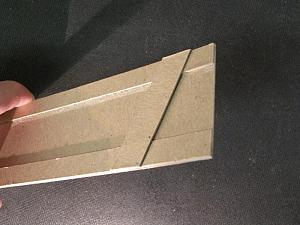
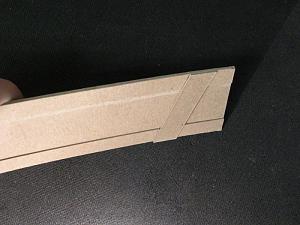
I do not use a 1-patch template for cutting patches. Too much trouble for me to hold the thing down without it moving while I'm cutting the patch - and I cut too far beyond the template too. Much better for me to cut strips of the needed width from the end of the roll or narrow end of the sheet (for proper stretch of drafting vellum) and cut them a touch short (1/16") for 2 wraps, because it can be stretched as it's wrapped on, making for a tight seam and a tight patch when dry. The last half-inch or so of paper, I stroke with a little dab of wood glue and roll it down on a piece of drawer liner, making sure to glue only paper to paper, not paper to lead. The strips should be from the heel to half way up the ogive + .100". The extra .100" is for folding under the heel. I quit using twisted tails a few years ago - too much wasted paper and torn tails, and that much more handing and attention to detail. I roll the wrapped heel between thumb and index finger when almost dry to pleat the extra like a cupcake paper, hold the heel down on a flat surface and give them a twist to fold it all flat. They are blasted off and shredded to confetti when they exit the muzzle. Here's my patch cutting fixture, made from cereal box cardboard, 7" x 2.5" glued double thick, for cutting patches from strips:
An interesting note on Lever-action chamber designs is that they don't often have a throat like a bolt-action does, but sometimes they do. Chamber blueprints usually show a chamfer from full chamber diameter into the rifling. Mine are this way, so I tend to patch to the maximum diameter that will chamber without resistance and let the entry into the rifling do the sizing. The chambers aren't much over what they need to be, so the difference is only .002-.003 more than groove anyway. A chamber cast will tell you what your chamber-to-bore transition looks like, but it sounds like you are already getting good performance with conventional practices. Just a thought.
Crimping? I crimp, but I make sure case mouths have a smooth radius from inside to outside - no sharp edges. My .357's and others will crimp well enough into the crimp groove to grip the boolit without cutting through the patch. This also assures a smooth, tear-free exit. I have pinched through them a few times, but usually I'm being too forceful.
Lube your patches. It doesn't take much - less than what a grooved boolit uses. I usually roll them in a groove in a block of Emmert's or tumble-lube in Ben's Liquid Lube. Lee liquid alox works okay too, but I prefer my boolits to not be tacky. Ben's and LLA will make them waterproof.
There you have it. Good luck with it.


 Reply With Quote


