If they are still hanging up, use some 0000 steel wool to clean up the edges of the cavities. Usually cures it or me, along with running the lead hot.

|
   
   
|
|


If they are still hanging up, use some 0000 steel wool to clean up the edges of the cavities. Usually cures it or me, along with running the lead hot.
The solid soft lead bullet is undoubtably the best and most satisfactory expanding bullet that has ever been designed. It invariably mushrooms perfectly, and never breaks up. With the metal base that is essential for velocities of 2000 f.s. and upwards to protect the naked base, these metal-based soft lead bullets are splendid.
John Taylor - "African Rifles and Cartridges"
Forget everything you know about loading jacketed bullets. This is a whole new ball game!

I agree with everyone who says you need more heat for your alloy and especially for your mold.
We all choose to do the same things in a different way. For me, smoking the cavities has made a lot of difference in how easy the bullets drop at first.

My eyes must be bad.Gohon- No...the photos show no such thing.
Last edited by 243winxb; 12-06-2018 at 01:57 PM.
Comet brasso mon ami house hold abrasive cleaners arnt a "graded" abrasive there is a mix of grits in them from very coarse to very fine. They are soft and break down to fast a to sharp cutting edge for finishing. Of the house hold get buys tooth paste will work. As will automotive rubbing compound. The comet could possibly be graded by settling in light oil or water. Will describe later. I doubt you have ruined the mould.
To grade an abrasive for lapping a small bowl of light oil or water is required and a second bowl
Put 2" of water or light oil in first bowl and lightly sprinkle abrasive to be graded on top of it. Set timer for 10 mins
At 10 mins pour remaining into second bowl do not disturb what is settled on bottom of first bowl. This is the heaviest coarsest grits and are usually to coarse for lapping
at 15 mins por into the clean empty bowl not disturbing the bottom settling this can be used for coarse lapping
at every 15 mins repeat above every time is a lighter finer abrasive grit.
In this way you can grade or separate the finer useable grits. this should work with the house hold abrasive cleaners. It also will grade the grit laying around the pedestal grinder in your shop or other abrasives.
http://pgbrandsweb.esecurecare.net/a...detail/a_id/21Is Comet ok to use to clean aluminum?
Comet Deodorizing Cleanser with Chlorinol No. Product is too abrasive for most aluminum surfaces around the home; for instance, window screens, siding, etc. (Comet may be used on good quality aluminum cookware if rinsed thoroughly and dried immediately after using. Cheaper items such as camping utensils or disposable cookware may be discolored by this product.)
Mr. Clean All Purpose Yes, these products may be used diluted to clean surfaces with the exception of brushed aluminum. We recommend rinsing.
Comet Disinfecting Bathroom Yes, this product may be used to clean aluminum surfaces. We recommend rinsing.
Spic & Span Powder No. Product is not recommended for washing unpainted aluminum. May be used diluted for cleaning painted aluminum, such as siding.
Spic & Span All Purpose and Glass Cleaner Yes. Note: aluminum should not be left wet with product for long periods of time, do not try to disinfect aluminum with Spic and Span 3 in 1. Aluminum can be cleaned with the product using the conventional spray and wipe dry method.
LeeThe lack of antimony will let the bullets shrink more while cooling in the moulds?? My guess.Knowledgebase
Lead Alloy for Lee Bullet Molds
Posted by Steph @ Lee Precision on 29 January 2018 01:42 PM
Our bullet mold weights for our rifle and pistol bullet molds are based in a 95% Lead / 5% Tin mixture.
Match the lead hardness to the pressure created with the load data.
For round ball and Muzzleloader/Conicals/REAL bullet molds, pure lead is required.
Check with a metallurgist on this one.

Dripping cold alloy into the mould. Add heat. Mould and alloy!
Clean with hot water and toothbrush to get any compound out of the vent lines.
Whatever!


For the new Lee molds I have recently purchased, I heat-cooled cycle them a few times on my hot plate. I also clean with brake clean just to make sure all oil is off the mold. Sometimes I'll cast a bunch and don't even look at them, just dump them in the pot. Almost every mold I purchased new needs some break in, and my heat-cool cycling seems to speed up the process. I heat my mold on a hot plate, cast a few then start checking and most molds will be dropping good bullets by this time. BTW, I put nothing in the mold, no smoke carbon, no "release agent".
With a sticky mold I sometimes tap open the mold; cut the sprue, then tap the sprue plate screw to open the mold (carefully, just a tap sideways to open the mold). This helps greatly even with a stubborn mold).
My Anchor is holding fast!
On the subject of lapping compound- comet cleanser is not the best material, the grain sizes are all over the place. Please use valve grinding compound, specified grit (like for optical work), OR in the worst case, you might even use the lee recommended compound. Keep faith!
I want to thank everyone for their help with this.
I scrubbed my mold with a toothbrush and dish soap water and rinsed it. I dried it using a heat gun, then I smoked it. I also looked at it closely and used a razor blade to trim some lead flakes off of the surface between the two halves. I did smoke it as well. I realize that we have varying opinions on smoking in this thread. I wanted to stay consistent with how I prepared the mold initially. I hit the bolts and the alignment pins with a q-tip and antiseize. Once I started casting, after I filled my first bullets, I used my antiseize to lube the mold again. I opened the sprue plate and lubed the top of the mold.
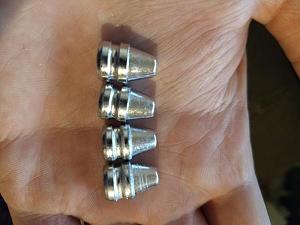
I produced a decent amount of bullets given the amount of time I spent casting, in comparison to my previous attempts. I took a pic of my mold after I cleaned it in anticipation of having problems again. I am not sure if those marks are from Lee's machining process or the comet. The bullets look like they turned out fine though.
I discovered that the issue is not only related to the temperature of the alloy but also the flow rate. It can help to poke the spout with a wire to speed up the rate if it slows down too much.
It is hard to tell if the mold behaves differently after lapping, it can still take 3-4 hits to drop all of the bullets, some cavities drop quicker.

.My eyes must be bad
Could be...He's now getting good casts with the same comet cleaned mold. As pointed out earlier, if the comet had of cut into his mold and made the rings, the rings on his casts would have raised ridges, not ringed depressions.
Not sure what marks you're talking about but keep in mind if the comet had cut into the cavity the cast would have a raised edge, not a depression. Most of your casts look pretty good but some with rounded edged indicate a raise in temperature is still needed. Alloy temperature of 650-700 degrees should work but sometimes 750 degrees is called for. Again, though expensive, get a thermometer so you have complete control of your casting...I am not sure if those marks are from Lee's machining process or the comet.
Build a PID to control your casting pot, you'll kick yourself for not doing it sooner.
I preheat my molds to apr 300°, set my casting pot between 675° and 750° and like to run apr 2% tin for good fill out.
this mold has a bevel base and curved lube grove.

Last edited by Grmps; 12-09-2018 at 02:47 PM. Reason: can't spell :(
I see what you mean with respect to fill out between the lube groove.


Okay, I'm coming into this conversation late, but here's my two cents anyway.
All of my Lee molds like to be run fast and hot. Doesn't matter if it is the old one cavity .38 wadcutter or a six cavity, they like it hot and fast (both fill rate and casting tempo).
Some of my Lee molds have been smoked, some haven't. If I can get them to work without, fine. If I've tried the obvious easy answers and it still doesn't work then I'll try smoking it. One of the long reach BBQ lighters works well for smoking molds. IF all that still doesn't work, it is time to consult the witch doctor and start thinking about sacrificing a chicken or two.
I also don't get too bent out of shape until the mold has been heat cycled four or five times. I have an older style two cavity 312-185 that after using it five times the sixth time it suddenly decided it was related to a Hensley and Gibbs mold and it just started raining boolits so I ran about half of a three pound coffee can of them.
You might need a bit of tin, but range scrap presumably had enough tin already so???
Your boolits in the bottom picture of post #30 still look a bit too rounded to me. You don't really need a thermometer, especially if you are using an electric pot. Set you dial to where it just melts your alloy then increase the temp by about half a number and try it, eventually you'll find the sweet spot.
If you have another mold that casts okay, I would use that while chasing pot temperature.
Hope this helps,
Robert
The two on top in the pic were better examples, the two on the bottom were rounded more in comparison.
I agree with what Robert states here.Originally Posted by Mk42gunner

and just to be clear, I am talking about Mold temp, not necessarily alloy temp. Casting faster will keep the mold hotter.
The boolits will tell you the mold temp. Poorly filled out boolits, mean the mold is way too cool. Shiney Boolits that are filled out mostly mean the mold is still too cool, but you are getting close. Boolits that are partially shiney and partially dull grey mean the mold is closer to the temperture you want, but still a bit too cool. Boolits that are fully filled out and are completely dull grey means you have achieved the best mold temperature. NOW, if the boolits start looking a little frosty, you are still good. BUT when the boolits start looking so frosty they look galvanized, you are too hot, at that point you will likely have some problems with fracturing.
Let me add one more thing on this, a mold that is hot enough, will usually drop the boolits easier (less tapping), than a cold mold.
I also agree very much with what Robert states here.
A new mold can need several sessions to break-in and become a pleasure to use. Several things happen during that time. First, while washing the mold with hot water and dish soap get most of the machining oil off the surface, there is oil in the pores of the metal that take time to 'cook' out. Oxides will build up during Break-in, which acts like a mold release agent, much like smoking the cavities is, but my opinion is the smoking it can be detrimental to those oxides forming...this is one of those "6 of one, and Half a dozen of the other" kind of thing. You'll have to decide what works best for you, as you gain more casting experience. There is no wrong answer. Also during break-in, the alignment pins will 'mate' and open and close more smoothly.
Lastly, even a experienced caster will learn what the mold prefers, as every mold will like varying conditions during casting...once you learn those, the mold will become a pleasure to cast with.
~~~~~~~~~~~~~~
“If someone has a gun and is trying to kill you, it would be reasonable to shoot back with your own gun.”
― The Dalai Lama, Seattle Times, May 2001
Constant pressure on the Lee handles when pouring without allowing the sprue plate to open. Up the alloy temp a bit and pour FAST - look at the bases. Some are good cuts and some have divits - alloy & sprue plate cool fast. Carefully just break the sharp edge at the top of the mould - leaves a slight groove at the top of the blocks to help venting. Pour FAST, as soon as a puddle is on one hole, just move to the next, don't stop the stream. You will get used to it but it takes a while. Practice counting 1) after pour until the sprue puddle looks right; 2) after cutting sprue to opening the mould; 3) after you dump them and close the mould. Warning, that big sprue plate is hard to keep hot and the cutting handle is pot metal - breaks easy. Start pouring near the sprue pivit bolt - it is first to cool. I don't use 6x anymore for pistol and only 2x for rifle - better results.
Whatever!
My casting cadence depends on the bullet's appearance. Very shiny and I can speed up the cadence a bit. If the bullets are starting to get dull, just before frosty, I'll slow down. For a lot of years I just used this method for my casting, no thermometer. Also, if the bullets drop with sharp edges, pot temp is OK. If rounded edges or wrinkles, pot temp too cool. It ain't rocket surgery. With my starting equipment (Coleman stove, SS pot and a Lee ladle) temp control was a bit difficult and I had to closely watch the finished bullets. Just keep my eyes on what I was doing, or I could have built an electronic control unit to keep my melt within +/- 5 degrees and used an infrared thermometer to keep my mold temp even...
My Anchor is holding fast!
I agree a cold mold.You will find when you hit the molds sweet spot in tem the bullets will drop much easyer without all the beating.The PID is an idea you will never regret.
I sent hatch a pm. I suspect he isn't charging a very large premium for the ones he builds, it sounds like they're high quality. I don't doubt I could build something myself. I wired something similar to keep a chest freezer at refrigerator temperatures. Just thought he might be able to get one to me before I have time to do it myself.
Last edited by weeple2000; 12-08-2018 at 12:53 PM.
 Posting Permissions


| BP | Bronze Point | IMR | Improved Military Rifle | PTD | Pointed |
| BR | Bench Rest | M | Magnum | RN | Round Nose |
| BT | Boat Tail | PL | Power-Lokt | SP | Soft Point |
| C | Compressed Charge | PR | Primer | SPCL | Soft Point "Core-Lokt" |
| HP | Hollow Point | PSPCL | Pointed Soft Point "Core Lokt" | C.O.L. | Cartridge Overall Length |
| PSP | Pointed Soft Point | Spz | Spitzer Point | SBT | Spitzer Boat Tail |
| LRN | Lead Round Nose | LWC | Lead Wad Cutter | LSWC | Lead Semi Wad Cutter |
| GC | Gas Check |

 Reply With Quote