


Titan ReloadingMidSouth Shooters SupplyReloading EverythingLee Precision
RotoMetals2

Donate Now Goal amount for this year: 4000 USD, Received: 0 USD (0%)
Our Annual server fund drive is going on now! This donation drive helps fund Cast Boolits for an entire year, and helps support our 2nd amendment rights! You can donate by Paypal by clicking the DONATE button. Or by Cash / Check / MO to the address below:

Willy Snyder
PO Box 2732
Pocatello, ID 83206


Page 1 of 3 123 LastLast
Results 1 to 20 of 41

Thread: Upsized my Smelting Pot

  1. #1
    Boolit Buddy
    Maximilian225's Avatar
    Join Date
    Oct 2007
    Location
    Hills of Western North Carolina
    Posts
    192

    Upsized my Smelting Pot

    Been Working on this for about a week. Finally got to drive it today.
    Melted and poured 130 pounds of lead today in less then three hours from cold pot to done.


    It's made out of the top of an old water heater I got from a friend. The old melting pot is included for scale


    It is a bottom pour. I used a spring to hold the valve closed. I think I may do this to my dripping LEE.


    5 Gallon bucket comes up to the top of the lower weld on the left leg. I figure it will hold about 300 pounds of WW when 3/4 full.


    127 Beautiful Bars of Silver Goodness.


    -Max

  2. #2
    Boolit Mold
    Join Date
    Jul 2008
    Location
    Hills of NC
    Posts
    9
    N-i-i-i-ce!! Will you be making more and selling them?

  3. #3
    Boolit Master copdills's Avatar
    Join Date
    Jul 2007
    Location
    South Carolina
    Posts
    825
    very nice , could you show us more on the inside and how you made the bottom flow

  4. #4
    Boolit Master Just Duke's Avatar
    Join Date
    Dec 2007
    Posts
    4,502
    Wow! bottom pour. That's what I need. Great job.

  5. #5
    Boolit Master Leadforbrains's Avatar
    Join Date
    Dec 2006
    Location
    TN
    Posts
    573
    Wow! I am in awe.
    Fast is fine, but accuracy is final!
    Will kill for food!

  6. #6
    Boolit Buddy
    Maximilian225's Avatar
    Join Date
    Oct 2007
    Location
    Hills of Western North Carolina
    Posts
    192
    Quote Originally Posted by copdills View Post
    very nice , could you show us more on the inside and how you made the bottom flow
    I will get some pictures of the valve up as soon as I can.

  7. #7
    Boolit Master copdills's Avatar
    Join Date
    Jul 2007
    Location
    South Carolina
    Posts
    825
    Thanks that would be great

  8. #8
    Moderator Emeritus
    dromia's Avatar
    Join Date
    Mar 2005
    Location
    UK. Sutherland & Co Durham
    Posts
    5,134
    Very impressive Max, very impressive.

    Welcome to Cast Boolits BTW Hawkeyenc.


    For fine firearms and shooting requisites visit my Web Site by clicking the link below:

    Pukka Bundhooks

  9. #9
    Boolit Master in Heaven's Range
    madcaster's Avatar
    Join Date
    May 2005
    Location
    Virginia
    Posts
    1,083
    I like it too!

  10. #10
    Boolit Buddy
    Maximilian225's Avatar
    Join Date
    Oct 2007
    Location
    Hills of Western North Carolina
    Posts
    192

    The Inner Workings

    First off as I am rarely satisfied with the first incarnation of anything. I have cut another section of the water heater and split it vertically to make a shield/chimney to go around the outside welded to the angle iron legs. I mounted it even with the bottom of the pot so it will direct more of the heat up and around the sides of the pot. I had some trouble on the lower "simmer" setting with the lead clinging to the walls.

    This is the inner workings of the pot the cross rod is 3/8 steel rod and the valve rod is a piece of 1/2 steel rod. The linkage between the two is made from a piece of 1/2 conduit. It is relieved so the valve rod can pivot. I used stainless cotter keys for the linkage pivots. There is a piece of flat steel welded in the bottom about 1/2 off the bottom with a 5/8 hole for the valve rod to travel through. This is in place of the normal protrusion that is on the end of the valve rod in most bottom pours. This was the last thing I welded in after I had the valve rod squared up. A plumb bob is your friend for finding where to drill the holes on the sides for the cross rod to pivot on, to cut the slot in the pot, where to drill the cross rod and still keep the rod centered over the hole.


    This is a close up of the linkage for the rod


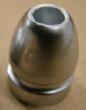
    The spout is made from a hardened bearing sleeve. I imagine a plain piece of black steel pipe would work, but it would have to be chamfered. The bearing sleeve though already has a chamfer in the end. I used this as the bottom part of the valve. ( This one is smaller than the one I used.)


    I slid this into a nut that was a snug fit and welded into the nut. Than welded a 3/8 galv elbow on the other end. Be sure to leak check this stuff with compressed air in water before using it with the lead. I drilled a 3/4 hole in the lowest part of the pot and centered the nut over it and welded the nut to the bottom of the pot.


    This is a closeup of the bottom part of the valve with the guide bar viewed from the top.


    I chucked the 1/2 rod in the drill press and set it on about 400 rpm and used a mill file to cut the angle on the bottom of the rod ( Alas, I have no lathe......Yet.)
    Then I used valve lapping compound to fit the valve rod to the bearing sleeve.


    This is the valve rod going through the guide. It seals quite nicely.


    The only shortcoming is that the pipe on the bottom cools to much at the elbow if I am away after pouring too long and requires the use of a propane torch played over it to restore the "flow". I am going to put a heat shield on the front to help redirect some of the lost heat to the pipe. Hopefully that will solve the problem. The bottle neck for me is that I own only one ingot mold.


  11. #11
    Boolit Master crabo's Avatar
    Join Date
    Jun 2007
    Location
    D/FW
    Posts
    3,141
    Max, make your own ingot molds. I used 5 pieces of channel and welded angle on the end. They are 8" long and drop a 3 pound ingot. Let them rust a little and the ingots drop out easily.
    Last edited by crabo; 10-11-2008 at 08:02 AM.
    Crabo

    Do not argue with idiots. They will drag you down to their level and beat you with experience.

  12. #12
    Boolit Master copdills's Avatar
    Join Date
    Jul 2007
    Location
    South Carolina
    Posts
    825
    Thanks for the pics Maximilian225 I might just try this myself the pics and the great discription of how it works helps alot

    Thanks again copdills

  13. #13
    Boolit Man Pitmaster's Avatar
    Join Date
    Jun 2008
    Location
    South Bend, IN
    Posts
    86
    Quote Originally Posted by crabo View Post
    Max, make your own ingot molds. I used 5 pieces of channel and welded angle on the end. They are 8" long and drop a 3 pound ingot. Let them rust a little and the ingots drop out easily.
    What are the dimensions of your channel iron. I need to make some.
    Pitmaster

    HELGA: Where are you going?
    HAGAR: To sign a peace treaty with the King of England.
    HELGA: Then why take all those weapons?
    HAGAR: First we gotta negotiate...

    "The Second Amendment protects an individual right to possess a firearm unconnected with service in a militia, and to use that arm for traditionally lawful purposes, such as self-defense within the home." Antonin Scalia

  14. #14
    Boolit Buddy Ghugly's Avatar
    Join Date
    May 2007
    Location
    Central California
    Posts
    332
    Nice job. I have about 12 or 14 hundred pounds of WW that I've allowed to build up. I've been dreading smelting in the heat. That bottom pour sure looks like the way to go.

  15. #15
    Boolit Buddy hotwheelz's Avatar
    Join Date
    Sep 2007
    Location
    Western Wa.
    Posts
    275
    Very nice set I think I need to make mine a bottom pour looks alot easier...
    Ill be as nice as you let me and as mean as you make me, your Choice

  16. #16
    Boolit Master kodiak1's Avatar
    Join Date
    Dec 2005
    Location
    Alberta Territory. Canada
    Posts
    860
    Nice set up you will really go to town once you get a few more ingot moulds or build them.
    Ken.
    Ken.

    Be nice if it was better, but it could be worse

  17. #17
    Boolit Master
    HeavyMetal's Avatar
    Join Date
    Jan 2008
    Location
    Orange county, Ca.
    Posts
    3,944
    What are you useing for a heat source?

    That can't be a turkey fryer can it? I didn't think one would have the "BTU's" to melt 300 LBS of lead.

  18. #18
    Boolit Buddy
    Maximilian225's Avatar
    Join Date
    Oct 2007
    Location
    Hills of Western North Carolina
    Posts
    192
    Yep, it's a turkey fryer. Was a Clearance Item at Wally World for 20.00 this spring. I haven't used it with 300 lbs yet, but it turned 130 to liquid in about 40 minutes. Since those pics were took I have added an outer shell that comes down to the cross pieces on the legs made out of more water tank. also added shields to the side even with the bottom of the burner on three sides. It forces all the heat from the bottom to come straight up the sides of the tank. It really gets warm in a hurry now. I'll post a pic of "Mega Pot 2.0" this evening.

    -Max

  19. #19
    Boolit Master in Heaven's Range
    madcaster's Avatar
    Join Date
    May 2005
    Location
    Virginia
    Posts
    1,083
    Just keep an eye on your support for the whole shebang,make sure it is secure!

  20. #20
    Boolit Buddy
    Maximilian225's Avatar
    Join Date
    Oct 2007
    Location
    Hills of Western North Carolina
    Posts
    192
    Quote Originally Posted by madcaster View Post
    Just keep an eye on your support for the whole shebang,make sure it is secure!
    It's gonna ride on the steel welding table for the heavier loads. I don't trust those saw horses for more than one bucket full.


Page 1 of 3 123 LastLast

Posting Permissions

  • You may not post new threads
  • You may not post replies
  • You may not post attachments
  • You may not edit your posts
  •  
Abbreviations used in Reloading

BP Bronze Point IMR Improved Military Rifle PTD Pointed
BR Bench Rest M Magnum RN Round Nose
BT Boat Tail PL Power-Lokt SP Soft Point
C Compressed Charge PR Primer SPCL Soft Point "Core-Lokt"
HP Hollow Point PSPCL Pointed Soft Point "Core Lokt" C.O.L. Cartridge Overall Length
PSP Pointed Soft Point Spz Spitzer Point SBT Spitzer Boat Tail
LRN Lead Round Nose LWC Lead Wad Cutter LSWC Lead Semi Wad Cutter
GC Gas Check