

Here's one you might not do regularly, or one that you might not even care to do at all...
I picked up a Marlin 122 Auto-Safe .22 at a pawn shop the other day, and it was in ROUGH shape. I am fixing and repairing all the problems with it right now, but IF I'm able to sell afterwards, I should have a couple extra bucks on the side.
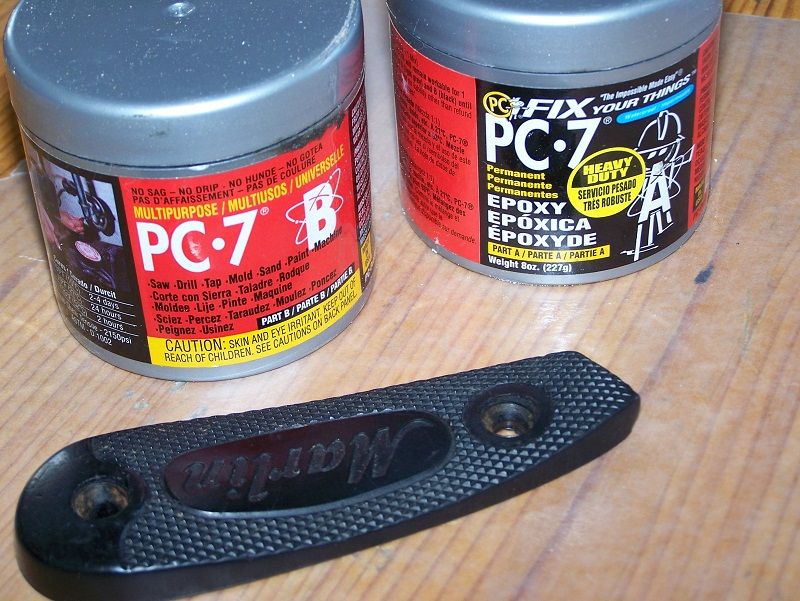
Here's the gig-- Plastic butt plate, right? Previous owner treated this rifle like a canoe paddle or a baseball bat, so the bottom corner of the butt plate is broken off and missing. I was entertaining thoughts of just buying a new one, but why drive up my costs on repair when I can do it at home? So I did! I'll give details at each picture...
(this is a teaser, because I have WAY MORE pictures of the rest of the job coming after the stock is done...)
Here's what it looked like when I got it. Clearly broken. A blind man would know that something was missing... Last year I bought the PC-7 cement, and it's pretty awesome stuff. One word of advice-- DO NOT, under ANY condition try to use this as a bedding agent. Don't ask me how I know this... However, it does make a wonderful all-purpose body repair for stuff like plastic butt plates.
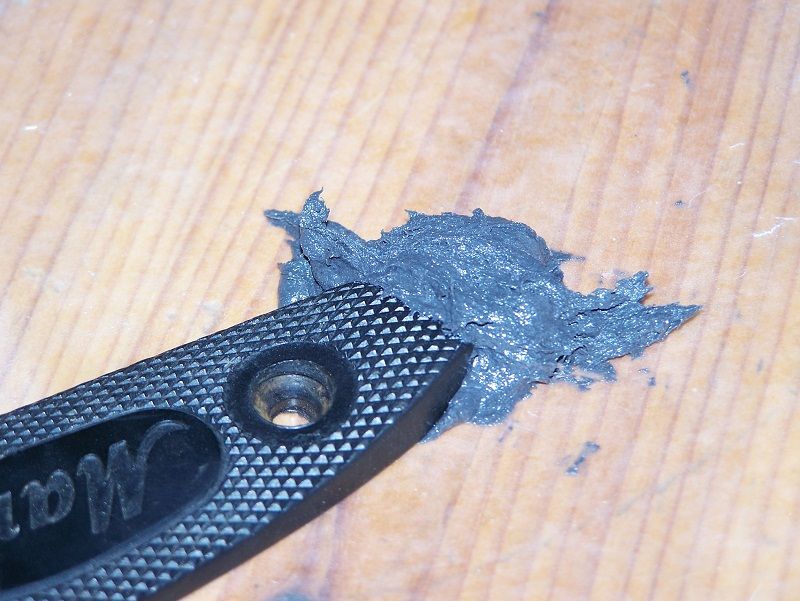
The PC-7 is goopy as all get out, but that's good in the way that it STAYS where you put it, and it won't "melt" all over the place if you are trying to make a form out of it. I just mixed it up and sort of smushed it against the broken portion. I did some cleaning and roughing-up of the area where I wanted the cement to bond, and then I set it up in the furnace room. PC-7 takes a long time to fully cure, but after a few hours it is still soft enough to carve at with a razor blade or clip it with some flush-cutting trimmers without the whole thing shattering or cracking.
Here it as after trimming off all the excess. I used 60 grit sandpaper after trimming away the largest portions. I used the plastic spacer, the thing that goes between the butt plate and the stock, as an outline, and then used 320 grit sand paper for final touches.
Next, I needed to replace the checkering. I used a set of Swiss Files for this and guided myself off of the existing pattern. After checkering was completed, I touched it all up with a sharpie permanent marker to fix the color shade.


|
   
   
|

|


 Reply With Quote


