Hello folks !
I could not resist to do my own press now when I have seen all of your beutiful work. I had to convert everyting to mm cause Im Swedish

and I will also make my dyes so thats much more easyer to do it in mm.
Some pics on the machine

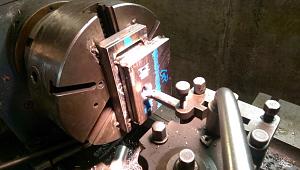
Here Im doing the holes and threading..
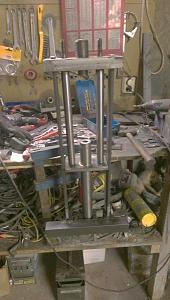
and som testing Before final assembly..
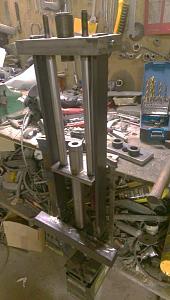
And more...
I hope to get it funktionally redy until this weekend,, I my gouverment here at home give me a freecard to the workshop

Hope you enjoying the pics and inspire som more to get the thumb out of,,,, and start to do your presses,, Im really enjoying this and will be more when im made my first 0,375 bullets,, then 6,5, then 0,30,and more and more,,,,
I hope .
I just have to figure out how to make dies,, I will try to use copperpipes and start doing 300gr 0,375 bullets with round leadtips,, later i will try to make bullets to my sniperrifle,, 340WBY Mag,,
Take care all of you.
If there are any questions,, just ask, and forgive me for my bad Spelling,,, Im an foringer
//Swede


 Reply With Quote


 ..........................................hehehe.


