

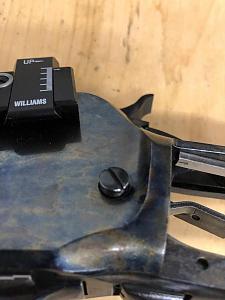
I took my recent manufacture Miroku Winchester 1886 45-70 apart to remove the rebound hammer feature. Getting it apart was no issue, and I was impressed with how tightly everything fit together, definitely a quality piece of machinery. I removed the rebound strut, polished the hammer spring strut (it needed it), clipped one coil off the stiff hammer spring, lubricated everything, and started reassembling the gun. No issue until I go to reinstall the rather tight hammer screw.
The screw does install all the way through the lower tang hole and the hammer, but with all internals installed I cannot get the hammer screw to start catching threads on the right side of the receiver. I can get it to catch threads and install fine without the hammer and lower tang installed, and with the lever all the way open, but with all the internals installed it’s not catching threads. I noticed quite a bit of wear marks on the hammer screw shaft (especially for a gun with less than 100 rounds) so I polished the shaft with hopes that would help my situation. Nope, still unable to get it to catch threads. I’ve tried grease, Kroil, lightly tapping the screw head with a non-marring hammer, but at this point I’m stumped.
I think the spring tension on the hammer screw from the hammer/sear/trigger is just enough force to cause this issue, because, as I said, I can install the screw with the internals missing. Since I can install the screw (without internals) the screw and receiver threads are fine.
This screw appears to be in stock at Midwest Gun Works and I’m considering buying one just to try.
Would appreciate any advice.

|
   
   
|


|

 Reply With Quote


