WidenersRepackboxRotoMetals2Load Data
Snyders JerkyMidSouth Shooters SupplyReloading EverythingLee Precision
Inline Fabrication Titan Reloading
Page 2 of 2 FirstFirst 12
Results 21 to 34 of 34

Thread: My newly fabricated smelting pot.

  1. #21
    Boolit Master

    Idz's Avatar
    Join Date
    May 2013
    Location
    New Mexico
    Posts
    842
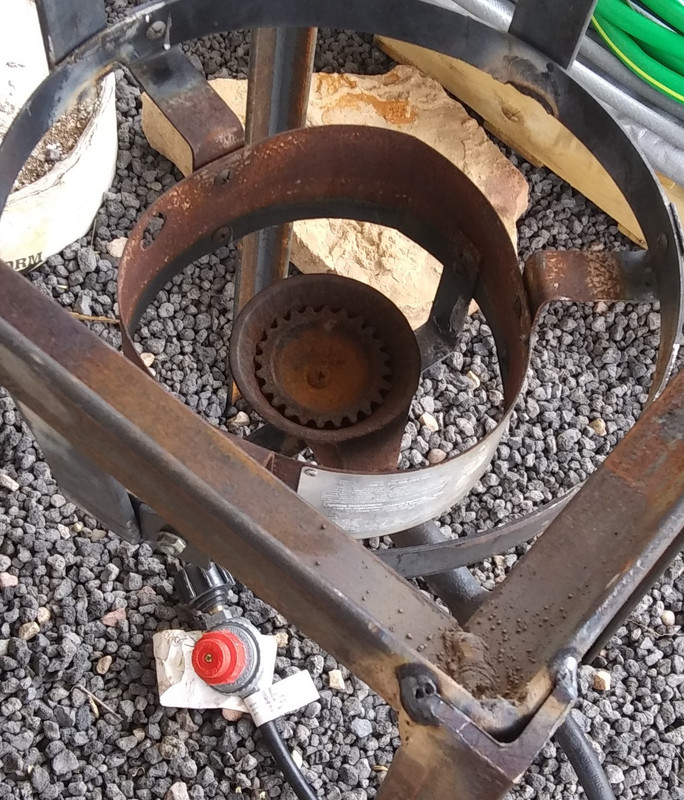
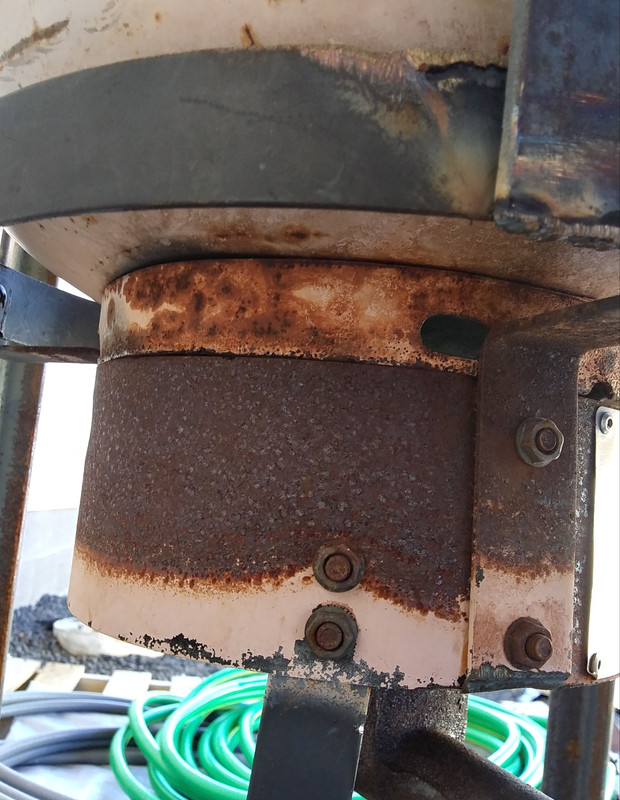
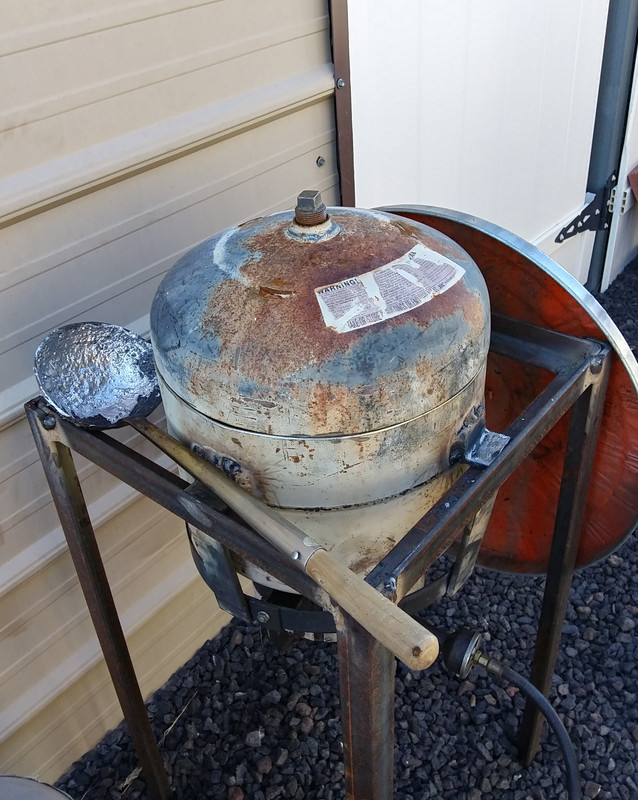
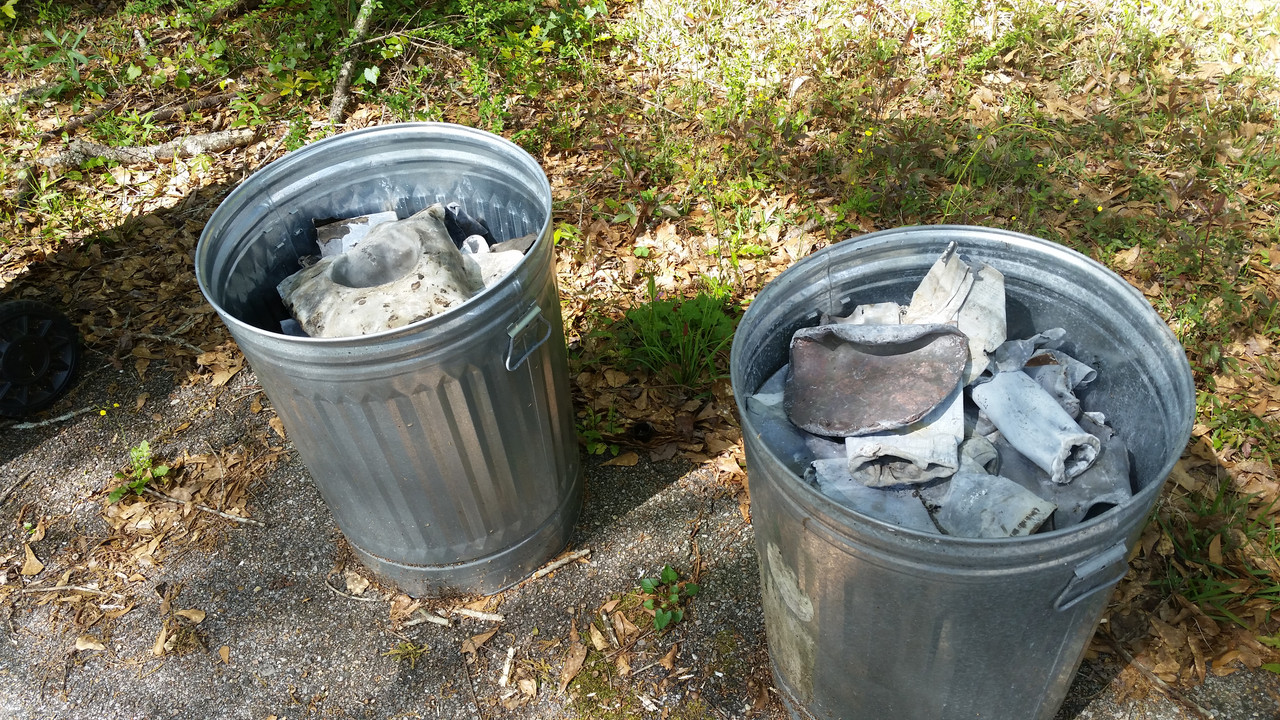
    I went a step further on the windscreen. My propane tank sits inside a 30 gal steel drum with a inner sheet metal liner giving about 1" of clearance around the tank. The drum to liner void space is filled with fiberglass insulation (paper removed). The tank sits on some bricks with a weedburner firing into them. The indoor range scrap we melt has bits of target cardboard and wood that acts as a reducing flux when heated in the covered tank. Its much nicer not being 'cooked' on the warm smelting day by an unshielded melting tank.

  2. #22
    Boolit Master MOA's Avatar
    Join Date
    Feb 2012
    Location
    Concho, Arizona. At home in the White Mountains at last. Formerly living in Mobile Alabama.
    Posts
    1,603
    Quote Originally Posted by Cap'n Morgan View Post
    Nice work!

    If you really want to save on the propane gas, you should make a dedicated wind shield/skirt - about an inch or two larger in diameter than the tank. It will isolate the tank from the wind and at the same time guide the heat flow alongside the tank. Make the shield deep enough to shield the burner as well. You'll be amazed how much faster you can melt a full load.
    Cap, what we did when fabricating the burner support housing was to open up the round flange that surrounds the burner housing so the bottom ring on the tank will insert itself into the windscreen of the burner. It now seals the wind from any direction and draws all its oxygen from the bottom of the burner area. We took extra time in the built to spread the supports with two extra washers to promote an spread at the top so as to allow the tanks bottom ring to set inside the burners windscreen. I like the heat concentrated within the 8" center of the bottom area of the tank. When I add my lead I always drop it in dead center where I know the heat is at the maximum.


    I guess I should have included this important image along with the others. I kept the top to use in retaining heat while lead is in the process of liquification, I now just need to tack weld a T to the plug at the top of the cover.

    Last edited by MOA; 11-13-2021 at 03:01 PM.
    [SIGPIC][/SIGPIC]

  3. #23
    Boolit Buddy JLF's Avatar
    Join Date
    Apr 2021
    Location
    Alvarez (ARGENTINA)
    Posts
    158
    Very good work. Congratulations Sir ....
    "When the homeland is in danger, everything is allowed, except not to defend it."

    Gral. Don José de San Martin.

  4. #24
    Boolit Master
    Join Date
    Mar 2005
    Location
    Mentone, Alabama
    Posts
    1,139
    Just curious what that white stuff is you appear to be using as flux.

  5. #25
    Boolit Master MOA's Avatar
    Join Date
    Feb 2012
    Location
    Concho, Arizona. At home in the White Mountains at last. Formerly living in Mobile Alabama.
    Posts
    1,603
    Quote Originally Posted by JohnH View Post
    Just curious what that white stuff is you appear to be using as flux.
    That's shavings of a candle. Paraffin. I first use sawdust and then paraffin to flux.
    [SIGPIC][/SIGPIC]

  6. #26
    Boolit Buddy
    Join Date
    Mar 2011
    Posts
    207
    For folks that are jealous of your ability to weld... buy a welder, watch some YouTube videos.

    What I’m jealous of is that you have a supply of scrap lead that warrants such a smelter!

  7. #27
    Boolit Master MOA's Avatar
    Join Date
    Feb 2012
    Location
    Concho, Arizona. At home in the White Mountains at last. Formerly living in Mobile Alabama.
    Posts
    1,603
    Quote Originally Posted by ChuckJaxFL View Post
    For folks that are jealous of your ability to weld... buy a welder, watch some YouTube videos.

    What I’m jealous of is that you have a supply of scrap lead that warrants such a smelter!
    I was just lucky back in 2013 while working with a roofer who was reroofing a home for my in-laws that I proposed a deal to purchase all the lead roofing boots he obtained from his roofing jobs. I did this for 7 years. The amount was substantial. The usual annual amount was 6 or 7 35 gallon galvanized trash containers like these with flattened boots. Had to be moved with a dolly. First attempt to move with the handles on the cans resulted in the handles breaking loose. About 6 tons of pure lead.

    [SIGPIC][/SIGPIC]

  8. #28
    Boolit Master


    Join Date
    Sep 2007
    Location
    East Texas
    Posts
    3,641
    Captn Morgan is giving you good advice about making a heat shield!
    My first large pot build was a piece of 12” pipe 12” long and made with a valve set up like a RCBS Pro Melt.
    Any slight breeze would only allow the center to melt. I had a meat smoker that was not being used and made a heat shield out of it and it made all the difference.
    My next pot was big enough to hold 20 gallons of range scrap and I had the same problem so I used a 55 gallon drum as a heat shield and it worked wonders!
    It only took half an hour to get 500 pounds of clean lead melted!
    Insulation between the pot and the shield will reduce that time and save you fuel!

  9. #29
    Boolit Bub
    Join Date
    Mar 2008
    Posts
    32
    MOA in your #12 post you show some smaller ingots. I already have some of the larger 5 lb molds. What brand are the smaller molds or how did you make them?

  10. #30
    Boolit Master MOA's Avatar
    Join Date
    Feb 2012
    Location
    Concho, Arizona. At home in the White Mountains at last. Formerly living in Mobile Alabama.
    Posts
    1,603
    Rayant, the mold on the 5 pound ingots was just something I found on a shelf at goodwill. You can see some of it in the left upper corner of #12 post. Here's a better image with a pair of vice grips clamped to it.

    [SIGPIC][/SIGPIC]

  11. #31
    Boolit Buddy
    Join Date
    Jul 2014
    Posts
    248
    I buy regular roof flashings from my local junkyard for about $1.00 per pound. I melt them down as is and clean and flux them very well. I then add 1/2# of tin to every 15# of melted flashings and assume I have a 30:1 ratio. I would welcome opinions and comments.
    Jed

  12. #32
    Boolit Master MOA's Avatar
    Join Date
    Feb 2012
    Location
    Concho, Arizona. At home in the White Mountains at last. Formerly living in Mobile Alabama.
    Posts
    1,603
    Quote Originally Posted by jednorris View Post
    I buy regular roof flashings from my local junkyard for about $1.00 per pound. I melt them down as is and clean and flux them very well. I then add 1/2# of tin to every 15# of melted flashings and assume I have a 30:1 ratio. I would welcome opinions and comments.
    Jed
    Looks like your on the right track. Having a good base of pure lead to make whatever alloy of a sufficient hardness for required velocity is nice to have.
    [SIGPIC][/SIGPIC]

  13. #33
    Boolit Master Jim22's Avatar
    Join Date
    Oct 2020
    Location
    Eastern Washington
    Posts
    592
    Yer braver than I storing a gallon of chainsaw gas next to your welding setup. Picture 5.

    Jim

  14. #34
    Boolit Master MOA's Avatar
    Join Date
    Feb 2012
    Location
    Concho, Arizona. At home in the White Mountains at last. Formerly living in Mobile Alabama.
    Posts
    1,603
    Quote Originally Posted by Jim22 View Post
    Yer braver than I storing a gallon of chainsaw gas next to your welding setup. Picture 5.

    Jim
    Thanks Jim22. Actually the two saw horses that the square frame is resting on is not the welding station used to do the welds. If you'll notice the flat table with the square sheet metal plate which the frame and tank are welded on are a good distance from the fuel can. See images 3 an 4 in the first and initial post on the thread. The saw horses were where I put the hot pieces to cool off and to keep them out an away from the welding work area. Saw horses were over by the roll up shop entrance.

    But, your eyes are good and sharp. Had the fuel can been near the welding station I would be thanking you for noticing that safety issue and I'd be sure to correct it. Thanks for your observations. B.
    Last edited by MOA; 02-20-2022 at 09:54 PM.
    [SIGPIC][/SIGPIC]

Page 2 of 2 FirstFirst 12

Posting Permissions

  • You may not post new threads
  • You may not post replies
  • You may not post attachments
  • You may not edit your posts
  •  
Abbreviations used in Reloading

BP Bronze Point IMR Improved Military Rifle PTD Pointed
BR Bench Rest M Magnum RN Round Nose
BT Boat Tail PL Power-Lokt SP Soft Point
C Compressed Charge PR Primer SPCL Soft Point "Core-Lokt"
HP Hollow Point PSPCL Pointed Soft Point "Core Lokt" C.O.L. Cartridge Overall Length
PSP Pointed Soft Point Spz Spitzer Point SBT Spitzer Boat Tail
LRN Lead Round Nose LWC Lead Wad Cutter LSWC Lead Semi Wad Cutter
GC Gas Check