This is what I am hoping to finish soon.

|
   
   
|


|


This is what I am hoping to finish soon.
WOOOHOOOO Perfect!Originally Posted by TylerR

Thank you so very much

Very neat! Way beyond my knowledgebase though. I tried to understand and play with electronics when I was a kid.....was only successful at the basics....nothing like what you know and do. Good job!
Last edited by GWS; 04-20-2022 at 10:03 PM.
What program are you guys using to create the 3d parts?
I believe he used SCAD.
Does anyone have a wall hanging bullet/case feeder plate storage solution?
And how do you all store all the bits and pieces(adapters, drop tubes ect)? My wife wants her dinning room table back...LOL
As an old Cad designer with 48 years experience with Autocad, I obviously find that easiest for me to use, because I know it. But it's extremely expensive for hobbyists. TylerR uses the free software DesignSpark Mechanical. The Plate Generator however was first created by AmmoMike and improved by TylerR using a "programmer's cad", OpenScad, also free.
In the interest of staying compatible with what TylerR creates, I've been learning DesignSpark too, but I've also used Fusion 360 (web based, but very powerful and free), and even MeshMixer to modify existing .stl files.
One advantage Fusion 360 has being "web-based" is you don't need an expensive computer to use it.
What you need to understand, is that most of these "cad" programs make drawing files, not .stl (print) files compatible with 3Dprinters. The drawing file has to be converted to a .stl file (by the cad software, after you create a 3d cad drawing file....usually a built-in conversion) THEN it has to be "sliced".....made into a .gcode file....by slicer software like Cura, Prusa, or IdeaMaker (most slicers are free software)
Plate storage? I don't.....least not yet. Plates are often different thicknesses, so that makes it harder....not to mention I have 3 different diameters of plates for small, medium, and large 300mm collator bases. My mind is open to ideas though.
For the other adaptors, drop tubes, ect. I so far am using this sort of thing: (by caliber)

Last edited by GWS; 04-24-2022 at 01:28 AM.
Thanks GWS. I have been playing with OpenSCAD. Blender, and FreeCAD. Blender seems to have lots of extra stuff meant for scene creation and 3d animation. FreeCAD is a bit buggy but works. I am going to give DesignSpark a go. BTW, I don't believe Fusion 360 is free anymore so I am going to avoid it for now. I am nowhere near the skill set that you guys have, but I want to get closer to it.
Did you figure this out? I have one now. I can help out.
I wanted to stop by as a newbie and thank everyone for this resource.
I'm wondering if you use the stock APP clear tube to feed from the collator, or do you utilize the spring as well to the APP. I haven't found an adapter in the instruction manual that appears to interface with the clear tube.
Edit: well just as I posted that. I found the answer on post 4303. So it looks like I'll have everything printed and waiting on springs then.
Last edited by jamg; 04-26-2022 at 01:00 PM.
You can do that way with springs alright.....but you can use the Lee tubes too. For example:
Starting with TylerR's Bracket main over his slider......
Then say you want to process .223 rifle brass...... print the part below and stuff it into the Bracket Main....
Then drop the the proper Lee clear tube adapter into that......either #1,#2, or #3. (which ever one will drop .223 brass nicely into the .223 Brass-insert-223.)
APP-Drop-Tube-1-Adapter or.....
APP-Drop-Tube-2-Adapter or.....
APP-Drop-Tube-3-4-Adapter or.....
Last edited by GWS; 04-27-2022 at 02:02 AM.
I am printing a Collator size 300 and the Mount_Post.stl does not align with the main body holes on the bottom correctly. The MONGO post size is too large. Am I missing another Mount_Post?
TylerR has made a million parts for this project, but he hasn't made every possible way to mount them.....especially not his last and latest base which happens to be your 300mm size. But you don't have to wait for him to do all the work.
What I did is go to Home depot, buy an aluminum angle, and bolt it to the 300 base. Wasn't that hard, just required placing the angle where I wanted it and used a pencil to mark circles through the base holes onto the angle. Then drill a couple of holes. (and I didn't have to wait 8 hours for 2 or 3 parts to print, because once you get that far, it's not hard to drill a larger hole through the other face of the angle and into a vertical post, made of conduit, square tubing, heck even a stained 2x4. Bolt it with a single bolt with washers and a nut, and you have a pivot you can adjust to any angle and tighten.
My support is a little more elaborate, having a hortizontal bar and welded sliding square tube angled "T" extensions, where I mounted a collator on each side, but you don't have to go that far to make something that works just as well and way, way simpler.
Picture below shows a 300mm on the left of the "T" and a normal smaller collator on the right side of the "T"extension.
TylerR's version of the collator-mounted proximity switch is in this picture....works great. But using his shorter prox switch in it is a little more streamlined.
Last edited by GWS; 04-27-2022 at 10:06 PM.
OK, thank you for the quick reply. Was planning to go to Home Depot this week anyway so will get some parts for this project.
Thank you. I'm not totally following for the APP press as I waiting on it's arrival. I've been looking at the adapters and I'm trying to figure out which ones to print.
For the bullet feeder project is there an adapter that goes from the drop_tube to the spring? and from the spring to the hornady_drop_tube_adapter?
The APP should be here shortly, and having it in hand should hopefully make it easier to figure out. I think I'm looking for the adapter that goes from the drop_tube to the clear lee tube?
Last edited by jamg; 04-28-2022 at 03:20 AM.

I think you may have something else going on. The holes on the mount post stl do line up. I have printed and tested it myself, and just confirmed it in CAD as well.
If you want to use clear tube between the APP insert (or offset) then yes, there is an adapter that goes from the clear tube to the bottom of the drop tube. These is a picture of that in the project. Or you can just skip the clear tube completely.
I wondered about that, but I have no way to confirm since I don't use the 3D printed mounts. I figured you probably did have that handled already. That said, I wanted to show that people can mount these collators many ways, some faster than waiting for 3D parts to print and just as effective.
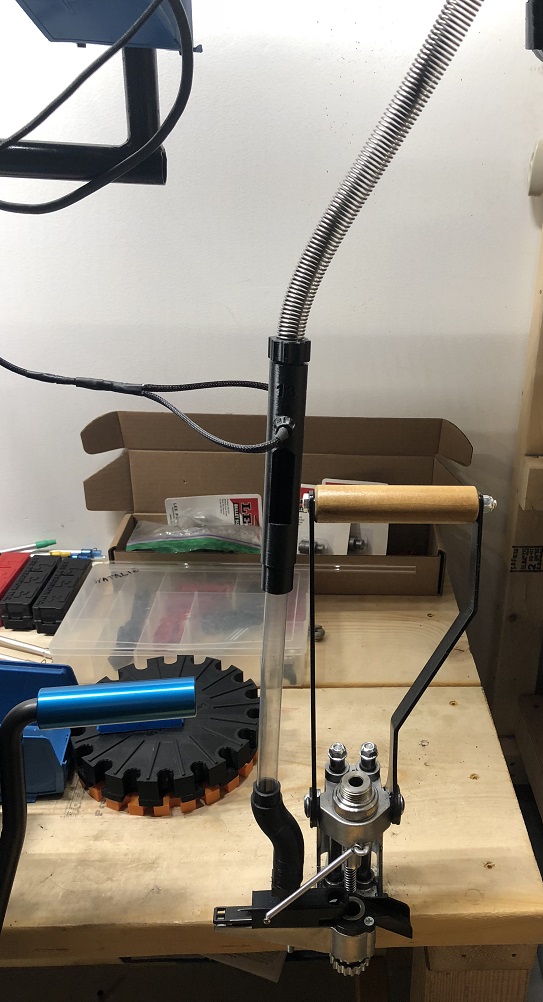
It's a personal thing....I prefer to see the stack behind the clear tube, when I can, but it sure isn't necessary, and you can stretch the tube until you can see somewhat. I usually use both.....the spring tube is less demanding for exactness in location and orientation, so I often use it to transition. Sometimes weirdly.....This is how I did it where I didn't have room to get my .223 bullet drop very close to the die location.
Those tiny springs came from the local Ace Hardware. and they work just fine. Did not have to wait for the printer or for the slow boat from China.
Last edited by GWS; 04-28-2022 at 10:01 AM.
Absolutely! if there's a will there's a way.
Thank you @TylerR. The problem is the difference between the curvature radius of the Mount_Post.stl with the 300 sized body curvature radius. The curvature of the post has a smaller radius than the 300 sized body. So the the bottom holes do not match up since the post does not touch the curvature completely and is pushed back (given the curvature differences). I printed the parts twice to make sure that the parts did not had any print failures and it still does not match. I was able to fix it yesterday night by sanding the Mount_Post curvature to have a larger radius. With the curvature fixed the parts fits nicely on the bottom holes (the top sidewall holes always match since the bottom parts are flat).
 Posting Permissions


| BP | Bronze Point | IMR | Improved Military Rifle | PTD | Pointed |
| BR | Bench Rest | M | Magnum | RN | Round Nose |
| BT | Boat Tail | PL | Power-Lokt | SP | Soft Point |
| C | Compressed Charge | PR | Primer | SPCL | Soft Point "Core-Lokt" |
| HP | Hollow Point | PSPCL | Pointed Soft Point "Core Lokt" | C.O.L. | Cartridge Overall Length |
| PSP | Pointed Soft Point | Spz | Spitzer Point | SBT | Spitzer Boat Tail |
| LRN | Lead Round Nose | LWC | Lead Wad Cutter | LSWC | Lead Semi Wad Cutter |
| GC | Gas Check |

 Reply With Quote


