Copy all. Thank you!

|
   
   
|


|


Copy all. Thank you!
USAF Retired
WAR EAGLE!
"A government that does not trust its law abiding citizens to keep and bear arms is its self unworthy of trust."
- James Madison
New question...
I'm using Simplify3D as my slicer, and I'm using the recommended print settings from the Manual. When I slice the Feed_Die_45_Body.stl there is a section approximately 3/4 of the way up that I'm assuming is where the ball bearings will ride once complete. That section is so thin that all that shows in Simplify when I slice it are the threads. There is no wall behind it. When I tried printing it, that is how it printed as well. What can I do so that there is a wall there to support the threads? Does the actual file need to have the wall thickened, or is it a slicer/printer issue? It printed beautifully up to that point, and I initially thought my nozzle had become clogged, but when I started a new print, it is printing beautifully as well.
USAF Retired
WAR EAGLE!
"A government that does not trust its law abiding citizens to keep and bear arms is its self unworthy of trust."
- James Madison

It is a slicer/printer issue. The design itself can not be changed. That wall was exactly why I went from 4mm bb's to 3.5mm bb's. What size nozzle are you using? If it is larger then .4mm that is the issue.Originally Posted by mktacop

I'm using a .4 nozzle. I just downloaded Cura and am trying to copy my print settings over to it from Simplify. The preview in Cura looks better than in Simplify, so hopefully that will do the trick. Thanks for your help!
USAF Retired
WAR EAGLE!
"A government that does not trust its law abiding citizens to keep and bear arms is its self unworthy of trust."
- James Madison
For the record, you are not the only one who has had this problem with other slicers. I have never had an issue with Cura.
I checked and there was a newer version of Simplify than what I was using available. I've downloaded/installed it and when I checked the preview of the print, it shows the section in question to be solid now. I've started the print using the new Simplify, so I'll know for sure if it worked correctly in a couple of hours.
USAF Retired
WAR EAGLE!
"A government that does not trust its law abiding citizens to keep and bear arms is its self unworthy of trust."
- James Madison

I've only used the "IdeaMaker" slicer and have never had a problem printing any of the files in the project so far...on the contrary, everything's been perfect. However I haven't printed a 3d Feed die yet. Since I have the bearings, I'll download and print this "Feed_Die_45_Body.stl". That way we will see if it's limited to only the Cura slicer. I've only used .4 nozzles.
TylerR, what settings are important on this part?
Last edited by GWS; 09-15-2021 at 10:56 PM.
The issue is not with Cura, it is other slicers. As mktacop said, as soon as he upgraded Simplify (which does not seem so simple in this case) it started working. The only important thing is to use a setting that will give good resolution, but that is really because of the threads. That is why we recommend .12 layer height.
The wall in question is very thin, because it needs to be, but it is greater then .4mm, so it should never be completely missing when sliced or printed. You cannot make the overall diameter of the die any bigger. It has to fit in the press like any other 7/8" die. Like I said, I had to go to a 3.5mm bb just to get the proper clearance. This issue only crops up with the .45 caliber dies.
I wasn't saying the issue was Cura......I just want to know if my fav. IdeaMaker has an issue like others. Only way to find out is print one. I planned on .12 layer height.....I print at that more and any other layer height. What about # of walls......? or thin-wall settings? Just want to test apples to apples.
I sliced the .45 set.....Assuming it's Ok to print both parts together? says it will take 5hr. 20 minutes. Be more like 6 hours at that layer height.....IdeaMaker time estimates are only close with more layer height (.2).
This will be my first attempt with your feeder designs....looking forward to more fun....
Last edited by GWS; 09-15-2021 at 11:46 PM.
My bad my friend, I misunderstood what you meant. Yes you can print the set together. I usually just do 2 walls, 20% infill. I have never used a thin-wall setting so I can't speak to that.
I thought so. But that's ok. If I do have trouble with it, I may have to change slicers.....ugh.....I tried Cura once, but I had a hard time with the settings.....just didn't feel easy to use for me, iow's setup organization was hard for me to understand....where IdeaMaker just made more sense......simply a chemistry problem.
After upgrading Simplify (just had to download and install the latest version), I was able to slice/print the 45 feed die with no issues.
Admittedly, I was several versions behind with Simplify as I was using 3.1.1 and upgraded to 4.1.2. I don�t know how many versions there were in between where I was, and where I am now.
FWIW, the Overture blue PLA+ is a very close match to Dillon blue for anyone with a Dillon press that is trying to match the color.
Sent from my iPhone using Tapatalk
USAF Retired
WAR EAGLE!
"A government that does not trust its law abiding citizens to keep and bear arms is its self unworthy of trust."
- James Madison
Has anyone here made a adaptor to attach a DAA Output Assembly to the bottom of the bullet feeder body? If so, can you share a link to the .stl file?
Thank you in advance
Attachment 288787 https://www.doublealpha.biz/us/mr-bu...utput-assembly
Is parts generator source available on githab ?
Not publicly, no.
I got the .45 cal. feed die printed. I successfully tested it on my little Summit press just to see if it could drop one at a time. I did not have a case ready, just a un-sized one, and the case wouldn't stay centered on the press, so only the first of three landed nicely. But that isn't the die's fault. A properly prepped case with an M die it would have been 100% perfect.
I have to admit, TylerR, on this one I was a little skeptical......shoulda known better.....great job! Worked first try! This will replace my Hornady metal one. Bearing activation rules. Fun stuff!
In case you're wondering....I didn't have a proper rubber band or spring, but hey it did the job...just a little funny looking......sorry for the shaky video......Iphone in one hand, working the press in the other.
Guess you can figure out....IdeaMaker works as good as Cura on that tool....YES! I don't have to learn another.
Last edited by GWS; 09-16-2021 at 11:20 PM.
I am very glad to hear it is working. I actually just purchased some more of the springs from mcmaster. They really do work very well. I tried rubber bands and o-rings at first but they just didn't work well, or last very long.
I do like to smooth out the insert with a little acetone to make it run even better. And I usually do a few passes with a round file on the inside of the insert and the die body to get rid of any rough edges.
I am unable to view your video.
My last two videos I left private by mistake.....hope I fixed that.
I have a box of various springs, but am finding it hard to mount one vertically, so I used a long one just on one side for the temporary test.
I'm impressed by the design....what I was skeptical about was how the balls would do inside the rough "comparatively to machined metal" holes. I'm still in wonder why it works so well.....but it does. I did smooth out the main barrels inside using a drill bit pushed vertically inside each. No acetone yet, except that I had to scrape the outside of the inner piece vertically on one side where the printer stopped and started layers in the same place......figuring that might be preferable to having start stops everywhere. I may yet acetone that side for looks, but it works smoothly the way it is.
My brother with his expensive DAA will be pleased to know he doesn't have to buy their expensive caliber exchange kits. I will have to design plates to fit inside his DAA bowl though, unless the Ammo Mike size fits.
Oh, I also added contrast to the .45 letters for my old eyes.....picture coming to this post in a bit. Used a white gooey paint stick, cleaned up with acetone.
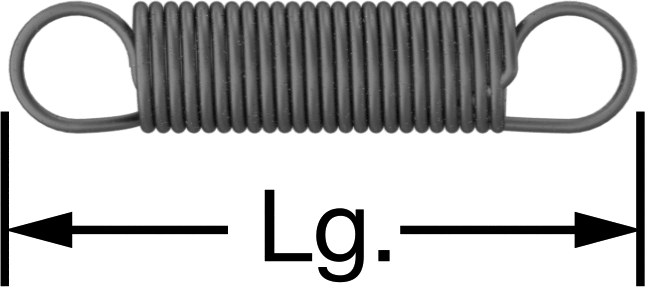
Picture of the spring you found?
Last edited by GWS; 09-17-2021 at 11:09 AM.
These babies right here:
https://www.mcmaster.com/9654K964/

If the McMaster link requires a log in try: https://www.mcmaster.com/catalog/127/1383
Then search for: "9654K964"
 Posting Permissions


| BP | Bronze Point | IMR | Improved Military Rifle | PTD | Pointed |
| BR | Bench Rest | M | Magnum | RN | Round Nose |
| BT | Boat Tail | PL | Power-Lokt | SP | Soft Point |
| C | Compressed Charge | PR | Primer | SPCL | Soft Point "Core-Lokt" |
| HP | Hollow Point | PSPCL | Pointed Soft Point "Core Lokt" | C.O.L. | Cartridge Overall Length |
| PSP | Pointed Soft Point | Spz | Spitzer Point | SBT | Spitzer Boat Tail |
| LRN | Lead Round Nose | LWC | Lead Wad Cutter | LSWC | Lead Semi Wad Cutter |
| GC | Gas Check |

 Reply With Quote