Thanks. I missed that one for the ramp.Originally Posted by GWS

The slider / case drop piece from the standard size fits in the 300. I just checked that out now than my 50+ hour 300mm body print is done!

|
   
   
|


|


Thanks. I missed that one for the ramp.
The slider / case drop piece from the standard size fits in the 300. I just checked that out now than my 50+ hour 300mm body print is done!

The 300mm body uses the Mongo ramp.
Sorry I see GWS already answered. I do not have a wall extender currently for the 300. The extender is really for when you have to run at an extreme angle for certain bullets, and brass base up. If just running regular brass you should be good.
It's funny because sometimes I go back through the thread to help answer new questions, and I am always amazed at the thought process and collaboration that went in to where it is today. Pretty amazing really.
I just wanted to thank all those involved in contributing to this project. As a new reloader and avid modder, this is right up my alley. I made one from thingiverse, and it works well for bullets, but all the options here are great. The feed dies got me to upgrade my press, and I'm printing a 300 for brass, as the largest I want to run right now is .308 and the 300 just feels like a good choice for it. It will seem really huge for my .380 ACP, so maybe I'll end up with a regular as well. I have PTS (printer too small) for the mongo, so that's out for now.
I was just filling the tubes for my Lee bullet feeder with the other collator, but I'm going to set it up with the proximity sensor and do this nicer feed setup. I'm sure I'll have questions later, right now I'm printing like mad and waiting for orders to come in. The 300 body is the largest single object I've ever tried to print, so it will be interesting to see completed. I have about 1.5 days to go just for that.
I'm kind of a noob at design, but I'll try to contribute if I see a spot that I can help in.
Welcome to the forum. Good to have another member. The depth of this project can be a little overwhelming at first, but isn't bad if you take it one piece at a time. The manual does a good job of covering most problems, but ask if you still have issues.
I too look forward to contributing, and will soon, but want to get things sorted out a little better before I send it to TylerR. Seems most of the time I need something electrical, it comes from china, and adds another 2-3 weeks. But I think the last piece I need is on the way.
Well, damn. The body looked good initially, but warped a little on the back and now I can't center the wheels. When I pull them up in the slicer together, it looks right, so I have a local problem.
My setup just isn't getting as good a first layer as I thought when I go over the whole bed. It "should" as it has a bed sensor and I'm running the calibration, but it's just not cutting it.

Questions:
0. What software are you slicing with?
1. Which printer do you have?
2. What kind of bed are you using? Is your print releasing from the bed prematurely?
3. Are you using an automatic bed leveler?
4. What brand, kind, and size filament are you trying to use?
5. What bed temperature are you using?
6. What filament temperature?
7. What distance from the bed are you trying to set your Printhead to for the first layer.
8. Is the top of the first layer round or flattened some? Do you know what baby stepping is?
9. layer height setting, first layer, 2nd layer and on.
10. Using a skirt, brim or raft?
I had trouble with my Creality glass bed until I took TylerR's advice and ordered a Polypropylene bed to clamp over it. Problems very rare after that, and when something does happen, I have to change nozzles and sometimes filament tubing. Mostly just getting the temperatures and first layer to nozzle distance right.....babystepping is a must every time for me. Got to get that first layer squeezed just right. But I only have used PLA and PLA plus. For me, temperature is best at 215C and 65C on the polypropylene bed, and works for every PLA I've used so far....Overture and Zyltec's normal and composite silks.
That will at least give us enough info to get started with help ideas, or who even has the experience with the machine and material you have.
Last edited by GWS; 11-04-2022 at 09:47 AM.
Wow GWS, thanks for the detailed list.
Software: Superslicer (modified PrusaSlicer)
Printer: Creality Ender 3 S1 Plus (Klipper firmware)
Bed: Spring steel (stock) with a 0.5mm PEI sheet instead of the stock sticker
Filament: Polyterra PLA, 1.75mm, 1kg, matte black
Temp: 60C bed, 225C extruder
First Layer Height: 0.3mm, 0.2mm for the rest
No brim or raft
First layer varied more than I would like, but it was about as good as I could get out of it. Some too close, some too far. I'm not sure what baby stepping is, adjusting the Z offset a little on the fly maybe?
The PEI is what I'm used to from my Lulzbot mini, though I replaced the one it came with. I think that one is 1mm. Both work well and are far more durable that the stock thin stuff the manufacturers use. I might try a similar polypropylene at some point if I find one. It seems like PEI has gotten popular lately. While the thin ones sucked, the thicker versions are very tough. Though the tall skinny parts from the bullet feed dies needed a brim to stay put on both printers. So the PP might be better there.
These printers apparently have a known problem with the auto level. I guess something is a little off on the Y axis, and it throws things off enough that the auto level doesn't work well. Some users replaced the mount for the sensor with one designed to place it on the same Y as the nozzle, this helped a LOT. After doing that, re-leveling and resetting Z-offset, then doing a mesh level with the auto level sensor, the first layer is now very consistent. I think this run is a little close, so I should move Z-offset up a little, but it was decent so I let it keep printing a new body.
I think this one will get it done, it's very flat and the ridges from the first layer disappeared after about 2 normal layers. It also seems to be sticking well, now that I know where to keep looking for warping. It's gotten to the top layers for the ramp and text, and so far so good. I did put a brim on this one, figured it can't hurt and they are pretty easy to clean up after. I didn't notice that area wasn't leveling well before as I never printed on it. Large prints certainly help detect issues.
If someone else is running an S1 with similar problems, try this thing out. I printed it on my Lulzbot, but it should print on just about anything. I used PETG for temp resistance, but other people have used PLA without issues.
https://www.printables.com/model/257...cr-touch-mount
The list in my last post was to just let everyone see where you are. There are so many variables with equipment and media, that knowing what you're using prevents us from giving you info that works for what we use, but not so much for you. That way people who DO have experience with what you have can chime in and help.
I've never used PEI, that was going to be next if PP didn't work.....but I don't ever have to use sprays, tape, or anything....with PP raised 5 degrees to 65C. In fact, for big prints like bases I have to wait until it's back to room temperature to release a print.....zero warping. I do clean the surface with 99% alcohol after every print, but that takes a few seconds. With smaller tall prints, that are top heavy I can release it earlier by popping it pretty smartly along the base with the spatula or even better, a upside down chisel. Absolutely love the Mamorubot Polypropylene. https://www.amazon.com/s?k=mamorubot...nker-1hour_2_9
Yes babystepping is Z-offset control on the fly. I try to get it right before the skirt (all I ever use) is done....squeezed down just enough that the 1st layer joins nicely with each pass of the nozzle....IOW's no holes or deep grooves between passes, and the finished print turned upside down looks like one smooth layer.....too low and the media can skip and cause hell.
I don't care for Creality's self leveling with the probe. No moving parts using the EZABL proximity sensor leveler from TH3D Studio...and their firmware. It levels perfectly for me, but you'd have to call them to see if that firmware can work with Klipper....I have no idea. When first starting out I gave a z command that would have broken a probe....so I dodged that bullet.
Last edited by GWS; 11-04-2022 at 03:58 PM.
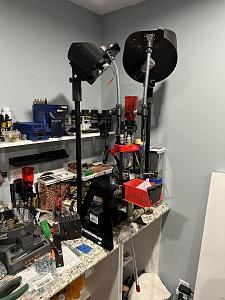
Well, I'm about 15 hours in, about half way. The flat bottom of the body is done and the walls are being built up. It looks great so far. Hopefully it finishes up nicely so I can put it together over the weekend. I have the other parts called out, other than some of the nuts/bolts I need to hit Ace for. I finally got the last electronic part, the sensors, so I can get the bullet feeder set up to work with the feed die. My press is going to look like a mad scientist experiment, but that's half the fun!
Got the electronics set up. It's working with the old bullet collator, feeding .38 Special into the feed die and refilling when I dump them into my hand. Very cool to see working. Wired up both sides and they seem good, but can't really test till the brass collator is ready.
Got the 300 size case feeder set up and connected to the press. Works great! I ran out of brass for .38 special, so I guess I need to switch over to something else. Thanks for the helpful thread! I need to explore the rest of the forum and get more loading done.
Last edited by tt365; 11-06-2022 at 01:22 AM.
Congratulations! Not as hard to get there as most people think. 3D printing is way more worthwhile than just making toys and trinkets, and brackets. Making reloading tools is a perfect fit.
I learned all I needed to know, here and on 3D printing videos on You Tube....even as old as I was. Learning a free 3D cad is next if you want to create your own designs. Lots of videos on that too.
Last edited by GWS; 11-08-2022 at 10:21 PM.
You took to it like a duck to water. Pretty impressive.
Hi Bossman! Good to rub posts with you again! I guarantee you there were a few missteps, but you guys were always there to help me figure it out.
AR-Bossman was the guy who encouraged me to dive in head first. It's been really fun and worthwhile....thank you!
Kind of a dumb little thing, but I already had a 3/4" square tube mount set up, so I made a little adapter to fit the 1" square tube mount. I don't think I'd try to hold the Mongo up with it, but it works for the little one just fine. If it's useful, feel free to include it in the repo.
I have some issues with my older collator with particular bullets, which might just not work well with these things, but the scad file for the plates made me want to try anyway.


Wow. It has been a while since I have followed the progress of Tyler's design. It is amazing to see the progress. I noticed that there is now a 300mm and Mongo version. Has anyone tried collating bullets with the Mongo? Or is it too much weight to hold? Looking for something to run on a star sizer nose down.
The Mongo he created first. But only the 350X350 bedded printers could print it. So TylerR had mercy on me and others who only had 300x300mm beds. Thus the 300mm was born.
I wouldn't dream of using the Mongo or 300mm for bullets.....the first basic size was the perfect for bullets, IMO. Pretty sure Tyler made parts to drop them nose down too, I just don't have a need for that.....even though I did make parts for AmmoMike's size collator to do that for a friend....even without the ramp.....but interest died before I got past the original .45 size plate.
That was 2 years ago last October in 2020. Here's the link.....in case you're curious. Most likely you already saw it.
https://castboolits.gunloads.com/sho...=1#post5006697
Last edited by GWS; 11-12-2022 at 11:58 PM.
I managed to adjust the scad code to make it work for these little bullets. .380 ACP flat nose 95 gr. I had to add the ability to move the ring of holes and slots offset a little from the default location, otherwise the slots were long enough to have the bullet lay down in the slot and eventually hang up the collator. I'll attach a ZIP with the STL and the modified scad code in case it's useful to anyone. Combined with the #5 flip plate it's flipping everything and running well now.
The only problem I have now is getting them to feed into the rest of the system. They are so short they can hang up in the spring adapter sideways. Once one does, they stack up and block off the drop hole. If I leave the adapter out or use the plug, I can get them to run fine. I tried the offset adapter, but that hangs up worse, I suspect my change to the hole location in the plate might make that one less likely to work.
And typing this gave me a facepalm moment. I think I can get Fusion 360 to modify an STL, and I have the plug, so if I can get it to start there I can probably get something going with it. I think if I make one like the standard adapter and neck the funnel section down faster it might help.
I'm glad I don't shoot .380's!
On another subject......I went and bought one of Lee's new Pro 6000/6 Pack Pro presses to play with for a winter project. At my age I'm always looking for a project to keep my brain busy. Will be using it to load.......(don't faint TylerR).....9mm. Still don't own one....yet.
Thought I'd use the Ammo Mike bullet feeder with the feed-all red plate I posted a couple of months ago. And share a case feeder already on line. Should be an interesting press.....for a 6 station progressive it is tiny! Lee finally has a new primer feed that just might work. Sorry no .380's in my future.....9mm is pushing it, but I'm thinking maybe my wife would like it for carry. Have NO idea what yet.
Last edited by GWS; 11-13-2022 at 08:40 PM.
That's funny, I ended up grabbing a Pro 6000 as well. So far, I like it. I haven't done any primers on it, my 38 special I primed on a single stage and the 380s are pre-primed as well. Maybe I'll toss some 308s in there, Lee claims it should work.
I did run about 150 38 special without issues other than maybe 4 that the case didn't hook into the shell plate properly. Just jostling the handle got them in place and it worked great. Coming from single stage and the pro 1000, it's been a nice upgrade. The 1000 I got as a kit cheaply from them, so I didn't lose much upgrading. I wanted to see if progressive would work for me, and other than primer issues I liked it. Even the priming wasn't too horrible, just irritating enough that it was worth pre-priming them to me.
Some quality time with a file got them feeding better, just needed to remove a little material on the offset adapter on the thin side of the adapter. Then I realized I printed it with the threads going the wrong way, so I get to run another one. No big deal, but hopefully I can call it good and do more loading. It is fun to mess with though.
The Z-mirrored parts work great after adjusting with a file the same way as before. Down side, flipping the parts also flips the orientation of the offset so you have to unscrew the main adapter from the collator body and rotate it 90 degrees to keep the hole lined up properly. No big deal, but if you end up swapping them often, it could be annoying. I doubt I'll do it much, unless I go to something that won't fit in my spring. Larger bullets are unlikely to need the offset though, so it might not matter.
Last edited by tt365; 11-14-2022 at 02:24 AM.
Me, too. I'm hoping it ends up being a decent press. I'm switching from a Pro 1000 press. With 6 stations, I got to ditch the Lee bullet feeder contraption, use a factory crimp die, and get to add a powder checker.
I just finally got it all mounted up, but still need to hook my electronics up and mount the switch box. I'm thiniking I'll make a new back plate to the electronics box that will mount to the pole (3/4" gas pipe) for the bullet collator. I ended up trying the APP press case feeder parts, and they work out perfect on the 6000. I hope the case feeder location will work out when I put the APP press on the pedestal mount, too (with a longer spring tube for sure).
Thanks to everyone who contributed to the project!!!These look like they will work out great.
 Posting Permissions


| BP | Bronze Point | IMR | Improved Military Rifle | PTD | Pointed |
| BR | Bench Rest | M | Magnum | RN | Round Nose |
| BT | Boat Tail | PL | Power-Lokt | SP | Soft Point |
| C | Compressed Charge | PR | Primer | SPCL | Soft Point "Core-Lokt" |
| HP | Hollow Point | PSPCL | Pointed Soft Point "Core Lokt" | C.O.L. | Cartridge Overall Length |
| PSP | Pointed Soft Point | Spz | Spitzer Point | SBT | Spitzer Boat Tail |
| LRN | Lead Round Nose | LWC | Lead Wad Cutter | LSWC | Lead Semi Wad Cutter |
| GC | Gas Check |


 Reply With Quote