RotoMetals2Load DataLee PrecisionReloading Everything
Titan ReloadingWidenersMidSouth Shooters SupplyInline Fabrication
Repackbox Snyders Jerky
Page 5 of 11 FirstFirst 1234567891011 LastLast
Results 81 to 100 of 209

Thread: Making 30 Cal Dies

  1. #81
    Boolit Master
    Join Date
    Mar 2013
    Location
    seated with Him in the heavenly places in Christ Jesus (Eph 2:6)
    Posts
    1,192
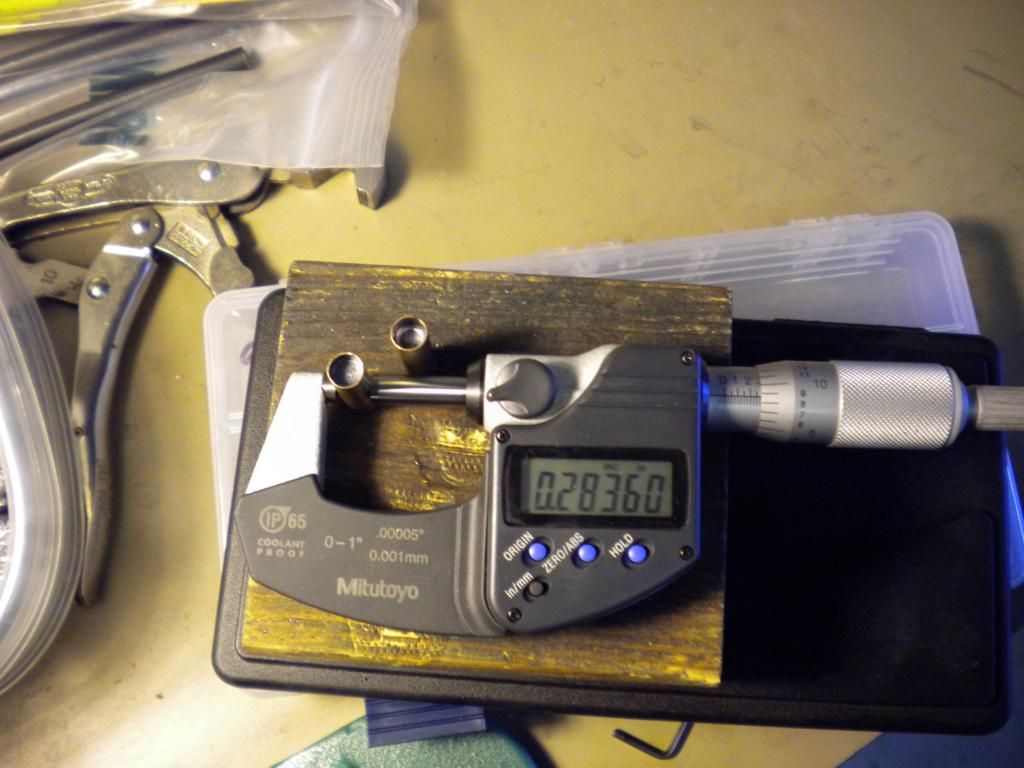
    finally got to work in the shop today and finish the core sizer, takes a cast .243 boolit and sizes it down for core seating… here I am using a Lyman mold that drops the cast boolits at 0.248, a tad too large for the 7mm jacket, so I sized them down to 0.235 and they slip in most of the way:


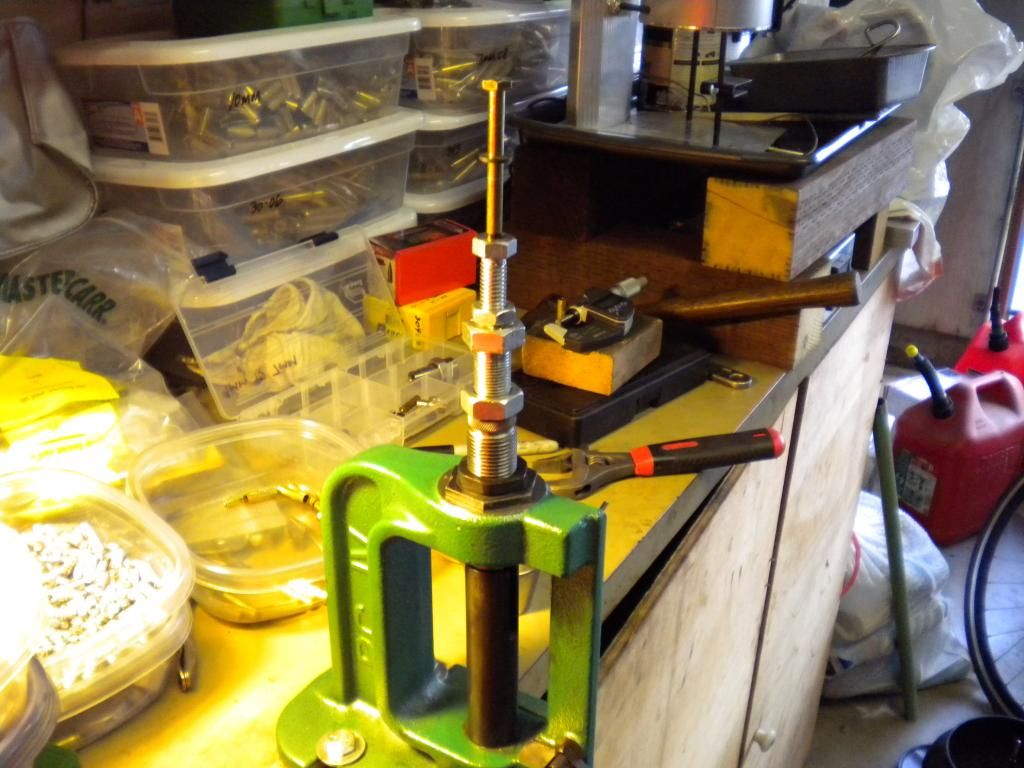
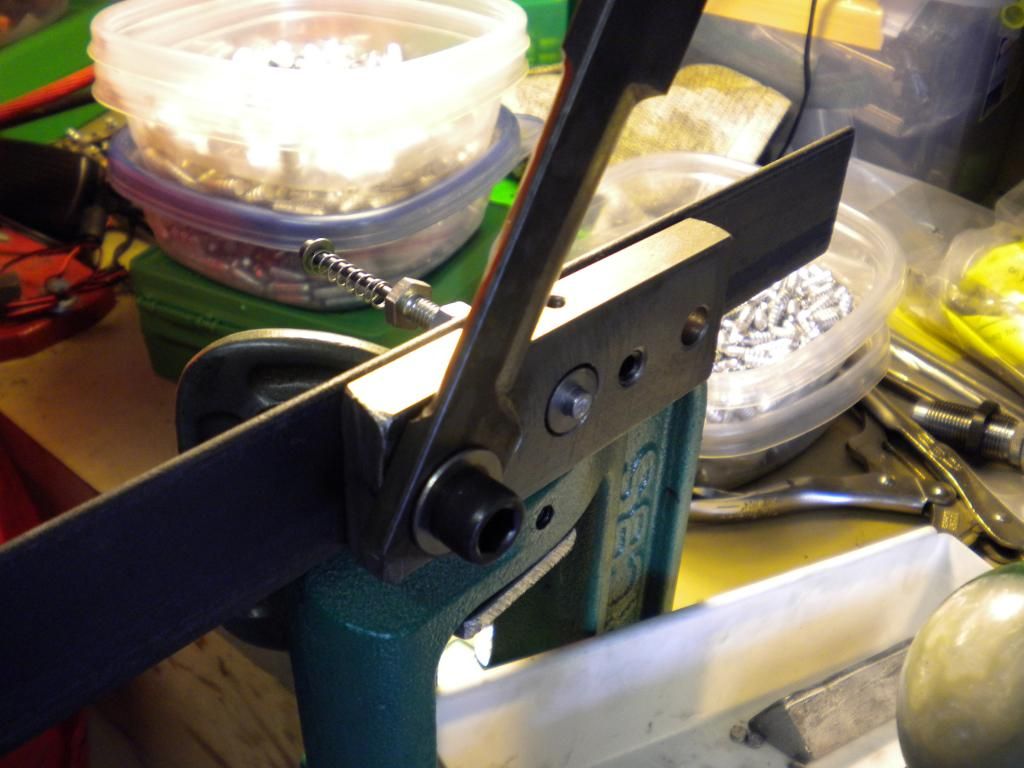
    not much to look at but the die slips inside of the threaded die body, and you can see the boolit ready to be pushed up thru the die (pass thru punch is on top, Lee threaded die body in the press, and 9/16" die inside)…

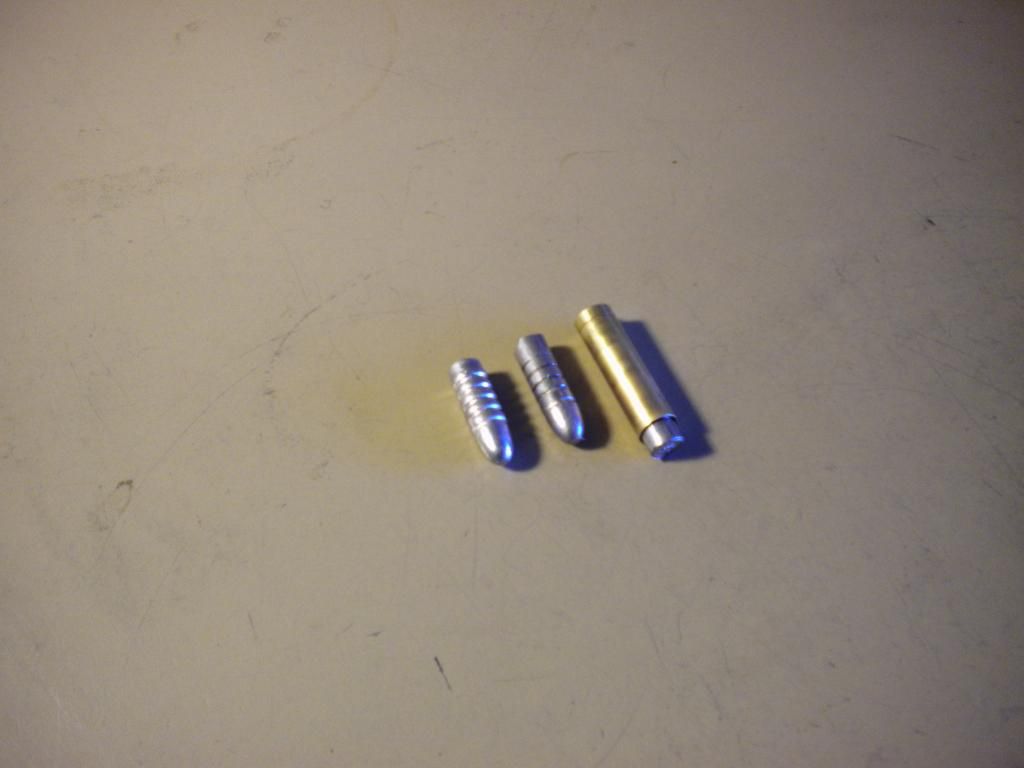
    here is a shot of what was produced from left to right: cast boolit at 0.248, cored sized at 0.235, core inside of 7mm jacket ready to be seated (cores weigh 87gr, which makes a 147gr swaged bullet, might be a little heavy for my 7mm-08, but i may go with it for now):


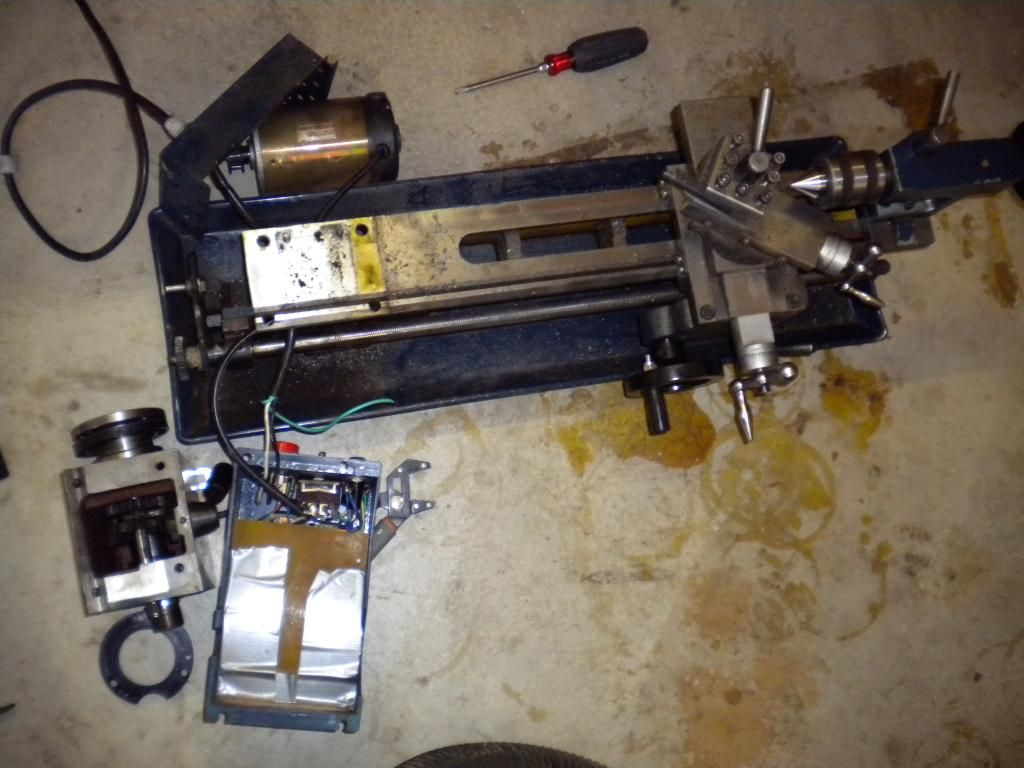
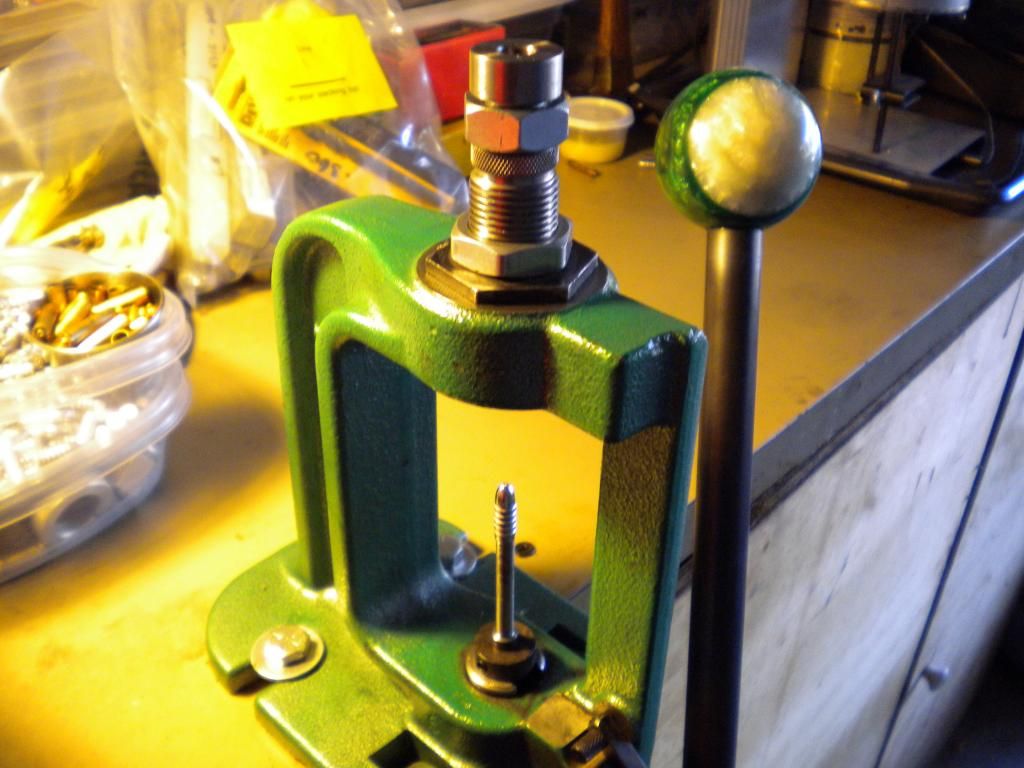
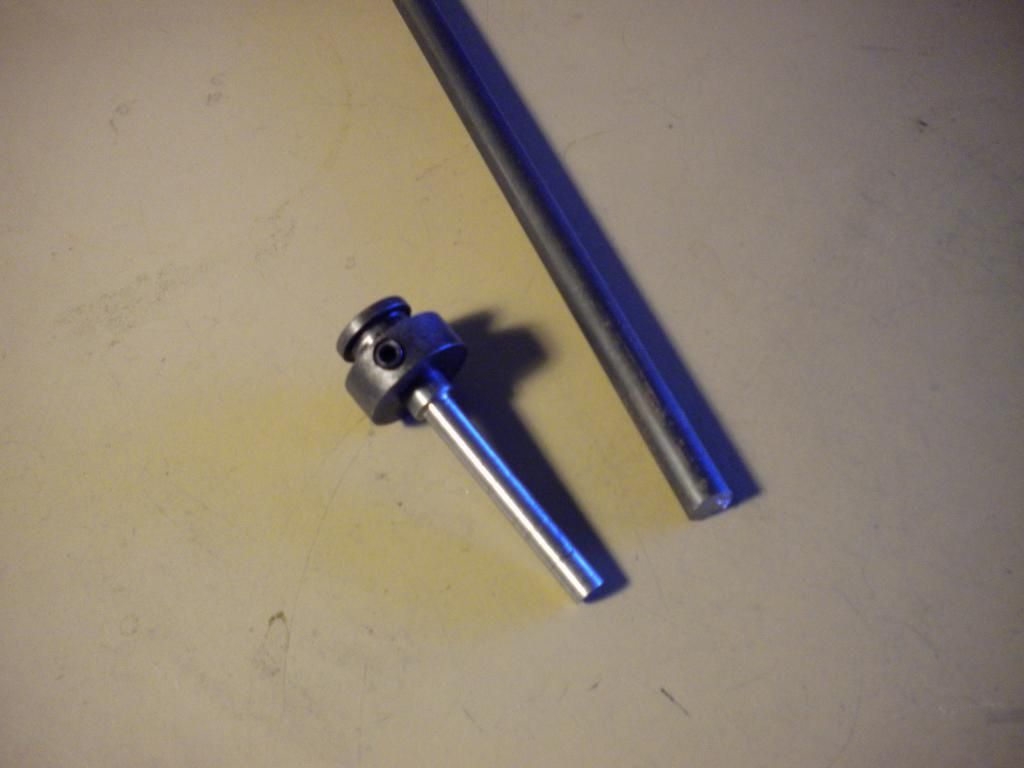
    yawn, nothing new right? well, the real winner here is the punch holder I made, you can see it here… it will take 5/16” 1144 ‘Stress Proof” rod and can be turned down to whatever diameter is needed for the punch… need a new punch? I was turning down grade 8 bolts, but that is somewhat of a pain, now I can just turn down a short section of rod to whatever diameter and length I need and lock it into the punch holder (I liked the way it looked black after heat treating and tempering so I decided not to clean it up, the matt black will wear off but I like it for now):


    next up is the core seater… this die is a simple idea, but I have found from the 0.224 project that it is harder to design that make… I will post the drawing in a few days…
    Last edited by Cane_man; 12-21-2013 at 10:36 PM.

  2. #82
    Boolit Buddy
    Join Date
    Apr 2013
    Location
    West Central Fl
    Posts
    451
    Hadn't thought of a punch holder. Better than using all of your larger stock up, making punches.

    Looks like you got your lathe fixed, IIRC you had some bad bearings or maybe gears? I've been reading a lot of the old "Rifleman" articles and writing notes and making drawings. I've got most of my measurements worked out on the .224 dies except for the lengths of some of the inserts and punches. Hoping to get into the shop this week, for a few hours.

  3. #83
    Boolit Master
    Join Date
    Mar 2013
    Location
    seated with Him in the heavenly places in Christ Jesus (Eph 2:6)
    Posts
    1,192
    CC still working on the lathe fix and as soon as i get the bearings on my lathe replaced i am moving on the next phase of this project which is to make the core seating die...

    here is the sketch for the design i came up with:


    as you can see it uses the Lee die body, and two grade 5 bolts and a grade 8 bolt for a punch... i think the standard bolt sizes i have on here will work, but i won't really know until i actually make this thing... hardest parts to make are the 'piston' stop (blue part) and threading the bolt for 3/8 coarse...

  4. #84
    Boolit Buddy Twmaster's Avatar
    Join Date
    Jul 2011
    Location
    Dallas, TX
    Posts
    375
    That's a pretty interesting diagram there CM. Cutting threads on the inside of that grade 5 bolt may not be as bad as you think. A good quality HSS or carbide tap, loads of tap juice. Slow careful turns with the tap. Cut a little, clear the chips, cut a little, clear the chips.......
    Mike

    Politicians should be limited to two terms.

    1 in office. 1 in prison.

  5. #85
    Boolit Master
    Join Date
    Mar 2013
    Location
    seated with Him in the heavenly places in Christ Jesus (Eph 2:6)
    Posts
    1,192
    ya Tdub, i don't think the 3/8" thread will be a problem, grade 5 bolt isn't too hard... i have cut drilled and tapped 5/8" fine and it wasn't a big deal

  6. #86
    Boolit Master
    Join Date
    Mar 2013
    Location
    seated with Him in the heavenly places in Christ Jesus (Eph 2:6)
    Posts
    1,192
    got the lathe torn down, got a few snags to work through, but hopefully by the weekend i will be back in action...


  7. #87
    Boolit Buddy Twmaster's Avatar
    Join Date
    Jul 2011
    Location
    Dallas, TX
    Posts
    375
    While you have it apart are you going with the tapered roller bearing upgrade?
    Mike

    Politicians should be limited to two terms.

    1 in office. 1 in prison.

  8. #88
    Boolit Master
    Join Date
    Mar 2013
    Location
    seated with Him in the heavenly places in Christ Jesus (Eph 2:6)
    Posts
    1,192
    no, just going with the upgraded Japanese made bearings offered on littlemachineshop.com

  9. #89
    Boolit Buddy Twmaster's Avatar
    Join Date
    Jul 2011
    Location
    Dallas, TX
    Posts
    375
    My 7x14 has the tapered bearings. It seems to be worthwhile. Although I really have no complaints about the original style bearings in the other 7x I had.
    Mike

    Politicians should be limited to two terms.

    1 in office. 1 in prison.

  10. #90
    Boolit Master
    Join Date
    Mar 2013
    Location
    seated with Him in the heavenly places in Christ Jesus (Eph 2:6)
    Posts
    1,192
    alright, back in business now that the bearing replacement is complete... it was a little more involved that i thought and i broke and replaced a gear in the process but i learned a lot about my lathe that i didnt know before and think i could fix any part of it now if i had to

    so now moving forward it is time to make the core seating die, and when i finished drilling out the 5/8-fine bolt so it could be drilled and tapped to 3/8"-16 i realized this wasn't going to work... so i resized a few things and the changes are noted on revised drawing below, here is what changed:

    1) smaller stop punch is now 7/16"-14, before i was planning to use 3/8"... i soon realize this was too small for the eject punch to fit inside so i had to beef up this stop a little... now i need to find a 7/16"-14 tap, and luckily i have a really good nuts/bolts specialty shop in town that has all of this, so i will take a little trip and see them tomorrow the drill size for the tap is 23/64" (0.3594) and i have one of those already...

    btw, for both stop punches (the 5/8"-fine and the 7/16"-coarse) i am using 2" long grade 5 bolts...

    2) eject punch is now 1/4" - this is great news as i wasn't thrilled with having to turn this punch down to 3/16" as planned before... just an off the shelf grade 8 1/4" bolt will be used and all i need to do is trim it to length and clean up the end


    the core seating die (the green part) is really simple to make, it is just a piece of 9/16" O1 cut to 1-5/8" long and then the ID is lapped to 0.283... the die is like a pass thru die and the entire ID is the same diameter... the core stop punch (the blue part) is a little tricky but not too bad, i will just make it out of O1 as well


    if you want to make 30 cal i hope you can see that it would only require some simple upsizing to make it work, the design of all the dies would be the same and the drawing of the 9mm jackets would be easier...
    Last edited by Cane_man; 12-30-2013 at 10:33 PM.

  11. #91
    Boolit Buddy Twmaster's Avatar
    Join Date
    Jul 2011
    Location
    Dallas, TX
    Posts
    375
    Is the green part a press fit or slip fit to the die body?
    Mike

    Politicians should be limited to two terms.

    1 in office. 1 in prison.

  12. #92
    Boolit Master
    Join Date
    Mar 2013
    Location
    seated with Him in the heavenly places in Christ Jesus (Eph 2:6)
    Posts
    1,192
    drops right into the Lee Die Body, 9/16" diameter anything will slip right in and out

    that is what i really like about this method is that if i screw up the die all i need to do is toss the insert because it slips in and out, the rest of the die does not have to be redone...
    Last edited by Cane_man; 12-31-2013 at 01:49 AM.

  13. #93
    Boolit Buddy Twmaster's Avatar
    Join Date
    Jul 2011
    Location
    Dallas, TX
    Posts
    375
    What keeps that insert from falling out?
    Mike

    Politicians should be limited to two terms.

    1 in office. 1 in prison.

  14. #94
    Boolit Master
    Join Date
    Mar 2013
    Location
    seated with Him in the heavenly places in Christ Jesus (Eph 2:6)
    Posts
    1,192
    the die has a "shelf" reamed on the bottom inside the die that keeps it from falling through (Lee makes the die this way so that the case mouth widening plug will fit inside), something like this:


    the top half is threaded on the inside with 5/8"-fine, just add a bolt on top and it snugs the die in place...

  15. #95
    Boolit Buddy Twmaster's Avatar
    Join Date
    Jul 2011
    Location
    Dallas, TX
    Posts
    375
    Ah! Easy peasy then!
    Mike

    Politicians should be limited to two terms.

    1 in office. 1 in prison.

  16. #96
    Boolit Master
    Join Date
    Mar 2013
    Location
    seated with Him in the heavenly places in Christ Jesus (Eph 2:6)
    Posts
    1,192
    finished version 1 of the core seating die, just in time for the games today... this is what i came up with, the core sized pretty darn well at 0.2838, but there are a few other problems to deal with before moving on to the pointing die:


    1) the lead is flowing out badly over the mouth... this means the punch diameter is too small, i sized it for 0.248, but it looks like i wasn't even close... i will make a new punch and size it at 0.260 and go from there...

    2) the seated core weighs in at 150gr, much too heavy for what i was looking for... just want a simple target/plinking bullet and 130gr-140gr would be fine... also it could be that this core has just a little too much lead for the jacket, and i just need less lead... so i probably need to trim the lead boolits down a little... not really a big deal but it means i will have to make a trimming die for my core cutter, and cutting the cores will add an extra step...

    3) you can't see it here in the pic, but the core stop 'plunger' is not long enough, doh! it needs to be just a little longer to fully eject the seated core... it got about 80% out of the die with the eject punch, but not long enough... so i have to remake this part (the blue piece in the drawing)

    all the bolt sizes for the die worked out really well, so this design is a keeper... i will post the final dimensions of the plunger and eject punch when i finish it up over the next few weeks...

  17. #97
    Boolit Buddy Twmaster's Avatar
    Join Date
    Jul 2011
    Location
    Dallas, TX
    Posts
    375
    That is terrific progress.
    Mike

    Politicians should be limited to two terms.

    1 in office. 1 in prison.

  18. #98
    Boolit Buddy
    Join Date
    Apr 2013
    Location
    West Central Fl
    Posts
    451
    Cane, one of the articles I read said to make the core seating punch .002" smaller than the ID of the jacket. I just looked it up from the "notes" that I made on my readings last week.

  19. #99
    Boolit Master
    Join Date
    Mar 2013
    Location
    seated with Him in the heavenly places in Christ Jesus (Eph 2:6)
    Posts
    1,192
    thanks cc, i forgot about that so that is what i will do

  20. #100
    Boolit Master
    Join Date
    Mar 2013
    Location
    seated with Him in the heavenly places in Christ Jesus (Eph 2:6)
    Posts
    1,192
    finally made the required adjustments and got it up and running, here is the die at press camming over:


    looks kind of tall but it works really well imo... the base punch is approximately 1.25" long and the nose is 0.253" in diameter, i had to round it slightly and just a little lead flows up the side...


    here is the final product with the jacketed core swaged to 0.2835 or so, ready for the point forming die when i finish it:


    had to trim the cast boolits so that the cores were 80gr, this required a die be made for the trimmer, you can just see about 1/8" or so of the boolit sticking out ready to be sliced off:


    now on to the point forming die, the steps will be something like this:

    1) make reamers
    2) rough out the ogive inside the die (step drill, d-ream, then ream with 2 fluted reamer)
    3) make the laps (using FB production bullets)
    4) lap the ogive to final

    there is more within each step but i will explain as i go along...

    gotta make up about 50 seated cores now so that they are ready to test the point forming die when i am at that stage...
    Last edited by Cane_man; 01-13-2014 at 11:45 PM.

Page 5 of 11 FirstFirst 1234567891011 LastLast

Posting Permissions

  • You may not post new threads
  • You may not post replies
  • You may not post attachments
  • You may not edit your posts
  •  
Abbreviations used in Reloading

BP Bronze Point IMR Improved Military Rifle PTD Pointed
BR Bench Rest M Magnum RN Round Nose
BT Boat Tail PL Power-Lokt SP Soft Point
C Compressed Charge PR Primer SPCL Soft Point "Core-Lokt"
HP Hollow Point PSPCL Pointed Soft Point "Core Lokt" C.O.L. Cartridge Overall Length
PSP Pointed Soft Point Spz Spitzer Point SBT Spitzer Boat Tail
LRN Lead Round Nose LWC Lead Wad Cutter LSWC Lead Semi Wad Cutter
GC Gas Check