Nice write-up and drawing. Thanks Cane_man.

|
   
   
|


|


Nice write-up and drawing. Thanks Cane_man.
Mike
Politicians should be limited to two terms.
1 in office. 1 in prison.

thanks t-dub!
Annealing
i did a lot of research on annealing brass the last few days because of this project and i found some really good information... because annealing the brass cases will be completed several times during the draw process i wanted to know more about it... here is one thing i found out that was interesting:
reloaders and swagers think they are annealing but what we are really doing is stress relieving the brass!
ya, that's right, we are not annealing at all typically, and what i learned is that there are basically two temperature ranges that are important to us:
482F to 787F Recovery Phase - this is where the brass is stress relieved after it has been cold worked due to swaging, reloading, or firing
787F to 1380F Recrystalization Phase - this is where brass is annealed and made more ductile and soft, ideal for swaging
if you are reloading you want to stress relieve your brass and keep it below 750F, that is the magic number... if you are swaging you want the brass to be softer because of annealing and you need to get in the range of 1000F to 1200F but do not exceed 1350F... here is a chart for the material phases of brass versus how much zinc is in the mix:
you can see the two temperature ranges here in the chart, and we want to use the vertical line marked for cartridge brass which has 30% zinc...
next i wanted to know how i could tell if i was in the annealing temperature range if i was using a propane torch, it is really easy to get to orange with a torch and i always had a feeling that was too much heat for the brass... i found out that when a material is heated colored light is emitted at certain temperatures, this chart is for steel but i found that it can be used for brass as well:
so when the brass is slightly red that is when you want to pull the case off the flame, if it is orange that is too late... and by the way, air cooled or water cooled makes no difference for brass... i found a tip that if you use swimming pool pH down in the quenching water it will descale the brass, i have a pool and i have some of this stuff so i am going to give it a try after i finish making my annealing jig (pics later)...
so what i decided to do is get a Tempilstik rated for 1200F to mark on the end of the case, and try to learn what the brass looks like at this temperature range with the flame on the casehead... i have this item coming in this week and will have some fun with it then, the temp crayon melts at the rated temperature:
i finished the draw dies for 9mm range fired to size down to 30 cal and 7mm, i just need to moly treat them then i will post some pics of the dies and the setup... and i plan to draw a 50 case batch of 7mm and when i get those drawn and polished i will show you how they look... so far i am pleased with the results!
so remember, the next time you are annealing your reloading brass what you are really doing is stress relieving it
Last edited by Cane_man; 10-21-2013 at 12:55 PM.


Cane,
Thanks for that. That info may turn around my 22lr point forming. Thanks again
Bill
NRA PATRON LIFE MEMBER
Space for Witty Signature Line FOR RENT...........Cheap

Good info CM as usual!!!!
http://castboolits.gunloads.com/show...-fashioned-way
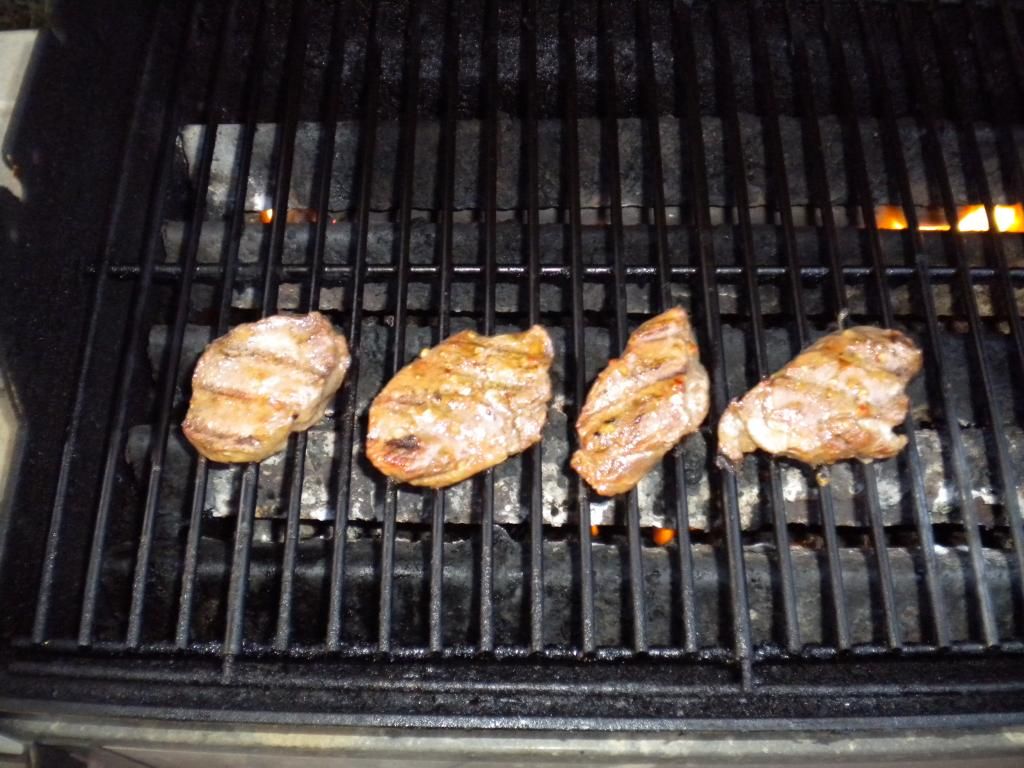
The old outdated & tasty method of annealing brass is how I roll. That deer pic you posted earlier looks like it would keep you in annealed brass for a month or two.
LOL, keeping me going for sure! backstrap filets on the bbq tonight, but no brass:
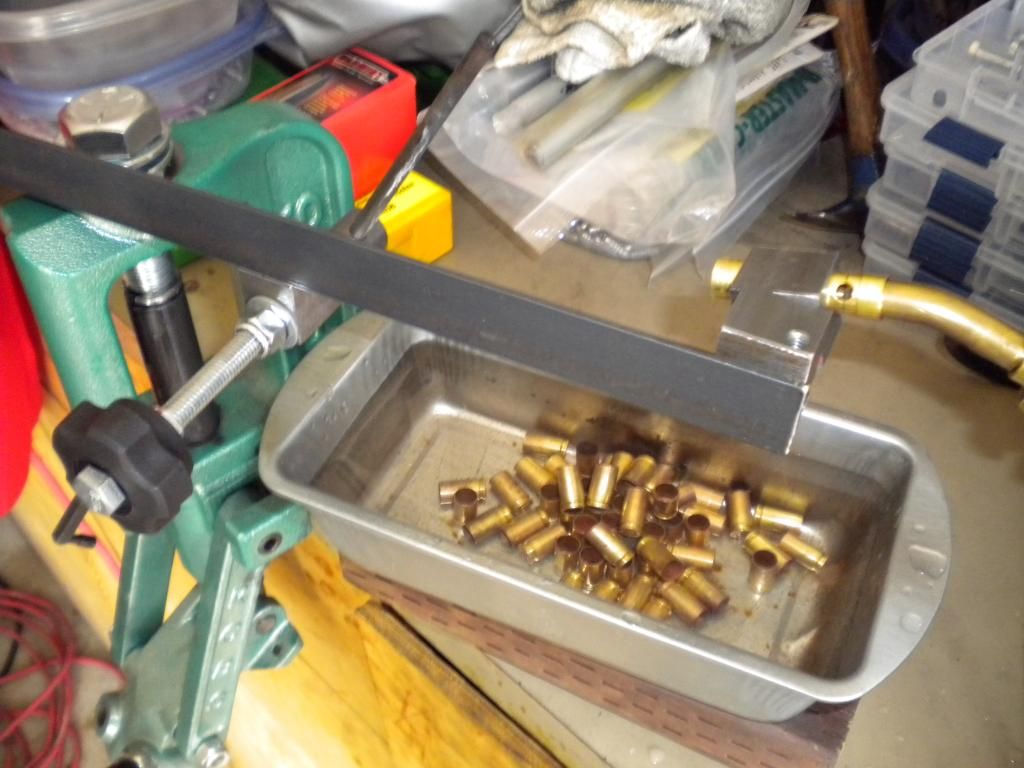
got my flame annealing jig done and finished annealing a batch of 50 9mm range pickups that i will use for this first test batch of draw downs to 7mm:
just a piece of angle that clamps on top of my reloading press... put the case on the rod, turn it on to the flame, and then at the right temp dump it in the water quench... i have always had shaky hands, and this annealing jig keeps the case steady and is easy for me to use... these cases are sitting in a bath of water with a tsp of pH Down swimming additive thrown it which helps to descale the cases after annealing, it works! i can get a large plastic container of this stuff from Home Depot for about $10...
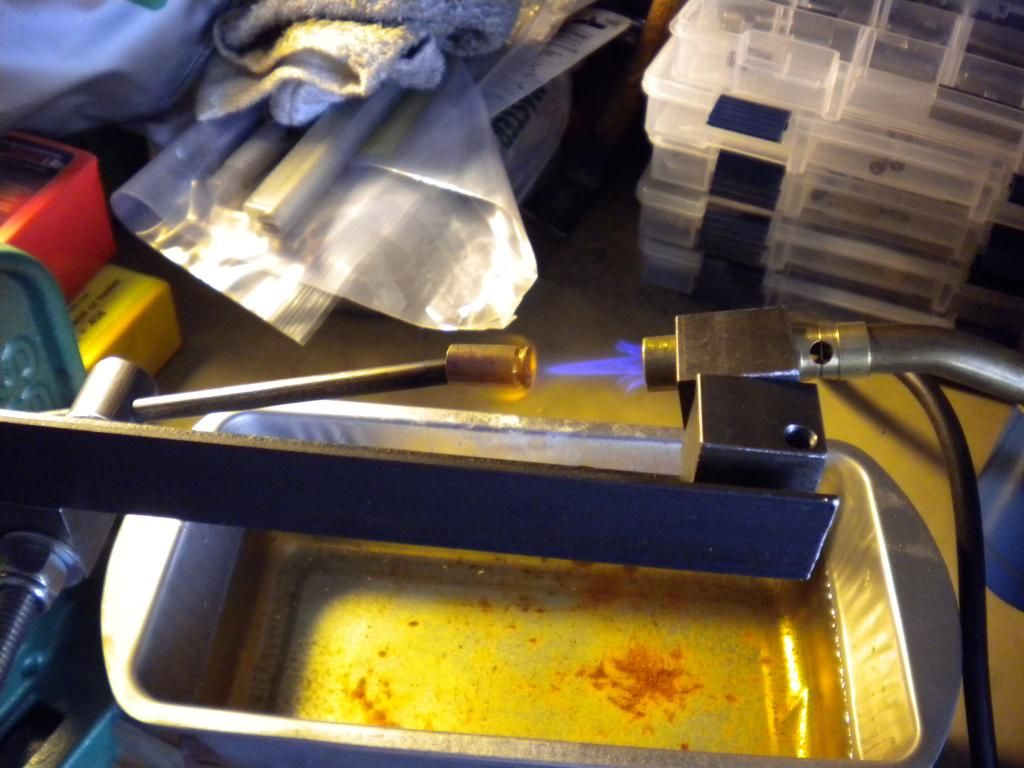
the correct annealing temp is 1100F-1200F and it took some practice with a tempilstik to get it down... you see what is needed is for the thick casehead area to be thoroughly annealed while just barely annealing the top 3/4 of the case up to the mouth... anneal too much and the mouth area will tear and stretch too much while drawing, anneal too little and you could break your arbor press or dies because the rim area is too hard and tough... here is a pic i took while practicing that shows what the case looks like just before it starts to turn from red to orange:
it is best to work in low light or the dark when doing this, but i just wear sunglasses and i can see the color change just fine... in the pic above what you see is that the flame from the propane torch will be blue and focused on the primer area at the beginning, but when the case color starts to turn red to orange a yellow flame will start to glow around the rim area and that is when you have to stop the annealing and quench the case
Last edited by Cane_man; 10-26-2013 at 04:16 PM.
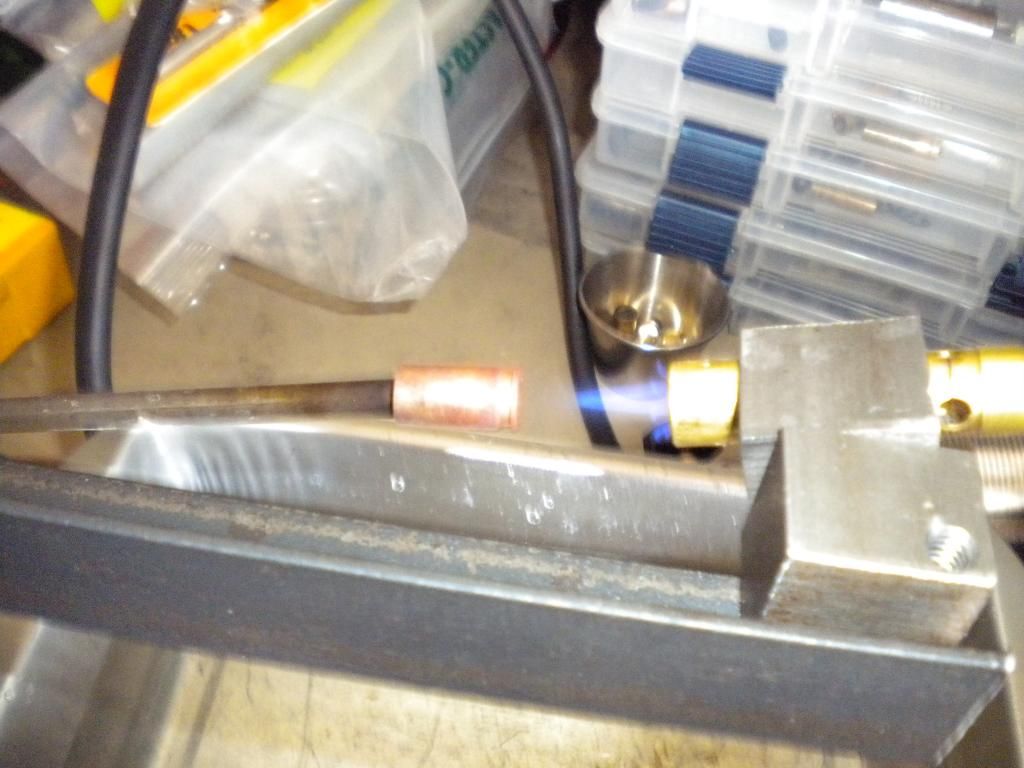
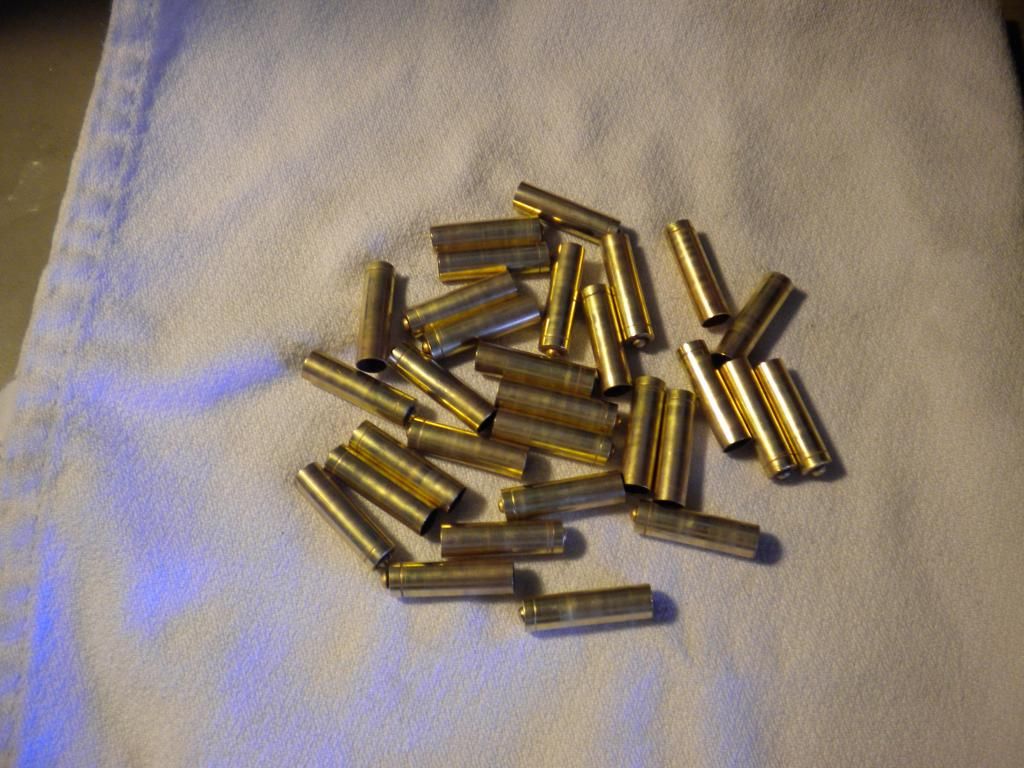
just finished my first test batch of 9mm draw to 7mm, and i dialed in the annealing... edit to what is written above, to fully anneal the mouth of the case must be red... if the flame is at the casehead this means the rim will be orange but the mouth is red, i tried to snap a pic of this and hope this explains it:
once the mouth turns red quench then you are good to go...
9mm Draw Dies Test Run
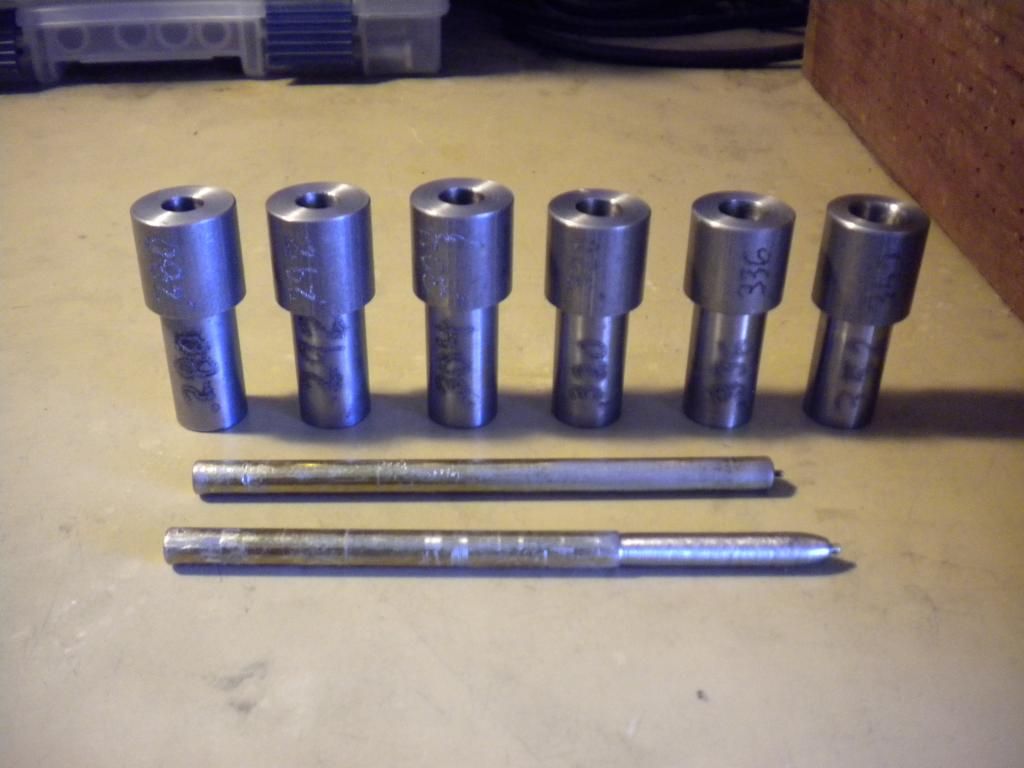
Did up a batch of 44 9mm cases to draw them down to 7mm in 6 draws… here is a pic of the dies used, the smaller the diameter the longer the case gets that’s why the dies on the left are taller and the 9mm case starts at a OD of 0.390… two punches are use, 0.25 for drawing down to 0.320, then the smaller 0.220 for drawing down to 0.280…from left to right: 0.280, 0.292, 0.304, 0.320, 0.336, 0.352
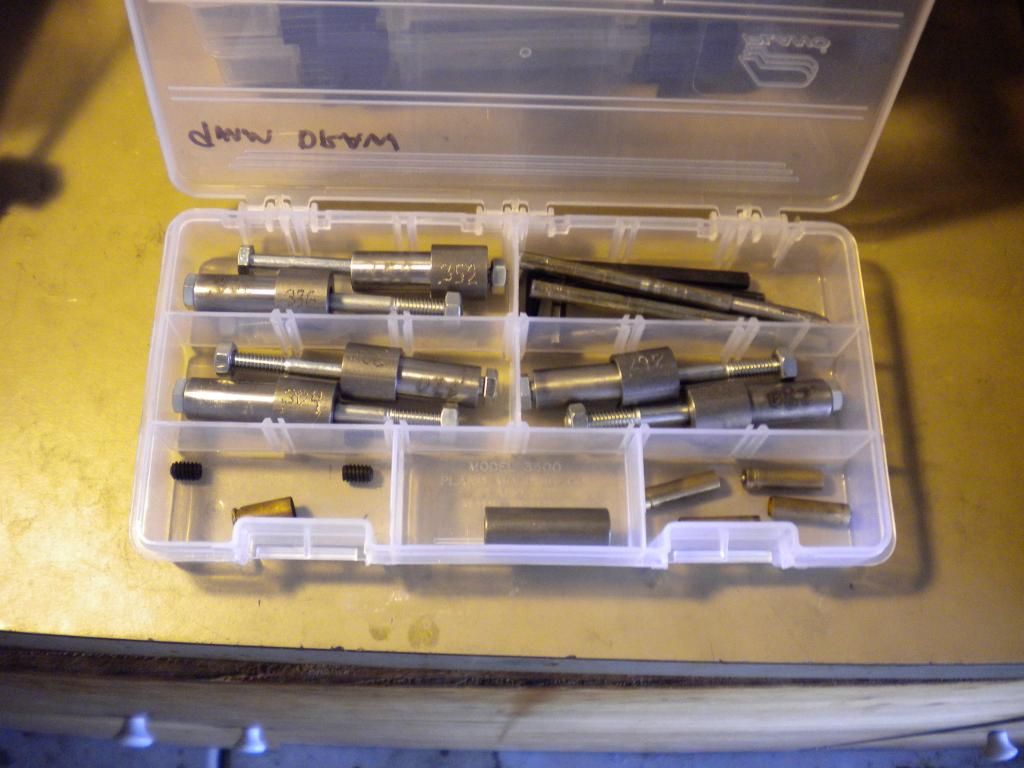
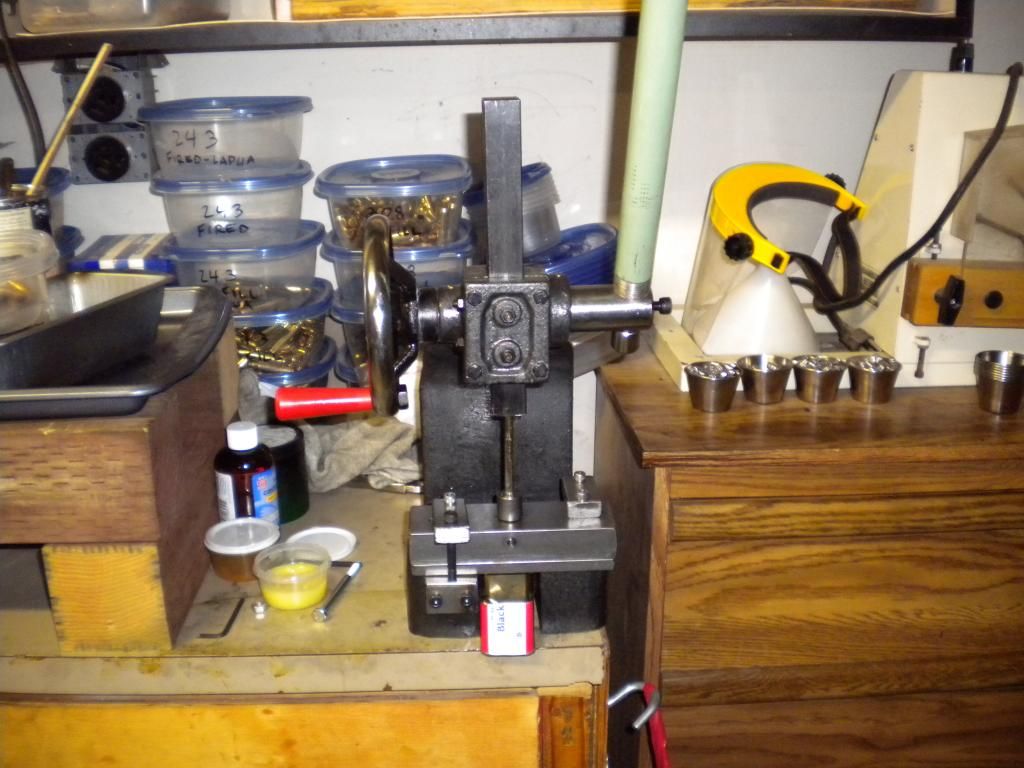
The dies store up real nice in a 3$ fishing tackle box from Walmart, i like to keep the bushing and die together on a 3" carriage bolt:
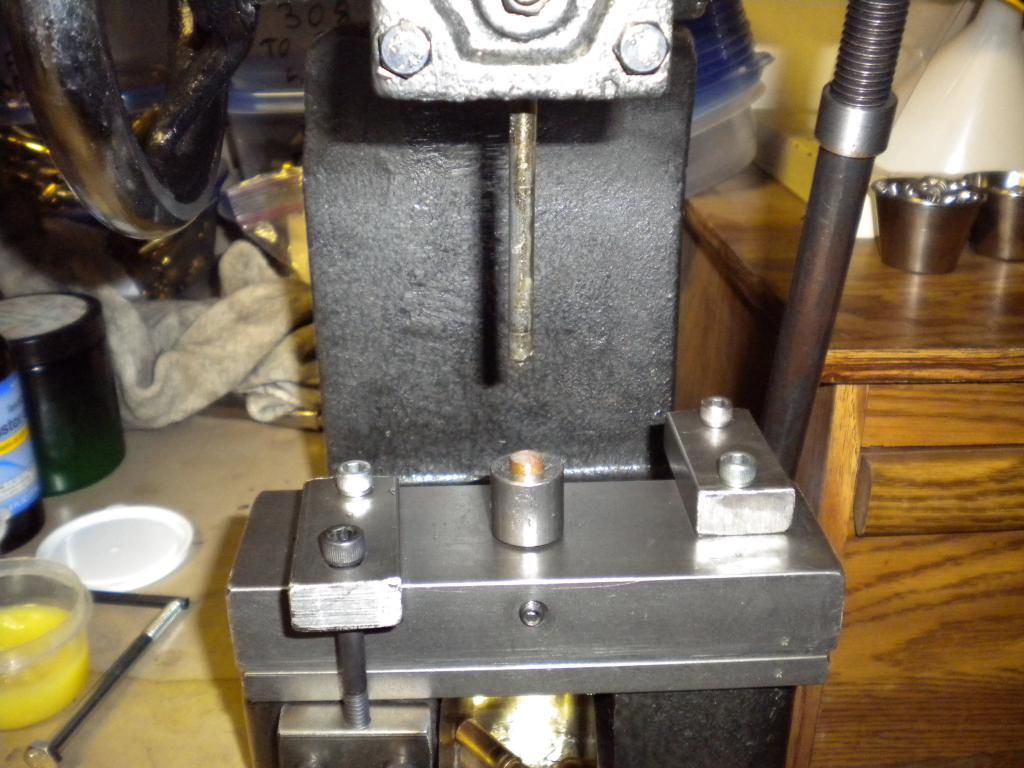
Here is a case sitting in the bushing ready to be drawn:
Attached to the press handle is a 30” piece of water pipe, this is not needed very often if the cases are annealed properly, but every once in a while a case can be hard to push through:
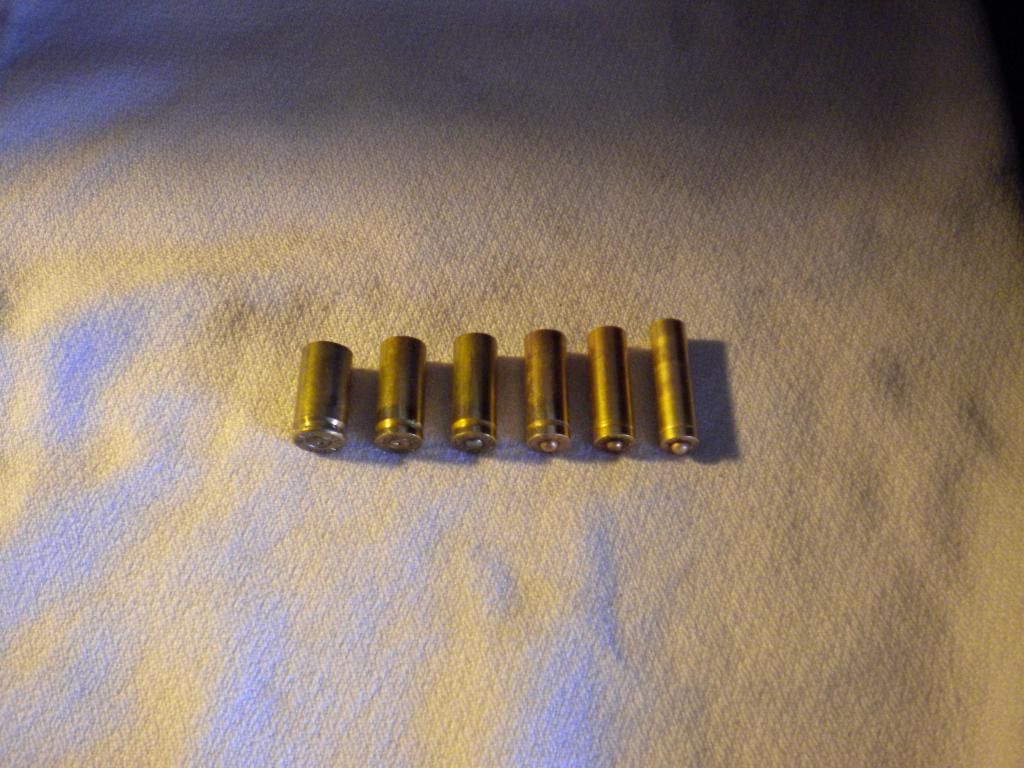
Here is the final draw progression of the cases from largest diameter to smallest going left to right: 9mm case, 0.352, 0.336, 0.320, 0.304, 0.292, 0.280
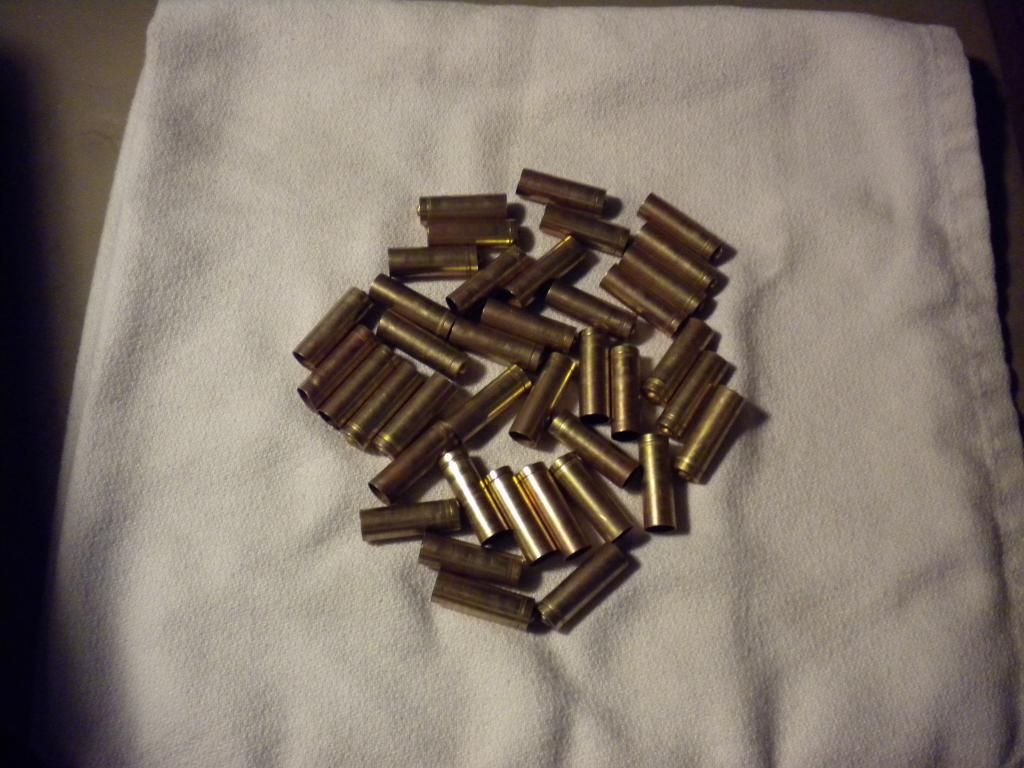
Here is a batch of 30 cal jackets ready to be core seated, approximately 0.95" length:
And here is a batch of 7mm (0.280) cases ready to be core seated, approximately 1.10" length:
This is the process I use with the dies:
1) clean range brass – do not deprime, lemishine and dawn in ultrasonic cleaner, dry in oven at 250F for 1 hour
2) anneal – propane anneal cases to 1200F-1300F, quench in water when the case mouth is cherry red (which means the case head will be orange), flame on the casehead, wear sunglasses and do in low light to see the case heat up, descale annealed cases in 'pH Down' pool additive
3) draw – 3 draws can be taken .352/.336/.320, use the large punch, lube with lanolin/castor oil mixture
4) anneal again, mouth cherry read rim orange
5) draw – 3 more draws can be taken .304/.292/.280, use the small punch, stop at .304 for 30 Cal
6) clean & polish – use ceramic media with lemishine and dawn in vibratory tumbler
occasionally a case will stick to the punch, if that happens then turn the stuck case down little by little in a lathe and it will eventually come off...
Last edited by Cane_man; 10-28-2013 at 11:38 AM.
Looks good Cane. Too bad you don't have an 8mm instead of a 7mm; less work. Even 3 draws for me to get to 8mm size takes some work. I see you're leaving the primers in. I couldn't see a reason to?
Never in history has there been a situation so bad that the government couldn't make it worse.
A foolish faith in authority is the enemy of the truth.
if the primer is out doesn't lead flow out when you seat the core?Originally Posted by Prospector Howard

it sure would be easier to have the primer out, or so it seems...
The flash holes on mine shrink to a very small hole after the 3rd draw. Also I don't bump the size up hardly at all (less than half a thou) in the core seating die, so I don't have to crank on the pressure to fill it out. If a tiny bit of lead tries to squirt through, I just flatten it out in the primer pocket. Now that I see that you will probably be bumping it up in size quite a bit you should probably leave them in, you might get a lot more lead to squirt through.
Never in history has there been a situation so bad that the government couldn't make it worse.
A foolish faith in authority is the enemy of the truth.
Very good work !!!!!
I also take the primers out anymore, just makes the draws easier & I've never had a problem with the lead cores.
That's one heckuva progression from 9MM brass to those jackets. Great looking work Cane-Man.
Mike
Politicians should be limited to two terms.
1 in office. 1 in prison.


Yep good work! Remove the primer first. You will get better results. There is so little left of the primer pocket after a case is drawn this much. Even if the lead does flow threw what is left of the flash hole it will stop when it hits your base punch and makes very little if any difference.
Good shooting and swage on!
BT
BTX Star Crimp Die
Back in stock with new low price!
Click link below!
http://castboolits.gunloads.com/show...Star-Crimp-Die
also check in and say hello on my new face book page!
https://www.facebook.com/BTSniper-153949954674572/
.... by the way.... nice job on your hunting success! Hope you connect with one of your hoe made bullets in future! That is a pretty cool feeling! Only got two deer with bullets I have made so far but I have a lot of hunting left to do!
Swage on!
BT
BTX Star Crimp Die
Back in stock with new low price!
Click link below!
http://castboolits.gunloads.com/show...Star-Crimp-Die
also check in and say hello on my new face book page!
https://www.facebook.com/BTSniper-153949954674572/
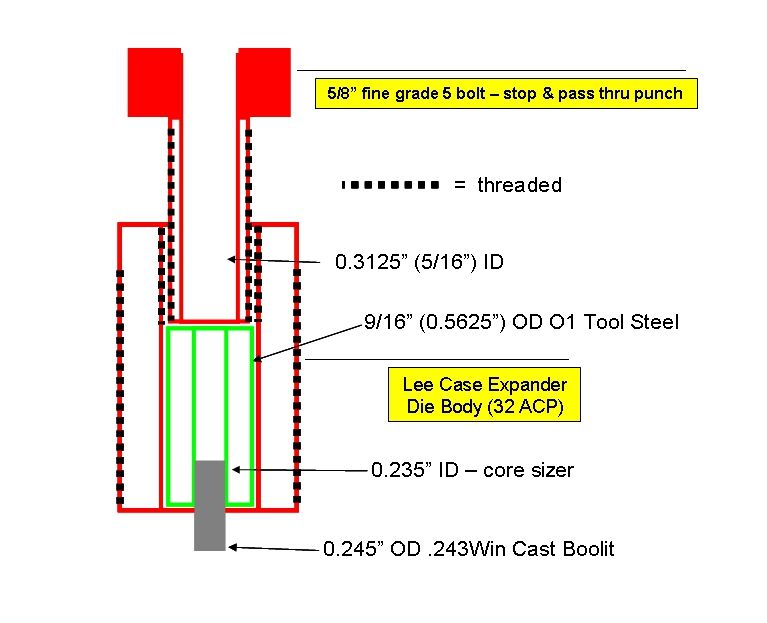
got most of the kinks worked out of the draw dies so now its time to move on to making the core sizing die... it is a very simple die to make using only my small Chicom lathe to make it work with a Lee Expander Die Body for 32acp and my Rockchucker press:
note: drawing is just a concept drawing and not to scale!
as you can see a 2" long 5/8" fine grade 5 bolt (grade 5 is easier to drill on my lathe and it is more than strong enough) will be used as both the die stop punch and the pass thru punch... the actual core sizing die is just a 9/16" by 1-1/8" length of O1 drilled out to approximately 0.235" and then heat treated (the green part of the drawing)... for cores i will be using a Lyman .243Win boolit mold which drops them to a diameter of 0.248 and 84 grains... the standard core size for 7mm is 0.25" lead wire, but i will size the boolits to 0.235" or so and they will drop into the drawn jackets with no problem at all... since the jacket is 60gr, and the core is 84gr, i may have to trim the boolits a little to get them to my design wight of 140gr, but i am not sure i will be doing that just yet...
the die drops inside the Lee die body, the bolt locks it in place, and then the die is screwed into the press... i will also be making a "case" holder from tool steel to attach the punches, it will use a set screw and this will be the first time i have made a system like this for my punches... i had been turning down grade 8 bolts but this is really a pain so it think this method will work much better... i have some 1144 "Stress Proof" rod (stress proof is the trade name for this steel) coming in which i will be trying out for punches... Stress Proof is a high yield strength steel that turns fairly easily and is somewhat inexpensive to purchase from Mcmaster.com
Last edited by Cane_man; 11-13-2013 at 05:24 PM.
thanks! unfortunately the communist governmental authorities in this state will not allow me to hunt with lead bullets
Cane,
Nice buck. Quick question on the die, I'm speed reading some of these old threads, and just want to make sure I've got it right. The core die is for OD only, it's not a squirt die, correct?
thanks,
CC
here are my definitions for my swaging dies:
core sizing die: this die takes cast boolits and sizes them to the correct OD so they can be seated in cores, and is the die you see above... the ID of that die (0.235") will be the sized OD of the lead core... I am using a Lyman .243Win mold that drops them at 0.248 and 89 grains... so to answer you question this die acts like a squirt die and sizes the cores for seating...
core seating die - i will post a detailed drawing of that in a few weeks, which uses my system of the Lee die body and drop in tool steel inserts...
more to come
Last edited by Cane_man; 12-14-2013 at 02:07 AM.
Those diagrams ought to be interesting. As usual. Standing by looking forward to your continued adventure.
Mike
Politicians should be limited to two terms.
1 in office. 1 in prison.
 Posting Permissions


| BP | Bronze Point | IMR | Improved Military Rifle | PTD | Pointed |
| BR | Bench Rest | M | Magnum | RN | Round Nose |
| BT | Boat Tail | PL | Power-Lokt | SP | Soft Point |
| C | Compressed Charge | PR | Primer | SPCL | Soft Point "Core-Lokt" |
| HP | Hollow Point | PSPCL | Pointed Soft Point "Core Lokt" | C.O.L. | Cartridge Overall Length |
| PSP | Pointed Soft Point | Spz | Spitzer Point | SBT | Spitzer Boat Tail |
| LRN | Lead Round Nose | LWC | Lead Wad Cutter | LSWC | Lead Semi Wad Cutter |
| GC | Gas Check |

 Reply With Quote

 BT Sniper