Lee PrecisionLoad DataMidSouth Shooters SupplyRepackbox
WidenersSnyders JerkyRotoMetals2Reloading Everything
Inline Fabrication Titan Reloading
Page 1 of 2 12 LastLast
Results 1 to 20 of 32

Thread: Trying to derim 22's???

  1. #1
    Boolit Buddy
    Join Date
    Apr 2013
    Location
    West Central Fl
    Posts
    451

    Trying to derim 22's???

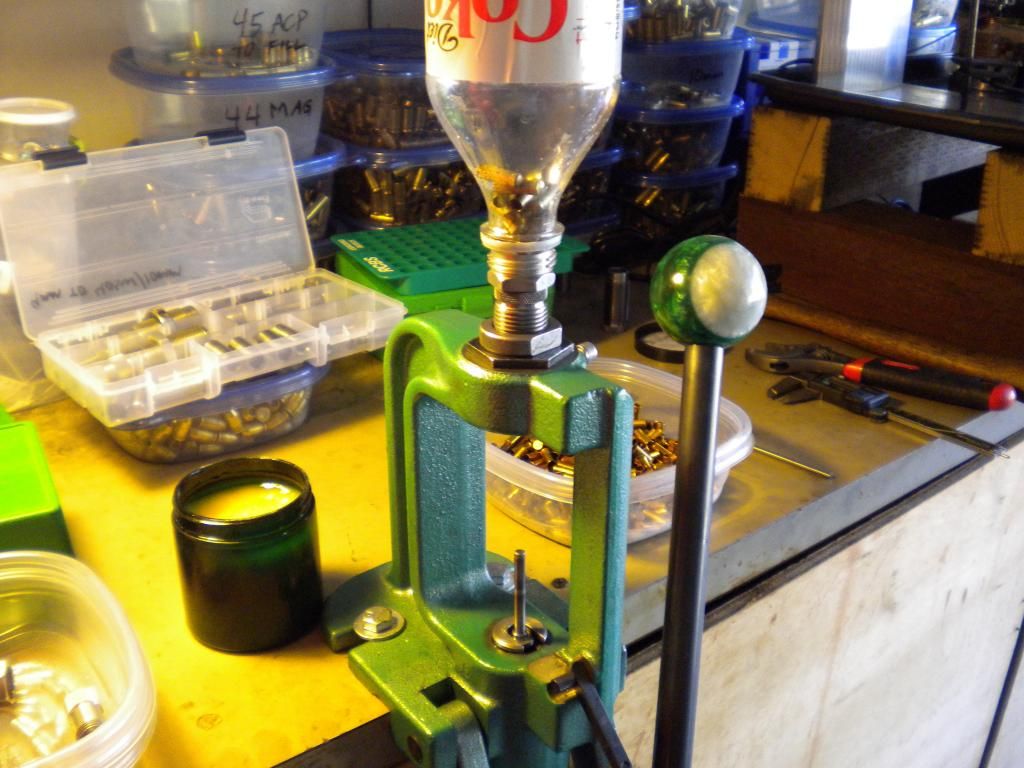
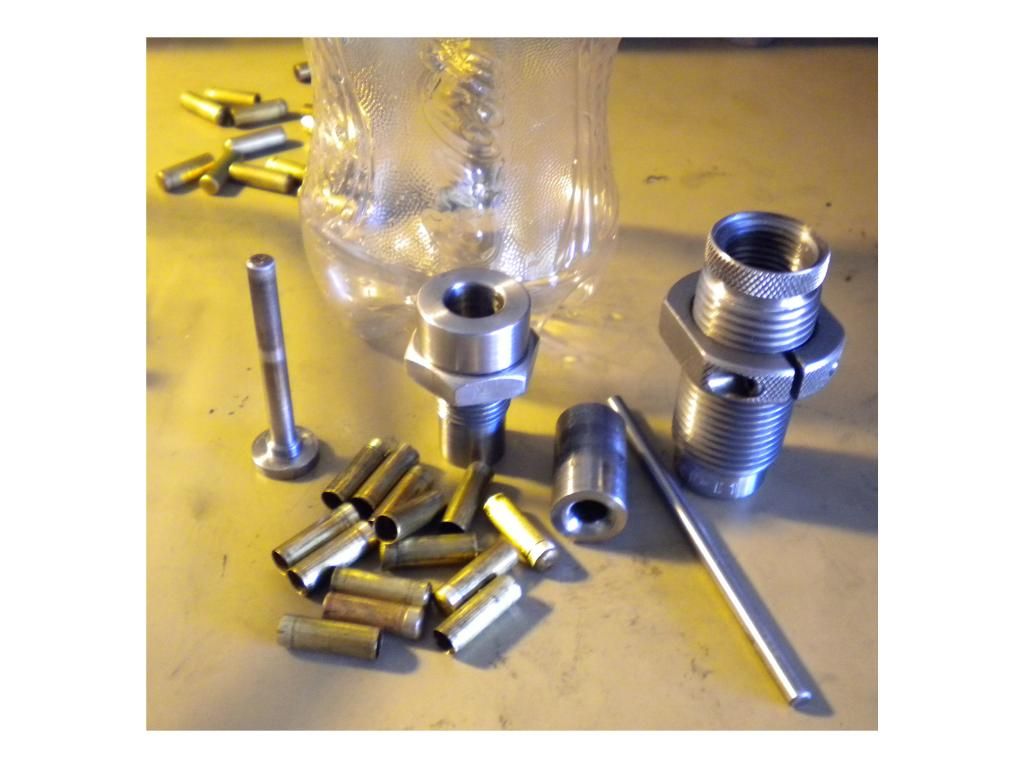
    OK, I finally called Grainger and my drill bushings have been sitting there since May 17th. They were supposed to call when they came in. Got em home finished drilling one of the dies out deep enought to seat the bushing. I noticed that there was almost no "lead in angle" for the bushing. I tried one anyway, popped the rim. I remembered that some folks said to round the top of the push pin, so I ground the square shoulder off and rounded it slightly. Popped another rim off. I ground the push pin a little more rounded. Also tried to chuck the die up and tried turning a "lead in" angle. Spotting drill wouldn't touch it, but I figured I'd try. I also tried getting a carbide tool into the 7/32" hole but there's almost no tool relief. I finally found a solid carbide 4 flute mill with about a 30* angle on the flute. Managed to get a slight taper out to just past the rim on the cases. I tried again and punced through 5 more cases. I'm using Castrol 10W-30W full synthetic as a lube, same thing I've used for years when full lenght resizing. I've got a solid carbide burr that I use in a flex head grinder, but can't seem to find it. I'm going to start looking through all my carbide to see if I have anything with more relief under the tip.

    I'm thinking I need to increase the angle from 30* to 45* or more. Any thoughts???

    thanks,
    CC

  2. #2
    Boolit Master

    Idz's Avatar
    Join Date
    May 2013
    Location
    New Mexico
    Posts
    842
    7/32 = .21875 which seems like a lot for the de-rimming. I do a two step process with a Lee .224 sizer that I smoothed out the entrance then down to .221 on a homemade die. I chucked the Lee sizer in my lathe and ground and smoothed the entrance with a dremel stone followed by 600 grit paper on a dowel. Drill bushings are so hard you'll need a grinding stone to machine them. A smooth entrance is critical to do de-rimming.
    good luck

  3. #3
    Boolit Buddy
    Join Date
    Apr 2013
    Location
    West Central Fl
    Posts
    451
    Quote Originally Posted by Idz View Post
    7/32 = .21875 which seems like a lot for the de-rimming. I do a two step process with a Lee .224 sizer that I smoothed out the entrance then down to .221 on a homemade die. I chucked the Lee sizer in my lathe and ground and smoothed the entrance with a dremel stone followed by 600 grit paper on a dowel. Drill bushings are so hard you'll need a grinding stone to machine them. A smooth entrance is critical to do de-rimming.
    good luck
    Most of the commercial derimming dies are .219, not sure if .00025 will make a difference. I don't have anything to measure it with. Carbide will cut it. Yes if necessary I will grind it, but not over the ways of my lathe if possible.

    I might try annealing the cases, but most folks say that they have more punch throughs annealed than not.

    thanks,
    CC

  4. #4
    Boolit Master


    MUSTANG's Avatar
    Join Date
    Jan 2012
    Location
    Kalispell, Montana
    Posts
    2,769
    What is the dimension of the punch? If the punch is too large (wide), then there is insufficient room for the brass to flow as the punch pushes the 22LR through your .21875 hole. My Corbin punch is .198. Others are using slightly smaller diameter punches.

    Mustang.

  5. #5
    Boolit Buddy
    Join Date
    Apr 2013
    Location
    West Central Fl
    Posts
    451
    Quote Originally Posted by MUSTANG View Post
    What is the dimension of the punch? If the punch is too large (wide), then there is insufficient room for the brass to flow as the punch pushes the 22LR through your .21875 hole. My Corbin punch is .198. Others are using slightly smaller diameter punches.

    Mustang.
    Just checked .195, thought you might have hit on it. I remember measuring the wall thickness, doubling that and subracting from the .21875, plus a little extra.

    I'm beginning to think if I can't find my carbide burr I may have to dig out a green wheel and grind some clearance on my carbide lathe bits. I know I don't have a boring bar with carbide inserts that small. I have heard of folks using a mill as a boring bar though. Just lock it up tight in a boring fixture after indexing one of the cutting edges. I do have some small carbide mills.
    thanks,
    CC

  6. #6
    Boolit Buddy
    Join Date
    Jan 2009
    Location
    Goffstown, NH
    Posts
    318
    Do you have a dremel tool? I used a dremel tool with a tapered stone and it did a good job at grinding a lead in the bushing.

  7. #7
    Boolit Buddy
    Join Date
    Aug 2012
    Posts
    246
    Quote Originally Posted by Danth View Post
    Do you have a dremel tool? I used a dremel tool with a tapered stone and it did a good job at grinding a lead in the bushing.
    I did the same thing while running it in my lathe. Finally took quite a bit of chamfer to get things to work.

  8. #8
    Boolit Buddy
    Join Date
    Apr 2013
    Location
    West Central Fl
    Posts
    451
    Quote Originally Posted by Danth View Post
    Do you have a dremel tool? I used a dremel tool with a tapered stone and it did a good job at grinding a lead in the bushing.
    Yes, I have a dremel. I had forgotten about the pointed grinding stones in the kit. I usually use my flex shaft grinder, and it usually has a carbide burr in it. (can't find the burr now). I can chuck up the dremel stone in it and use the drill press to turn the drill bushing while grinding with the stone.

    thanks,
    CC

  9. #9
    Boolit Buddy
    Join Date
    Apr 2013
    Location
    West Central Fl
    Posts
    451
    I dug out the dremel this AM, and there was my carbide burr. Last time I used it I couldn't get the chuck open on the dremel so I left it. I tried opening the tip of the drill bushing, and it was cutting fine just couldn't get a decent finish. So I pulled the die out of the lathe and went to the flex shaft grinder with a cone shaped stone. It opened up at a steeper angle, but a bad finish. From there I chucked up a brass rod with a slit in the end about 3/8" long. Wrapped some 120 wet/dry to blend everything together, then finished it off with 400, and 600.

    I went back to the press applied some lube and tried it. I thought it was about to break through again and then it suddenly disappeared into the die. I stuck another 5-6 on the push pin and away they went, much easier this time though. I probably did another 50 before I stopped. However, I noticed that the push pin would get pretty warm. Anytime I stopped to pick up a case that popped out of the die, or get more brass the push pin would cool off and again it would be just a little bit difficult to de-rim the brass on the first one and then they were easy again.

    I'll try to post pics.

    CC

  10. #10
    Boolit Master
    Join Date
    Mar 2013
    Location
    seated with Him in the heavenly places in Christ Jesus (Eph 2:6)
    Posts
    1,192
    that is great cc, looking forward to the pics

    are you using any lube?

  11. #11
    Boolit Buddy

    Join Date
    Jun 2011
    Location
    Lebanon. Pennsylvania
    Posts
    462
    I experienced a little break-in time with my derim die, around 300-500 before it would consistantly derim smoothly and with little pressure I also notice my derim punch and die get warm during the process.
    Glad to hear everything is up and running.

  12. #12
    Boolit Buddy
    Join Date
    Apr 2013
    Location
    West Central Fl
    Posts
    451
    OK, lets see if I can post pics. Obviously, I still can't figure out sizing pics on the phone. One is 1K the other 29K.
    Attached Thumbnails Attached Thumbnails 100MEDIA36IMAG0116.jpg   100MEDIA36IMAG0118.jpg  

  13. #13
    Boolit Buddy
    Join Date
    Sep 2009
    Location
    Tennessee
    Posts
    360
    Looking good CC

  14. #14
    Boolit Master

    midnight's Avatar
    Join Date
    Sep 2009
    Location
    East Troy, WI
    Posts
    1,156
    Very interesting read. I have been trying to make reducer dies to reduce 30 jackets to 284 & 277. Those jackets are very difficult to find but Sierra still has 30 cal jackets with a 4 to 6 week shipping time. I made a nice die about 2in long with a tapered hole from .311 to .276. Too much friction and a jacket won't go through. That's when I thought of using short (3/8) drill bushings to make sort of a "ring" die. I only have a milling machine and will probably have to use my air die grinder and stones to grind a taper on the bushings and polish the daylights out of it. I'll try to go to 283 first and then down to 276. Your work here indicates that it may work. Maybe preheating the die and punch will help.

    Bob
    Last edited by midnight; 06-09-2013 at 09:49 AM.
    Si hostes visibilis, etiam tu

  15. #15
    Boolit Buddy
    Join Date
    Apr 2013
    Location
    West Central Fl
    Posts
    451
    Quote Originally Posted by midnight View Post
    Very interesting read. I have been trying to make reducer dies to reduce 30 jackets to 284 & 277. Those jackets are very difficult to find but Sierra still has 30 cal jackets with a 4 to 6 week shipping time. I made a nice die about 2in long with a tapered hole from .311 to .276. Too much friction and a jacket won't go through. That's when I thought of using short (3/8) drill bushings to make sort of a "ring" die. I only have a milling machine and will probably have to use my air die grinder and stones to grind a taper on the bushings and polish the daylights out of it. I'll try to go to 283 first and then down to 277. Your work here indicates that it may work. Maybe preheating the die and punch will help.

    Bob
    Bob, I'm just getting started, but I would think it would be a multi-stage process to reduce that much. I'm sure you know that the die needs to be a "mirror" polish also, to reduce drag. Also use a quality lubricant.

    good luck,
    CC

  16. #16
    Boolit Master
    Join Date
    Mar 2013
    Location
    seated with Him in the heavenly places in Christ Jesus (Eph 2:6)
    Posts
    1,192
    first attempt at making the derim die and bottom punch... lessons learned:

    -only need to derim, does not take a very long die to do this
    -my punch was way too long (2-1/4"), need to make the punch just long enough to get in the upper 1/3 of the press stroke, looking at 1.75" long
    -started with drilling a 0.218 die, when i finished polishing it was swaging cases at 0.226! start smaller and test with a drill rod to see where you are at with the diameter while polishing
    -shape of the punch nose greatly affects the results; too square and cases can get stuck, too round and the case doesn't get swaged enough, just rounded on the edge seems to work fine with a little roundness on the tip
    -punch od was 0.197", seemed to work pretty good

    trashing this first die and punch, will make a much better set tomorrow, using O1 hope to heat treat and see how it works this weekend...

  17. #17
    Boolit Buddy
    Join Date
    Apr 2013
    Location
    West Central Fl
    Posts
    451
    Cane, you can save that die. Drill it out to .5 inch and order a drill bushing, with a shoulder on it so that it can't be pushed through the die. Thats what I did, and only had to slightly relieve the shoulder where the casing starts into the die. I used a rotary stone in a dremel and then polished it with some 600 grit wet/dry. Take a piece of 1/8" brass and cut a small slot about 3/8" long in the end, and wrap your wet/dry onto it.

    hope this helps,
    CC

    Edit: IIRC the bushing is .5" X 7/32" X 1" I'll double check and re-edit if necessary. Yes 7/32" for derimming is .21875. I ordered 3/16 X 1.5" to make a core swage with but haven't started on it yet.

    CC
    Last edited by customcutter; 06-15-2013 at 08:34 AM.

  18. #18
    Boolit Master
    Join Date
    Mar 2013
    Location
    seated with Him in the heavenly places in Christ Jesus (Eph 2:6)
    Posts
    1,192
    thanks cc, it wasn't a complete die just an insert drilled out from 9/16" O1 so tossing it aside is no biggie... these 22LR inserts are easy to make as i don't have to turn them down as they drop right into the Lee Expander Die body that already has a 9/16" ID, and they drill out in two steps... those 40sw/10mm inserts took 6 to 7 different steps to drill out... i am sizing my die/punch to not completely iron out the rim so it leaves a small line near the base; doing this per the Prospectors insights so the cases will be stronger (not as thin from being drawn when derimmed) and to keep stresses as low as possible on my press... and it takes much less force to push these thru compared to getting the rim line completely drawn out

    i should have added also as you found out that the mouth of the die makes a big difference as well, a nice wide/deep shoulder helps a lot

    you should start a 22LR swage thread and we can compare notes as we go along with this project... the 1/4" deburr came in yesterday, haven't had time to measure the profile but grinding it down to 0.220 looks doable

    going out to my shooting spot today to shoot some of those swaged 200gr 10mm and get some practice...

  19. #19
    Boolit Master
    Join Date
    Mar 2013
    Location
    seated with Him in the heavenly places in Christ Jesus (Eph 2:6)
    Posts
    1,192
    got it done and pleased with the results, not much to look at... what i didn't expect is that the derimmed cases shoot out of the die like a chapaign cork! you push the next case thru and the trapped air between the case above it shoots it out into the bottle:


    here is what i ended up doing, what you see from left to right: punch with 0.198" OD x 1.75" long, top push thru punch, derim insert derimming cases to an OD of to 0.221" (you can see the shoulder flared real wide), Lee expander die body, and a smaller push thru rod to get out the last case, and some of the cases (i wanted to leave a small rim line and not iron them out smooth to leave more material on the case and lower the stresses on my press)... if you are not familiar with my okie swaging dies what you do is put the insert in the Lee die body, lock it in with the top punch then thread it into the Rockchucker reloading press and get busy swaging:


    the real key was heat treating the O1 insert, here is a pic of the little coffee can heat treating oven i made per the suggestion of Forrestr (thanks again, this is a game changer imo for folks who make dies at home)... once the insert is orange i let it soak at that temp for 2 minutes, i rotate the part 90* every 30 seconds or so, quench in oil (wear long welding gloves because the surface of the oil will catch on fire!), wipe off and immediately put in the kitchen oven at 350F for 1 hour to temper... the heat treating and tempering made all the difference for me and the swaging much much easier... before heat treating i was getting punch thrus on the cases and stuck cases, and case mouths that were folded from the case below pushing up on it... after heat treating all those problems went away and it took much less effort to push the case thru and derim:


    the oven is very simple as you can see, that is 1" thick ceramic insulation (evilbay) and it keeps the heat around the part very well... just quench in a coffee can of motor oil (move the part up and down along the longitudinal axis to avoid warping) and temper in the oven and you are all set, dont forget to temper it or you will have problems (dont ask how i know this- cracked insert inside a Lee die body because it was too brittle due to inadequate tempering, had to saw open the die body to salvage the top punch )...
    Last edited by Cane_man; 06-15-2013 at 08:04 PM.

  20. #20
    Boolit Buddy
    Join Date
    Apr 2013
    Location
    West Central Fl
    Posts
    451
    Looks good. Did you make your push pin out of O-1 also, and heat treat? I used a grade 8 bolt and cut it down to size. Are you cleaning brass before derimming? I haven't been and push pin is showing it after a couple thousand derimmed cases. But they are easy to make. I like the die with the insert idea. Is that a powder through expanding die modified?

    CC

Page 1 of 2 12 LastLast

Posting Permissions

  • You may not post new threads
  • You may not post replies
  • You may not post attachments
  • You may not edit your posts
  •  
Abbreviations used in Reloading

BP Bronze Point IMR Improved Military Rifle PTD Pointed
BR Bench Rest M Magnum RN Round Nose
BT Boat Tail PL Power-Lokt SP Soft Point
C Compressed Charge PR Primer SPCL Soft Point "Core-Lokt"
HP Hollow Point PSPCL Pointed Soft Point "Core Lokt" C.O.L. Cartridge Overall Length
PSP Pointed Soft Point Spz Spitzer Point SBT Spitzer Boat Tail
LRN Lead Round Nose LWC Lead Wad Cutter LSWC Lead Semi Wad Cutter
GC Gas Check