MidSouth Shooters SupplyRotoMetals2Lee PrecisionSnyders Jerky
Titan ReloadingInline FabricationRepackboxReloading Everything
Wideners Load Data
Page 1 of 2 12 LastLast
Results 1 to 20 of 40

Thread: annealing brass

  1. #1
    Boolit Grand Master


    Bad Water Bill's Avatar
    Join Date
    Aug 2006
    Location
    Where our governors, congressmen AND THEIR WIVES make our license plates
    Posts
    5,642

    annealing brass

    http://www.youtube.com/watch?v=mbjhT...eature=related

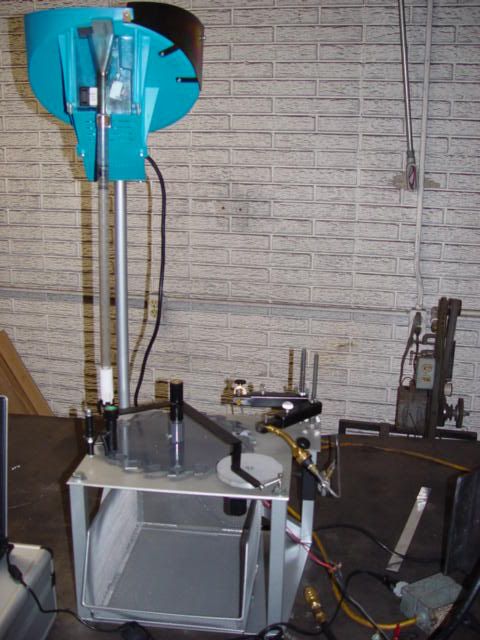
    I saw this on u tube and found it interesting. it sure would speed up the job and get many cases done in one hour. Then I searched for the Mfgr and found out this product is made only 60 miles from home. A phone call was made. Yes sir we have that item in stock and the price is $500.00. After I picked the phone up from the floor I started thinking about making one. BUT all of my electrical training is 50 years old so I am wondering if anyone here can duplicate this product inexpensively

  2. #2
    Boolit Buddy longranger's Avatar
    Join Date
    Jun 2009
    Location
    Buffalo WY
    Posts
    343
    Wow, it sure does a nice job. Wish I could figure it out but I am "elcetrically declined" At the Shiloh Sharps store they have unit for propane that does all sides at once for alot less than $500.00.

  3. #3
    Boolit Master
    Doc Highwall's Avatar
    Join Date
    May 2007
    Location
    Ct
    Posts
    4,615

    Talking

    I like how fast it is but I think it is too hot as you can see the brass glow.

  4. #4
    Boolit Buddy
    Join Date
    Mar 2008
    Location
    Dawsonville, GA
    Posts
    106
    There is another video on youtube. Same guy, same hardware. Now he has a variable timer on his coil. Problem solved.

  5. #5
    Boolit Grand Master


    Bad Water Bill's Avatar
    Join Date
    Aug 2006
    Location
    Where our governors, congressmen AND THEIR WIVES make our license plates
    Posts
    5,642
    I agree but you can do the same with a torch. Just don't hold it there so looooong.

    To bad I wasn't born rich, smart or good lookin. Oh well all them guys are gone and I am still here so I won't complain.

  6. #6
    In Remembrance
    montana_charlie's Avatar
    Join Date
    Feb 2006
    Location
    West of Great Falls, Montana
    Posts
    8,414
    Quote Originally Posted by Doc Highwall View Post
    I like how fast it is but I think it is too hot as you can see the brass glow.
    The case necks turn a bright red, and that is in a brightly lit area. They are getting much too hot.

    The setup looks simple, but it will take some research to figure out what he makes his coil from...and what kind of power it needs.

    EDIT...
    After fifteen minutes of reading, there are some basics to pass on which are easy to understand...if not easy to duplicate.

    The coil is just copper tubing curled into a circle.
    For this application, perhaps cooling liquid flowing inside the tube is not needed...I don't know.

    The power is a high frequency current of somewhere between 100 and 400 kilohertz. That is radio frequency current.
    An oscillator capable of that kind of output would be required to provide the electricity pumped through the coil.
    It's the frequency that does the work...more than the amount of raw current applied.

    And...that's all it takes.

    CM
    Last edited by montana_charlie; 03-22-2010 at 07:51 PM.
    Retired...TWICE. Now just raisin' cows and livin' on borrowed time.

  7. #7
    Boolit Master in Heaven's Range
    AZ-Stew's Avatar
    Join Date
    Jul 2006
    Location
    Mesa, AZ
    Posts
    2,006
    According to the article in the latest Handloader, there's a temperature sensitive paint available that will indicate when the brass has reached the correct temperature. It could be used in conjunction with the induction heating to properly anneal the brass.

    100-400KHz is RF, but a VERY low frequency RF. It's below the AM broadcast band, which is the lowest RF frequency band known to most folks. Regardless, a certain amount of power is going to have to be applied to heat the brass to "glowing". A Ghz at 0.1W won't do the job. There's more to it than just the frequency. With the proper circuit, it wouldn't be necessary to use the temp. sensitive paint. Apply just the right amount of power and you'll get just the right amount of heat.

    I didn't go to the trouble to research this inductive heater. Did anyone else find a circuit diagram or other description of the circuit?

    Regards,

    Stew
    Sig file change:
    "Obi Wan Baloney"
    VOTE 2012! Throw them out! Every last one of them! (Feel free to add this to your sig. Spread the word!)

    "...Get a rope." Pace Picante Sauce commercial, ca. 1984

    "I (did, on several occasions) swear to support and defend the Constitution of the United States, against ALL enemies, foreign AND domestic, and to bear true faith and allegiance to the same." And when I left, they never asked me to recant.

  8. #8
    Boolit Grand Master


    Bad Water Bill's Avatar
    Join Date
    Aug 2006
    Location
    Where our governors, congressmen AND THEIR WIVES make our license plates
    Posts
    5,642
    Here is what I found for the temp indicator

    http://www.google.com/products?clien...ed=0CA8QzAMwAA

    I did not look for any diagrams because I do not know what to look for as so many things have changed since I was in AE school. All we had were glass tubes and big resistors

  9. #9
    In Remembrance
    montana_charlie's Avatar
    Join Date
    Feb 2006
    Location
    West of Great Falls, Montana
    Posts
    8,414
    You can find a simple schematic of the coil here, as well as a simplified block diagram of an induction heating system.
    http://www.inductionatmospheres.com/...n_heating.html

    In the system diagram you can eliminate the feedback loop elements. That requirement will be met by your eye seeing the color change and your hand removing the case from the coil.

    The 'power supply' is a radio frequency generator you find on eBay (or someplace). And, the 'heating station' is the arrangment anchored on your bench where the leads from the generator are connected to the coil.

    As said before, I don't know if cooling liquid would be required, but I see no indication of anything like that in the video.
    Quote Originally Posted by AZ-Stew View Post
    Regardless, a certain amount of power is going to have to be applied to heat the brass to "glowing". A Ghz at 0.1W won't do the job. There's more to it than just the frequency.
    No, a Ghz (at any wattage) won't do the job at all. The frequency is so high, only the thinnest layer of the skin would generate any heat. At that frequency, the heat may only penetrate one molecule deep.

    Conversely, a 5 Khz signal will cause heat to be generated deep inside a solid block of metal.

    As for the amount of power required, it's probably true that (say) 100 watts will heat to 600 degrees faster than 50 watts. But 50 watts may reach the same temperature, if you wait long enough.

    CM
    Last edited by montana_charlie; 03-22-2010 at 09:29 PM.
    Retired...TWICE. Now just raisin' cows and livin' on borrowed time.

  10. #10
    Boolit Master pdawg_shooter's Avatar
    Join Date
    Mar 2007
    Location
    S.W. kansas east of dodge city
    Posts
    3,008
    I still use, and get near perfect results, with 800* lead. Not the fastest system but I am in no hurry.
    45 AUTO! Because having to shoot someone twice is just silly!

  11. #11
    Boolit Grand Master jmorris's Avatar
    Join Date
    Aug 2007
    Posts
    5,284
    I built an automated one there are links to step by step photos of the build and videos of it running here http://www.castboolits.gunloads.com/...ad.php?t=48611

    In order to defray some of the costs having the “blade” part CNC laser cut I had more than I needed cut so I could sell them to other do it yourself types. I also traced out the top plate and where all the holes go, the drive wheel and torch arms (to scale). A blade and the drawings are $60 shipped in the con US. Shoot me a PM if you’re interested.


  12. #12
    Boolit Master

    Calamity Jake's Avatar
    Join Date
    Mar 2005
    Location
    Okla. City
    Posts
    2,471
    I will put my $500 in a good gun and continue to use my record playing turn table, a cutoff #3 coffee can and propane torch!!

    Did 200 cases in about 45 minutes last Sunday afternoon.
    Calamity Jake

    NRA Life Member
    SASS 15704
    Shoot straight, keepem in the ten ring.

  13. #13
    Boolit Mold roggom's Avatar
    Join Date
    Feb 2010
    Location
    Firestone, CO
    Posts
    25
    Wow, two of my favorite hobbies, DIY electronics and reloading. This looks like a great challenge. I will start working on the timer circuit and start scouring the net for various RF induction circuits. I build solid state and tube amplifiers, so I am comfortable with prototyping. Any techs who come across some schematics please link to the thread.

    Rogers

    Edit:

    Noticed this circuit http://diymania.hv4all.com/zvs%20ih.PNG and there are many examples on youtube http://www.google.com/search?q=youut...ed=0CBEQqwQwAA . A couple of mosfets and other components. Its called a ZVS induction heater.
    Last edited by roggom; 03-23-2010 at 08:43 PM.

  14. #14
    In Remembrance
    Join Date
    Feb 2006
    Location
    SW Washington
    Posts
    1,118

    Induction heating

    In my opinion he is getting his brass way too hot in the video.
    Instead of buying and assembling all that machinery and electronics I will buy another can of propane for my Turner torch.
    I hold the brass in my fingers and heat the neck and a little of the shoulder while turning 180 degrees till I see just a start of color change then drop them on the bench. A couple or three seconds. YMMV. At the most I don't get them hot enough to see any glow. They turn out looking just like a factory GI annealed brass. Very consistent. The brain and hand eye cooridination does it all.
    That method would work if he didn't hold it in the coil so long. Propane is cheaper initially.

    Life is good

  15. #15
    Boolit Mold roggom's Avatar
    Join Date
    Feb 2010
    Location
    Firestone, CO
    Posts
    25
    The builder of the first rig has constructed a timing circuit and now has the annealing down to the correct timing.

    To Bill's point, there are many commercial items out there made to perform a specific task. These products can be reproduced with virtually the same parts, but most of the cost is defrayed as the builder invests his own time. Sure, I currently have a propane rig with a variable speed drill, and a couple of sockets. The torch works like a charm, but the induction heater is just fascinating.

    I figure if there is enough people on board we can collaborate to make a functional rig about the size of a small ammo box. I am not trying to steal this guys idea or move to production. Just something anyone with the proper electronics background can make at home.

  16. #16
    Boolit Mold roggom's Avatar
    Join Date
    Feb 2010
    Location
    Firestone, CO
    Posts
    25
    Threw together a plan and layout for the timing circuit. This is untested but just to show how it can be done. The Eagle (when complete) can be downloaded and transferred to a PCB for home etching. The picture below is the guys rig.


    Also looking at the blog, it appears that the guy is in fact using a ZVS flyback driver as an RF generator. Most folks use these to make DIY tesla coils, and for those not familiar, the sparking units in the old Frankenstein movies. The picture looks like a Switch mode power supply and the ZVS board (actually a Royer heater).

    Just need someone to figure out the ferrite core to induction coil section.

    The LED in the schematic simulates the heater, also I figure since the relays both come in at the same time, it can be done on one dpdt relay.
    Attached Thumbnails Attached Thumbnails TIMER.jpg   delayUnit.png  
    Last edited by roggom; 03-25-2010 at 07:40 PM.

  17. #17
    Boolit Master mtnman31's Avatar
    Join Date
    May 2007
    Location
    Knoxville, TN
    Posts
    861
    The guy's setup is pretty slick. If I had access to one of the Mini-Ductor's he has, I'd use it in a heartbeat. I agree that something similar could be made for very cheap. As for the timing circuit, I'd just use the darkroom timer that I already have. The timer I have is digital and can be adjusted down to one second intervals. Once the time is set all you do is push a button and it repeats the time. The only question would be how much wattage the inductor uses since the darkroom timers I have seen are rated for less than 1200w on the output. Hopefully someone can really play with this and make it work. I am not proficient on the engineering side of electronics, but would have no problem building the item from components.

  18. #18
    Boolit Mold roggom's Avatar
    Join Date
    Feb 2010
    Location
    Firestone, CO
    Posts
    25
    From what I have read the power supply must be around 300watts. Further reading, the essentials of the power supply are line power, and a 15v 1A power supply. I do not like using line power without a line isolator so this will have to be added. You can use your timer to control both an isolation transformer and low voltage power supply. Either way, I am sure it will work, just have to work through the other particulars.

    Note: More info on the heater board http://www.neon-john.com/Induction/Roy/Roy.htm

    Other note: I am making some great headway, I have already modded the heater circuit to work on a single plane board, also I will be adding a 12v regulator to the timer circuit to step the 15 down to 12vdc. Next: putting together a parts list for mouser for the main components. Will have to do more research on the ferrite and heater coil.
    Last edited by roggom; 03-25-2010 at 10:35 PM.

  19. #19
    Boolit Master mtnman31's Avatar
    Join Date
    May 2007
    Location
    Knoxville, TN
    Posts
    861
    Other note: I am making some great headway, I have already modded the heater circuit to work on a single plane board, also I will be adding a 12v regulator to the timer circuit to step the 15 down to 12vdc. Next: putting together a parts list for mouser for the main components. Will have to do more research on the ferrite and heater coil.
    Fantastic!

  20. #20
    Boolit Grand Master


    Bad Water Bill's Avatar
    Join Date
    Aug 2006
    Location
    Where our governors, congressmen AND THEIR WIVES make our license plates
    Posts
    5,642
    Still watching and learning I hope. With any luck we can all build one of these things for under $1.00

Page 1 of 2 12 LastLast

Posting Permissions

  • You may not post new threads
  • You may not post replies
  • You may not post attachments
  • You may not edit your posts
  •  
Abbreviations used in Reloading

BP Bronze Point IMR Improved Military Rifle PTD Pointed
BR Bench Rest M Magnum RN Round Nose
BT Boat Tail PL Power-Lokt SP Soft Point
C Compressed Charge PR Primer SPCL Soft Point "Core-Lokt"
HP Hollow Point PSPCL Pointed Soft Point "Core Lokt" C.O.L. Cartridge Overall Length
PSP Pointed Soft Point Spz Spitzer Point SBT Spitzer Boat Tail
LRN Lead Round Nose LWC Lead Wad Cutter LSWC Lead Semi Wad Cutter
GC Gas Check