Lee PrecisionRotoMetals2Titan ReloadingRepackbox
WidenersLoad DataInline FabricationMidSouth Shooters Supply
Snyders Jerky
Page 18 of 129 FirstFirst ... 891011121314151617181920212223242526272868118 ... LastLast
Results 341 to 360 of 2563

Thread: Loading bench pics

  1. #341
    Boolit Buddy
    Join Date
    Jun 2009
    Location
    Kentucky
    Posts
    471
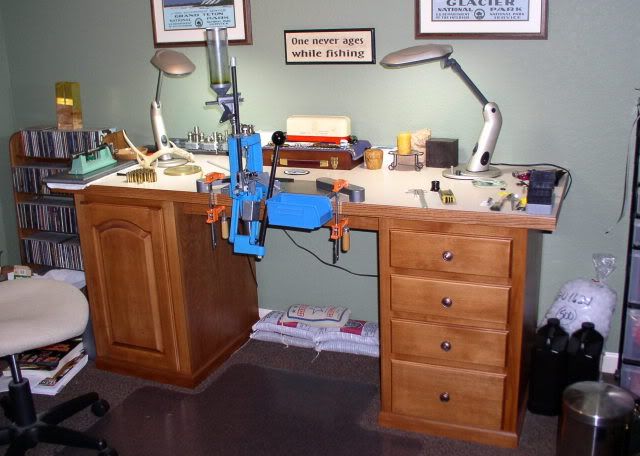
    Softpoint - wow, your reloading room looks like home to me! No pictures of mine yet. The wife says I have to clean and straighten it up first, so there probably will never be any pictures.

    So far it only consumes half of an unfinished basement. I still have hopes and plans for the other half.


    skt

  2. #342
    Boolit Buddy watkibe's Avatar
    Join Date
    Nov 2008
    Location
    The Great Pacific Northwest
    Posts
    281
    JesterGrin - " As I have looked at every single page here with a press here and a press there here a press there a press everywhere a press press with no McDonald lol. Way too many presses mounted all of the time leaving little room to actually work on anything."
    Hey Jester, I notice the same thing, and it's true on my bench too. A while back I had a realization. I have always thought of a reloading bench as where I do everything related to reloading. Well, that's just plain crazy. There is so little space between the presses and powder measure that it's hard reaching in between them to get to the rest of the bench top. So, the only thing I do now on "the reloading bench" is use the presses or powder measure. At the back I store small tools and parts like shell holders and trim length gauges; I only have to get into that stuff once or twice every session, so I don't mind. I put another table next to the bench with nothing on it except my case trimmer. I use the empty space there to sort and clean cases, weigh powder charges, write in my log book, trim cases, prime cases, cast and lube bullets and lube cases prior to sizing. It works better, and my patience and elbows both feel less mistreated ! On the shelves under the bench I store primers, powder, bullets, dies and cases. On the shelves under the table I store ammo boxes, vibratory cleaner, melting pot, and miscellaneous stuff. There is a chest of drawers on the other side of the bench where I keep loaded ammo, and holsters, belts, chronograph, cleaning supplies and range bag. Much better than trying to do everything on the "reloading bench"!
    Last edited by watkibe; 08-18-2009 at 07:48 PM. Reason: fix quote format
    "A society that values equality above liberty will have neither. A society that values liberty above equality will have plenty of both " - Milton Friedman

  3. #343
    Boolit Master


    grumman581's Avatar
    Join Date
    Apr 2009
    Location
    The Lone Star Republic
    Posts
    759
    Quote Originally Posted by watkibe View Post
    Hey Jester, I notice the same thing, and it's true on my bench too.
    I suspect that part of the problem is that most of us just don't have the spare space in our houses to devote the appropriate space to our reloading area that it deserves. Like most things in life, it is is a balance of compromises. Hell, on my reloading bench, the upper shelves even have old laptops, DVDs, and CDs stored up there. I justify it by telling myself that the added weight makes my table more steady... And that's my story and I'm sticking to it...

  4. #344
    Boolit Master oldhickory's Avatar
    Join Date
    Jul 2008
    Location
    Enders Pa.
    Posts
    1,160
    Quote Originally Posted by targetshootr View Post
    This was my set up a couple of years ago. Since then it's become unorganized.

    Ha!...You're a neat-freak!
    Those who would give up essential liberty to purchase a little temporary safety deserve neither liberty nor safety.

    Benjamin Franklin, Historical Review of Pennsylvania, 1759

  5. #345
    Boolit Master
    wallenba's Avatar
    Join Date
    May 2009
    Location
    S. E. Michigan
    Posts
    2,695
    Bench is as heavy as I could make it. I used about $40.00 worth of materials to make ( less paint an plexiglass ). It's only 2' x 4'. Click on image for larger size.
    Attached Thumbnails Attached Thumbnails loadbench 002.jpg  
    Dutch

    "The future ain't what it used to be".
    -Yogi Berra.

  6. #346
    Boolit Master


    grumman581's Avatar
    Join Date
    Apr 2009
    Location
    The Lone Star Republic
    Posts
    759
    I recently bought a Dillon press from one of the people on this board and finally got around to installing it on the table top that I'm using for reloading... One of the things that I noticed is that it only takes 1/4" bolts and that the front ones are really too close to the edge in my opinion... My table top is made up of 2x8s joined together by routing out a tongue and groove and then gluing up while held with large bar clamps, so it's strong enough even this close to the edge, but from an engineering perspective, I think it should have been a bit further from the edge... I also think that it should have used larger diameter bolts since I managed to break one of the bolts while tightening it down... Yeah, I mean *break*... I didn't strip the threads, I actually *broke* the bolt... One of my other presses uses 3/8" bolts and I didn't have a problem with it breaking...

  7. #347
    Boolit Grand Master


    Join Date
    Dec 2005
    Location
    Southwestern Ohio
    Posts
    8,456
    I have a couple of Dillon 550B's. I have had NO problems with fastening it down (my bench is made of 2x10's with a hardboard covering). If the common, ordinary mild steel bolts are not working for you, I would replace them with Class 5 or Class 8 bolts:

    http://www.grainger.com/Grainger/wwg/guideBrowse.shtml

    I have ordinary bolts holding down my Dillon but would have NO hesitation going up in strength if necessary. Your local Home Building supply has many choices in bolts (Home Depot and Lowe's as a for instance).

    Good luck!

    Dale53

  8. #348
    Boolit Master


    grumman581's Avatar
    Join Date
    Apr 2009
    Location
    The Lone Star Republic
    Posts
    759
    Quote Originally Posted by Dale53 View Post
    I have a couple of Dillon 550B's. I have had NO problems with fastening it down (my bench is made of 2x10's with a hardboard covering). If the common, ordinary mild steel bolts are not working for you, I would replace them with Class 5 or Class 8 bolt
    Looking at the torque specs on this page:

    http://www.dansmc.com/torque_chart.htm

    I think it's quite likely that I exceeded the torque limits for the 1/4" bolt that broke on me. Assuming that the standard bolts that you get up at Home Depot are grade 2 bolts, it's probably a safe bet that I exceeded 6 ft-lbs by quite a bit even though I was not using a long wrench... I usually just tighten the bolts like this down until I start getting some deformation in the wood as the bottom fender washer is pressed into it... I don't like things that wobble, so I probably gave it one grunt too many... Oh well... Too bad it wasn't one of the shorter bolts that broke instead -- I have some replacements for them around my shop...

    On the side of the house where my reloading and computer room is located, I just completed replacing the carpeting with travertine stone... Slowly moving things back in the room and putting things back together... I guess I could take a photo right now of it, but it would look artificially clean since not everything has been moved back into that room...

  9. #349
    Boolit Mold Roper1952's Avatar
    Join Date
    Apr 2009
    Location
    Wet side of Washington for now...
    Posts
    21

    Here 'tis

    After gutting my den, remodeling, painting and new carpet I just had to build a new reloading/tying bench (like I needed another project).

    So here 'tis, and I have to say it works well for me. I can load shotshells, brass, or tie flies. There's lots of storage (but we all know there's never enough) and it doesn't look half bad. It has a laminate top that cleans up easy no matter what I spill on it.


  10. #350
    Boolit Grand Master


    Join Date
    Dec 2005
    Location
    Southwestern Ohio
    Posts
    8,456
    Roper1952;
    I would have to nominate you for the nicest bench of all. Nice work!!

    I"m very happy with my tool head rack (self made) but yours is certainly slicker.

    Dale53

  11. #351
    Boolit Buddy watkibe's Avatar
    Join Date
    Nov 2008
    Location
    The Great Pacific Northwest
    Posts
    281

    2 out of 3 ain't bad

    The last 2 reloading benches I built mostly worked fine, and the second one benefited from where the first one went wrong. I don't need another one yet (pics on a previous post in this thread) but when I do, I would make it basically the same but shorter from front to back. The bench space behind the presses is hard to use, and so it's wasted. The area with the storage cabinet with drawers is hard to reach because it's behind the presses, too. I would build the shelf for the cabinet higher, so that it would be above the presses. It would be easier to reach since it would be closer. The other thing I would add is a shelf screwed to the bottom of the bench top, extending forward, and with cutouts for the press rams and handles. That way there would be places next to the press to put the containers for brass/bullets, and for finished cartridges. The idea for the lower shelves has been working really well. If all the shelves came all the way to the front, it would be really hard to use all the space on the lower 2 shelves. This way everything is where I can see it. The drawing probably explains it better than I have in words.
    Attached Thumbnails Attached Thumbnails loading bench.jpg.jpg  
    Last edited by watkibe; 08-13-2009 at 09:11 PM. Reason: spell check, add drawing
    "A society that values equality above liberty will have neither. A society that values liberty above equality will have plenty of both " - Milton Friedman

  12. #352
    Boolit Bub
    Rusty Parker's Avatar
    Join Date
    Aug 2009
    Location
    Trumansburg, NY
    Posts
    73

    Casting and reloading benches

    Hi everyone,
    reading through this thread and the lurker's thread elsewhere is what convinced me to join the board.

    Just getting back into BP casting after a 15-year break. Finally have a shed where I can set everything up and leave it set up--too many moves years ago made casting seem more like work than play.

    Anyway, I've learned a lot these past couple of months here, and here are pics of the setup so far. Since BP is the immediate obsession, I recently bought a Lee press to help with sizing minies (I sized thousands of rounds by hand 20-25 years ago . . . sure wish I knew then what I know now!), but now I'm also going to start reloading for my centerfire rifles, and eventually I may cast for them as well.

    here goes: first, the casting/reloading shed
    Click image for larger version. 

Name:	reloading shed.jpg 
Views:	180 
Size:	67.2 KB 
ID:	15354

    The shed used to be wired for electricity years ago, but now I have to run lights off a generator. A new sub-panel is on my wish list. Outside the shed you see the remnants of my last, jerry-rigged reloading bench that I finally dismantled this month, leaning against the building.

    Inside, here's the casting station:
    Click image for larger version. 

Name:	casting bench.jpg 
Views:	229 
Size:	56.9 KB 
ID:	15355

    I bought a used bathroom vanity for $60 from an architectural salvage barn and set up my propane stove on the countertop for casting. Years ago I had a Lee electric pot that was nothing but trouble, but I may just get another electric pot after some of the posts I've read here. The shed needs electric before that can happen.

    To the right is the reloading/sizing bench:
    Click image for larger version. 

Name:	reloading bench.jpg 
Views:	194 
Size:	46.6 KB 
ID:	15356

    I broke down and bought a nice sturdy metal bench for the press from Sears, and although I'm not a big Sears fan, I don't regret it at all. I could have built one, I know, but life's too short sometimes . . . .

    Finally a bunch of new minies:
    Click image for larger version. 

Name:	minies.jpg 
Views:	232 
Size:	47.0 KB 
ID:	15357

    I have struggled the past several weeks with three or four different Lee molds and a couple of Lyman molds. This is a batch of Lyman 575213OS, all sized down to .576--it's a new mold and these are still a bit wrinkly, but they'll do fine for load development with the Enfields. The bench looks pretty clean now compared with some of the others I've seen here, but the file cabinet between the benches is filling up with the basics for reloading, so that will come next.


    That's about it. I just really enjoyed seeing the pictures of everyone's bench setups, thought I'd share mine.

    thanks.

    Rusty

  13. #353
    Cast Boolits Owner


    No_1's Avatar
    Join Date
    Mar 2005
    Location
    N.E. Florida
    Posts
    12,700

    Welcome!

    Welcome to the fun house Rusty!
    As you have noticed there is a tremendous amount of stored info here but what is more important is the knowledge of the members who have not problem chiming in with a helpful answer.
    Your shed is the perfect start (or restart) for your re-found hobby. I must admit the file cabinet does add a little "color".

    R.
    "The only way to deal with an unfree world is to become so absolutely free that your very existence is an act of rebellion."
    - Albert Camus -

  14. #354
    Boolit Buddy watkibe's Avatar
    Join Date
    Nov 2008
    Location
    The Great Pacific Northwest
    Posts
    281
    Hey Rusty, good for you ! I recently returned myself, after some health problems. Looks like you can even cast in, or in front of, your shed. That's a big plus. I have to back my truck into the parking space outside the window of my apartment and run a cord out for the melter on the tailgate...I didn't mean to retire, but it looks like I did. Sometime soon, I'll be outta here...
    "A society that values equality above liberty will have neither. A society that values liberty above equality will have plenty of both " - Milton Friedman

  15. #355
    Boolit Grand Master


    Join Date
    Dec 2005
    Location
    Southwestern Ohio
    Posts
    8,456
    Rusty;
    Looks to me like you have a near ideal set up. When you get electric, that will give you an option of heat and A/C. I had a small utility barn built (12x20) just for some overflow from the garage and a dedicated casting station (I reload in the finished basement in my home). I had 220 run so I could use a welder (if necessary) and an electric heater. I added a small window air conditioner. I insulated it and can cast in most weather that we will find around here. It has been a WONDROUS addition.

    I admire your choice of kitchen cabinets from a salvage seller. My reloading room has benefited from fire salvage kitchen cabinets. I also found some really nice and relatively inexpensive wire shelving that are properly rated for 800 lbs for storing the heavier components (several thousand cast bullets, for example) at Home Depot and Lowes.

    You'll be an excellent addition to the forum.

    Dale53

  16. #356
    Boolit Bub
    Rusty Parker's Avatar
    Join Date
    Aug 2009
    Location
    Trumansburg, NY
    Posts
    73
    thanks guys. yeah, that file cabinet is wild--you have to pay extra for that (another salvage special.)

    rp

  17. #357
    Boolit Master LAH's Avatar
    Join Date
    Mar 2005
    Location
    In The Hardwoods
    Posts
    3,057
    Love your set up Rusty.


    Dry Creek Bullet Works
    Dry Creek Firewood

  18. #358
    Boolit Bub
    Rusty Parker's Avatar
    Join Date
    Aug 2009
    Location
    Trumansburg, NY
    Posts
    73

    Coleman stove woes

    p.s. to the earlier posts. I said I had been struggling with several molds and getting wrinkled boolits, etc. It occurred to me I just wasn't getting enough heat from the stove. Well I finally took the 25 year old Coleman stove (which has been sitting in a shed unused for 15 years) apart, and the propane pipes had been almost completely filled up with mud dauber nests--I was hardly getting any gas at all.

    Quick trip to Wally Mart for a season's-end on-sale replacement stove, and I was back in business. Wow, what a difference, 10,000 btu per burner, what a concept. And now the boolits are shiny and solid and smooth.

    Life is good.

  19. #359
    Boolit Grand Master


    Join Date
    Dec 2005
    Location
    Southwestern Ohio
    Posts
    8,456
    Rusty;
    Generally, less than perfect bullets are a matter of technique. However, sometimes, it IS the equipment. I would like to suggest an additional item, if you don't already have one - a GOOD thermometer. I got mine from Bill Ferguson, the Antimony Man. I originally had a Lyman but it did NOT give me correct temperatures. I believe my good one is a Temp-Tru:

    http://www.theantimonyman.com/thermometry.htm#p5

    Dale53

  20. #360
    Boolit Bub
    Rusty Parker's Avatar
    Join Date
    Aug 2009
    Location
    Trumansburg, NY
    Posts
    73
    Dale, thanks, that's very good advice. I'd earlier been on the Temp-Tru website but couldn't figure out which one would be best for lead melting. The thermometer's next on the list.

    I've had to phase my purchases over the past couple of weeks--high on the list was an electronic scale to measure bullet weights, which previously I'd never done. I got an RCBS 750, and so far so good.

    Here's a small sample of minies out of a Lyman mold cast yesterday over the new stove:

    Click image for larger version. 

Name:	scale2.jpg 
Views:	211 
Size:	57.8 KB 
ID:	15404

    It was nice to see the nice normal distribution. I did learn, however, that my Lyman mold was mislabeled--I thought I had a 5751213 old style minie, which is supposed to weigh 460 grains or thereabouts. Instead, these all hovered around the 500 to 501 grain range, despite the "OS" stampings on the mold blocks and the label on the Lyman box!

    I recently picked up this mold at Dixon's in Allentown PA. I think there's a chance the wrong mold ended up in the wrong box somewhere along the way. So I still need to get a mold for the old style minie. Meanwhile, I've got a growing pile of 501 grain new style minies (which I'm sure won't go to waste). And I probably wouldn't have figured it out without the scale, so that purchase has paid off already.

    Hopefully I'll shoot some of these today and see how they do.

    rp

Posting Permissions

  • You may not post new threads
  • You may not post replies
  • You may not post attachments
  • You may not edit your posts
  •  
Abbreviations used in Reloading

BP Bronze Point IMR Improved Military Rifle PTD Pointed
BR Bench Rest M Magnum RN Round Nose
BT Boat Tail PL Power-Lokt SP Soft Point
C Compressed Charge PR Primer SPCL Soft Point "Core-Lokt"
HP Hollow Point PSPCL Pointed Soft Point "Core Lokt" C.O.L. Cartridge Overall Length
PSP Pointed Soft Point Spz Spitzer Point SBT Spitzer Boat Tail
LRN Lead Round Nose LWC Lead Wad Cutter LSWC Lead Semi Wad Cutter
GC Gas Check