Inline FabricationMidSouth Shooters SupplyLee PrecisionRepackbox
WidenersSnyders JerkyRotoMetals2Reloading Everything
Load Data Titan Reloading
Page 1 of 3 123 LastLast
Results 1 to 20 of 49

Thread: Duracoating my Ruger Single-Six .22LR/.22 WMR

  1. #1
    Boolit Buddy
    Join Date
    Dec 2008
    Location
    San Diego
    Posts
    266

    Duracoating my Ruger Single-Six .22LR/.22 WMR

    After some thought I decided to post as I go wit this one, rather than compile a report of the finished project. For one thing, I'll probably finish it sooner if I'm motivated to make daily updates. I'm pretty sure doing it this way will result in a bigger article with more detail and certainly more pictures.

    So here it is, with this post I'm officially kicking off the project.

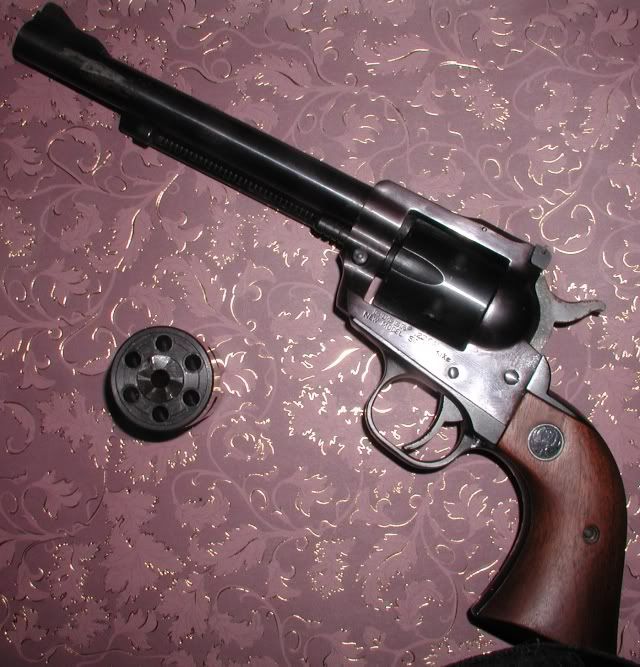
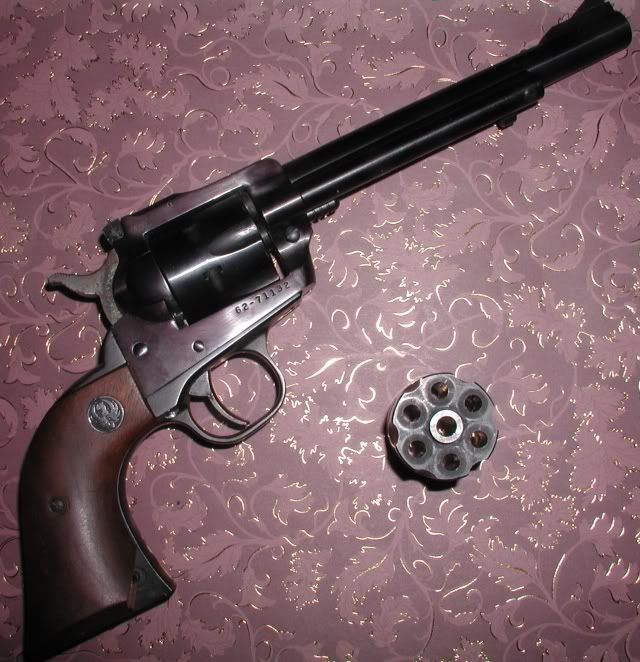
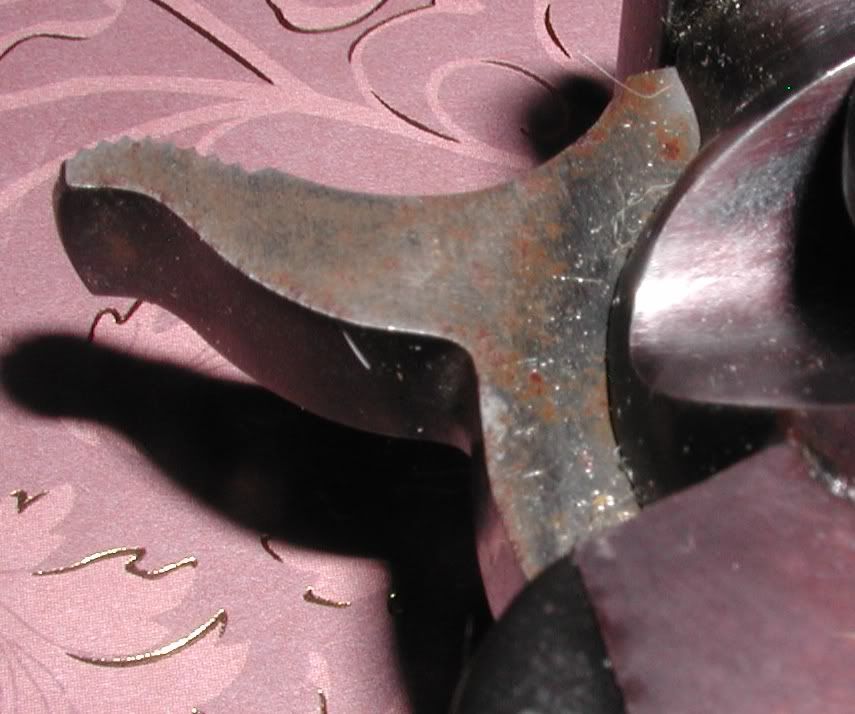
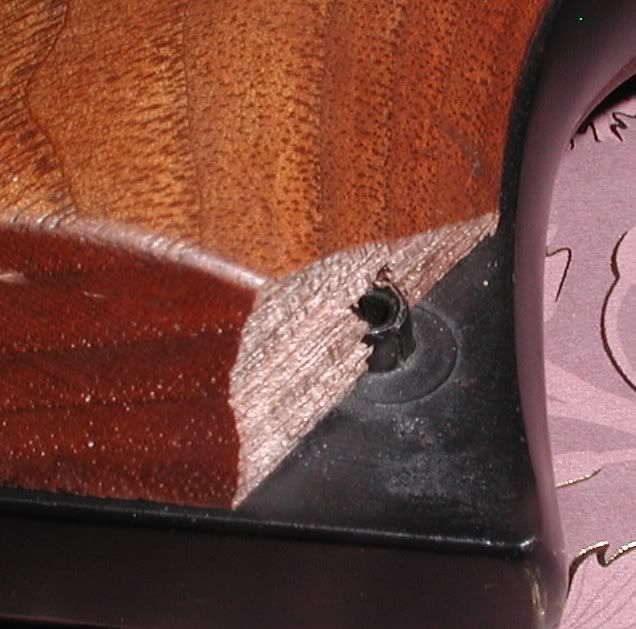
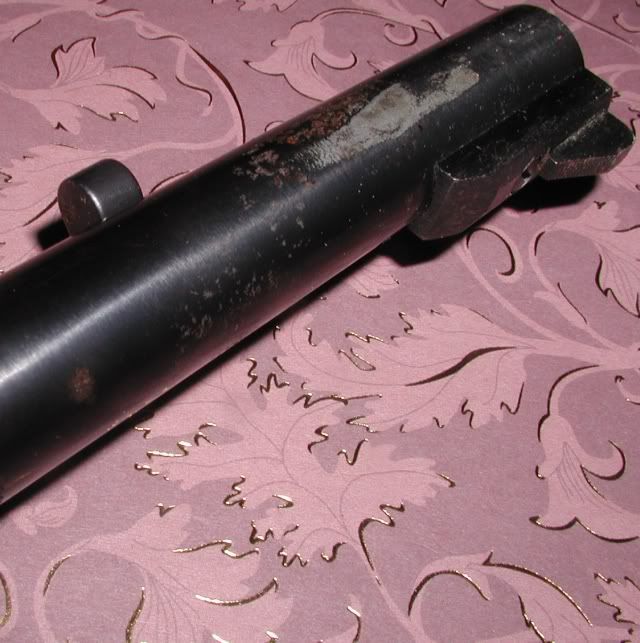
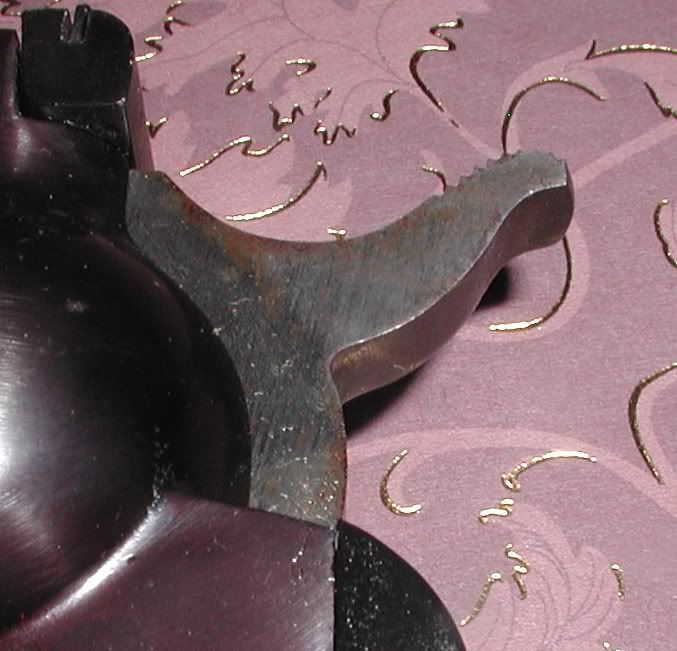
    First, the gun as it is right now. I picked it up for $80, cheap because when I bought the thing, in addition to some issues with the finish, it had a mechanical problem. It turned out to be simple, just a rusted bound-up spring. I managed to chip the corner off the wooden grip all by myself just a couple days ago- please don't ask.

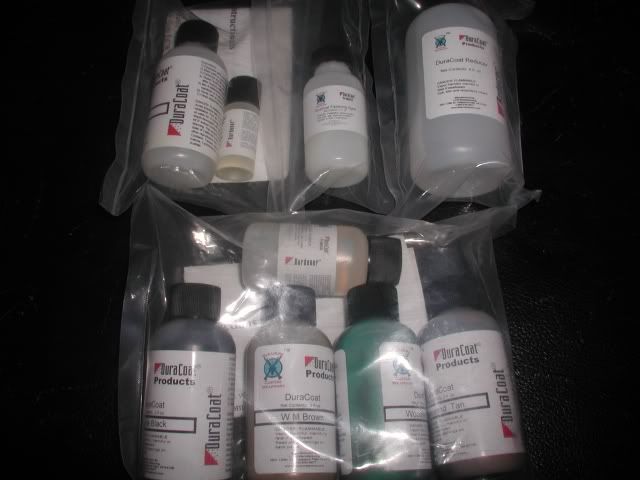
    I started to plan a duracoating project some time back, I want to do a bolt gun I built. Then I built an AR and wanted to do that. Trouble is, they don't look so bad as they are and I'd hate to mess 'em up...so along comes an $80 .22 with a meesed-up finish, seems to me to be the perfect candidate to teach myself how to airbrush with duracoat.


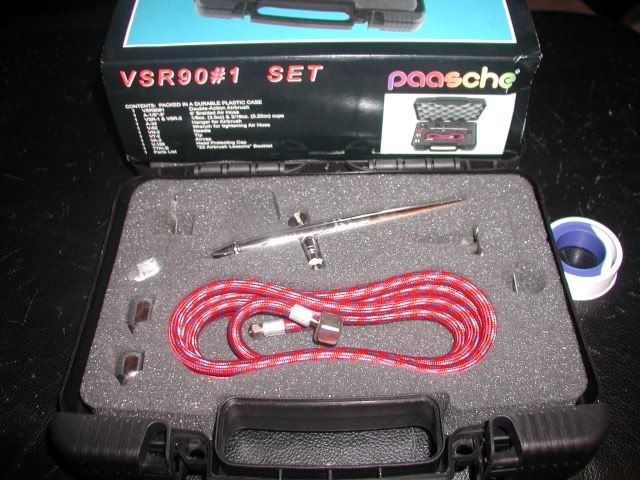
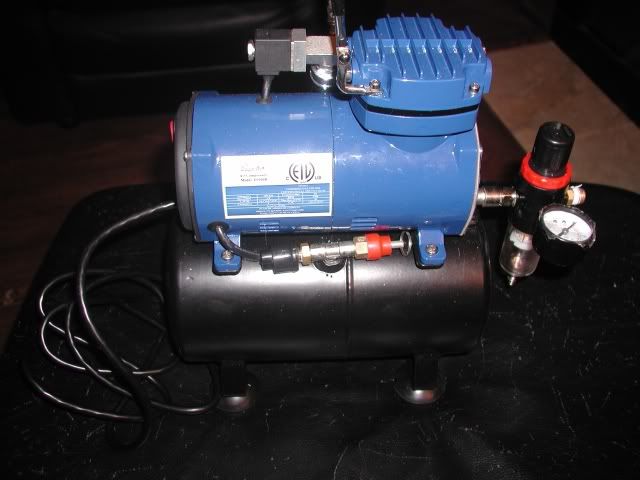
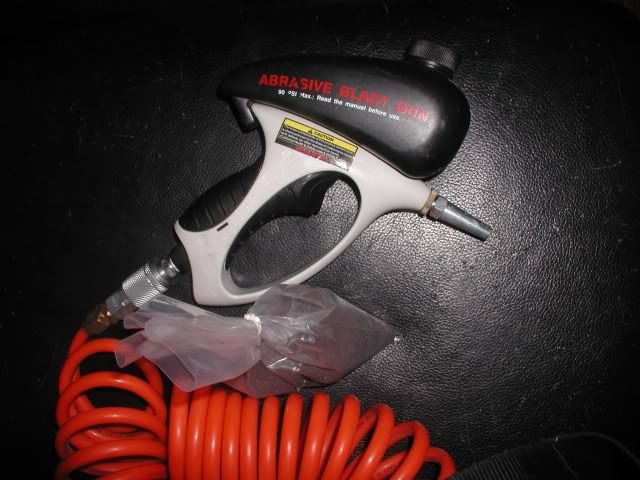
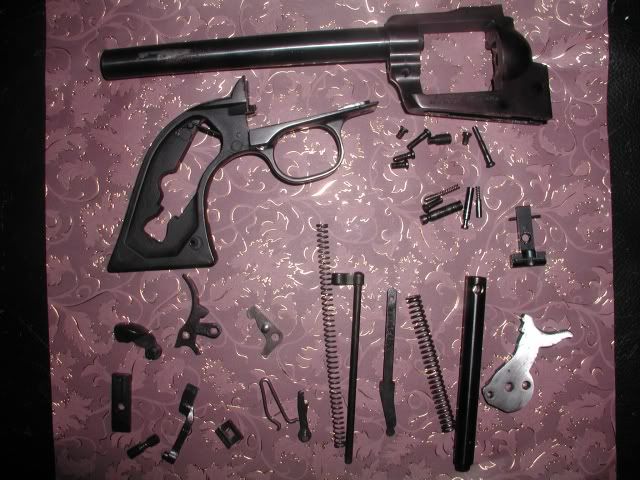
    Tomorrow I'm taking the pistol to my gunsmith to have him disassemble it for me, frankly revolvers scare me a little. I know I could figure it out, and I even have the book, but I don't have the proper tools and really that's not what this project is all about. So I'll drop it off, he'll probably have it for a few days. Meanwhile, tomorrow I'll go over my plan and show some pics of my airbrush set-up.

  2. #2
    Boolit Grand Master


    stubshaft's Avatar
    Join Date
    Apr 2009
    Location
    Southernmost State of the Union
    Posts
    5,912
    Looks like an interesting project. Looking foreward to seeing your results.
    Old enough to know better, young enough to do it anyway!

    Men who don't understand women fall into two categories: bachelors and husbands!

  3. #3
    Boolit Buddy
    Join Date
    Dec 2008
    Location
    San Diego
    Posts
    266
    Thanks S!

    Day 2:

    Dropped off the pistol today for disassembly. My gunsmith was out so I'll need to talk to him tomorrow to get a handle on how long it'll be before he can get to it.

    Meanwhile, here's the rundown on gear I've acquired to pull this off.

    -Paasche VSR #1 airbrush, actually my wife gave me this for Christmas last year. I've had a little practice with it in the last 10 months, just using water-based paint on paper. So I guess I'm ready enough to move forward. This thing is sweet.

    Anyone considering an airbrush project should not feel they need to get one this nice. I probably wouldn't have bought this for myself, but what can I say- my wife loves me. Actually, this one may be a bit too good for this project... it's set up for very fine detail work. But I guess that suits me OK, I plan on some tight detail and I don't need two units, but for the coarse work it's going to be slow going.


    -I also have a sweet compressor, the Paasche D3000R. Again, thanks to my wife, I get to enjoy a far nicer system than I'd ever get for myself. If not for her, I'd probably just hook the air-hose up to a spare tire. I bet I could get through this whole project only filling up one tire lol.


    And here's the duracoat stuff I got from Lauer: black, brown, green and tan, some matte clear, flattening agent, reducer, and hardener. This is expensive doo-doo. I hope it has a good shelf life, it's been on my shelf for maybe 6 months or more.


    I decided not to buy the expensive Tru-Strip degreaser right away. I heard a rumour that brake cleaner works just as well, so I'm going to see for myself. Remember, my mission is two pronged: yes, I want a camouflaged pistol, but I also want to work out the bugs and develop my duracoating "A" game for some other more complicated projects.

    Tomorrow I'll go over my plan for prepping the metal. This could potentially be a little tricky, because the gun is made of both steel and aluminum alloy. I hope I don't have to jump through too many hoops getting the paint to stick to the aluminum. Hopefully I'll also be able to say when the disassembled gun will be back in my hands.
    -T

  4. #4
    Boolit Master
    Join Date
    Oct 2008
    Location
    Sacto., Ca.
    Posts
    1,703
    Sounds like a good project, I'm looking forward to seeing your progress. Those old Rugers are great.

  5. #5
    Boolit Buddy
    Join Date
    Dec 2008
    Location
    San Diego
    Posts
    266
    Thanks you d!
    Day 3:

    Just got off the phone with my gunsmith who tells me I'll probably be able to pick up the exploded gun on Tuesday.

    Regarding the prep needed for the surfaces on this pistol, the FAQ says it can go directly over blueing if it's in decent shape, and aluminum must be blasted or sanded. I'm just going to blast the whole thing. Last year, in preparation to prep my MacMillan stock whenever I actually get around to it, I picked up a blaster and some aluminum oxide at Harbor Freight. So I already have that, no need to spend more $$. That's a relief if it actually works- I'm a little skeptical about that aluminum.

    I have it on good authority that brake cleaner will work, further corroboration to support the idea I put forth yesterday. Not gonna buy Tru-Strip if I can help it. I guess despite the FAQ's suggestion to only degrease once, it's best to hit the parts several times and be certain they're thoroughly cleaned and grease/oil free.

    It's important to have a dust-free zone. I need to come up with a means of providing that, and the parts ought to hang. So I'll need to create a spray booth of sorts enabling me to either walk around the parts to spray all sides, or rotate the parts as they hang so I can stand in one spot and spray all sides. Need good lighting too, and of course I'm not going to hold my breath the whole time I'm in the booth so I'll be wearing a respirator. I'd like to find a way to ventilate, but I think that could defeat the purpose.

    My plan calls for visquuen, wire and snap swivels...I'll need to come up with a way to keep the parts from rotating when I want them steady, I think clothespins on the swivels could work.

    Monday I'll go over my plan for the cami pattern and how to apply it.
    -T

  6. #6
    Boolit Master

    Join Date
    Jul 2008
    Location
    Tennessee
    Posts
    1,795
    Tippet, I have used Duracoat on a couple of rifles and was VERY pleased with the results. Couple of pointers: First, you stated you were going to sand/bead blast your revolver. I do not recomend sand, instead use glass bead material AND the finer the blasting material, the smoother the finish. In other words a course blasting material will give a heavy matt finish. However, this can be overcome with additional coats of Duracoat. Second, I believe Duracoat suggests NOT to use any cleaner AFTER blasting. Just blow any dust off with air. Third, If I remember correctly, the "shelf life" of the hardner is only 6 months. Might want to check this out since you stated you have had the material for sometime.

    Larry

  7. #7
    Boolit Buddy
    Join Date
    Dec 2008
    Location
    San Diego
    Posts
    266
    Thanks I'll check it out. I'll be using fine aluminum oxide for media, I hope it produces a matte finish- I don't like shiny camouflage! I'll be taking it to a buddy's place to blast it with his compressor. I planned on degreasjng it again after I get back home just to be safe. They may say only do it once and I must have missed where they say to do it only before blasting, but from what I hear once is not enough. I can see where degreasing before blasting could improve the blasting process.

    Thanks for the tip I'll find out about the hardener

  8. #8
    Boolit Buddy Ekalb2000's Avatar
    Join Date
    May 2009
    Location
    Alamogordo, NM (Holloman AFB)
    Posts
    253
    Looks interesting.
    I just parked my 44. Cant wait to see yours done.

  9. #9
    Boolit Buddy
    Join Date
    Dec 2008
    Location
    San Diego
    Posts
    266
    Delaying progress tonight, my new handles came in and I've got a pot melting right now to try out my new MiHec 452-200 dual cramer. I'm as excited as a puppy with two peters.

    After I get that out of my system I'll get back on here and explain my plan for a stencil.

    -T

  10. #10
    Boolit Buddy
    Join Date
    Dec 2008
    Location
    San Diego
    Posts
    266
    Change of plans- the exploded gun came back to be today, so I'll go over the paint and stencil scheme after the holiday. Today I'll run down the skinny on the parts.

    Here's what the exploded gun looks like. Everything's there except the grips and one little internal pin assembly that's taped-up to keep it together, no benefit to unwrapping it now:


    I'm still not sure what to do about grips. I have the broken chunk to glue back on the the wooden set that came off this gun, but I'm toying with the idea of getting some new ones. I'll decide in the next few days.

    One reason I decided to go the extra mile and completely tear the thing down is, that hammer. Have a look at the first pictures, you can see the thing is in need of a serious cleaning up. The only way to do that properly is to remove it, so why not do it right and paint each piece of the exploded gun.

    When I first got this thing, the cylinder would only advance if the gun was held so gravity kept the mechanism in the proper position to engage. It turned out that a spring rusted , binding it to what was supposed to be a moving part. So to my thinking, duracoating everything, even the smallest internal parts, is the way to go.

    However, my gunsmith told I shouldn't paint the hammer. Apparently it's supposed to be a very tight fit and a layer of paint could prevent the hammer from fitting adequately.

    Now, I know for a fact the man knows his stuff when it comes to guns, but I also know he's only vaguely familiar with duracoat. The finish ends up being from 1/4 mil to 1-1/2 mils thick depending on how many coats are used.

    I looked at what I think is the area the where the hammer needs clearance, and I think I'm willing to risk a coat.

    The idea of have a pistol that's completely camoflaged, except for a bare metal hammer, just doesn't appeal to me. I want this gun to be invisible.

    Oh - regarding the shelf-life issue, as I mentioned earlier they say duracoat has a shelf-life of 12-18 months, and the hardner goes 6 months. "Bummer for me", I thought, because I got the stuff over six months ago. But I called them and found out they give those numbers conservatively, and as long as the stuff will pour out of the bottle, still remains liquid, then it should be fine. Apprarently it thickens when it goes bad. So I'm in good shape.

    OK after the holiday I'll go into detail about my plan for color scheme and making the stencil, in fact I'll probably have the stencil done and have pics to post.

    I think most peopel will like my idea better than paying the big $$ for a commercial camo stencil kit- man those things cost way more than it seems they should.

    OK everyone have a great Thanksgiving and God bless you all.
    -T

  11. #11
    In Remembrance

    Join Date
    May 2009
    Location
    Nct, Ohio
    Posts
    1,097
    You should be fine with the aluminum oxide on the steel but you may want to try it out on an unseen part of the aluminum to see how aggressive it will be. I have an old air powered spark plug cleaner and it has aluminum oxide in it, it removes the carbon deposits and leaves a nice clean matte finish on the steel. I am not rushing you but I can't wait to see the finished product.

  12. #12
    Boolit Buddy
    Join Date
    Dec 2008
    Location
    San Diego
    Posts
    266
    Thanks for your interest- funny you should mention that, the aluminum oxide I have is actually sold as spark plug cleaner.

    I'd say it's likely that by this time next week I'll be posting pics of the painted parts. Initially I'd palnned to leave them hanging until cured, which unfortunately takes about 3 weeks.

    This stuff can optionally be cured by popping the painted parts into the oven for an hour, but I talked to a guy yesterday who did that and ended up with marks on the underside of the parts from the rack in the oven. So I guess he didn't wait long enough to bake them. Problem is, I'm not sure how long you're supposed to let it dry before it's safe to let it bake. Apparently the finish stays very soft and fragile for quite some time, so I may very well decide to let it all hang for several weeks before I schlepp it back to my gunsmith for reassembly.

  13. #13
    anachronism
    Guest
    Duracoat doesn't recommend glass beading. Glass beads polish the metal slightly, making paint adhesion marginal. You're doing the right thing with the aluminum oxide. You can bead blast the metal, but you'll need to scuff over the finish with red scotchbrite to get paint to stick. I just finished up a bunch of AR lowers for a local rifle builder & they were a bit of a pain to deal with. If it helps, I went over the bare metal with scotchbrite & lacquer thinner to degrease them & remove my finger prints. Then I wiped them off with a clean lintfree cloth before painting. I did 3 at a time & heated them in a very low oven to help offset the cool temps we're experiencing. I don't bake Duracoat, preferring to let them air dry overnight, then move them to a warm place in the house after most of the paint solvents have outgassed. If you're not in a hurry to use the item, this is much safer than baking & risking grill marks. Baking doesn't seem to make the Duracoat any harder, it seems to do that by itself over time. Duracoat recommends no agressive solvents like Gunscrubber by used for about 3-4 weeks, and I usually wait even longer than that.

  14. #14
    Boolit Master peter nap's Avatar
    Join Date
    Jul 2009
    Posts
    599
    Really enjoying this thread!

  15. #15
    Boolit Master
    Join Date
    May 2006
    Location
    God's country - WI.
    Posts
    941
    Quote Originally Posted by peter nap View Post
    Really enjoying this thread!
    Yes! Very informative too - I can't wait to see how the project finishes up. Duracoat finishing is a process I've thought about trying myself and I'm glad to learn from your experience.
    <
    Uncle R.

  16. #16
    Boolit Master jameslovesjammie's Avatar
    Join Date
    Aug 2007
    Location
    Plentywood
    Posts
    850
    +3

    This is a really cool thread.

  17. #17
    Boolit Master yondering's Avatar
    Join Date
    May 2008
    Location
    NW Washington State
    Posts
    1,519
    You are on the right track with the aluminum oxide. Glass bead will not let the coating stick very well.

    It will work great on the aluminum grip, BUT be careful on the edges, especially where it mates to the frame. It is very easy to round off the edges. In fact, it might be a good idea to blast the grip while attached to the frame, to avoid rounding those edges. You really don't need (or want) to coat the mating surfaces of the grip and frame anyway.

    For stencils, if you want real good camo, use small leaves, twigs, and branches; whatever is found in your area. It works very well. If you really want effective camo, it needs to match the camo you are wearing, which should also match your environment.

  18. #18
    Boolit Buddy
    Join Date
    Dec 2008
    Location
    San Diego
    Posts
    266
    Thanks guys I really appreciate the feedback and tips. Between us we should have a great looking project! The camo pattern I plan on using is MARPAT. I keep blouse and trousers for hunting crows, so I figure I'll just copy the back of the blouse on my flatbed scanner. Should be original size printed on some peel and stick paper, pretty sure I can find that at Fry's or maybe even WalMart.

    I need to get to Walmart anyway, I feel it's time to start contributing to one of my favorite sites, http://www.peopleofwalmart.com/

    LOL There's no shortage of photo ops at any Walmart I've ever been to.

    I'm taking a break from this and every other project I have, taking time to enjoy the holiday with family. I was going to wait even just to spill the beans about my stencil, but instead I'll try to actually have the stencil set ready for a photo-op this weekend. I figure a picture of my marpat shirt printed on peel-n-stick, along with an exacto knife ought to be all I need.

    I guess it's possible those guys at duracoat are using some special kind of adhesive for their $25 stencil pak, but I'll gamble that the same mineral spirits they recommend as a solvent for the glue on their stencils will work for the glue on Walmart peel-and-stck.

    I considered using leaves and twigs, but it's not my style. Looks cool and everything, and so do bass fishing & NASCAR. But I'm more of a trout fisherman. Them bass are too tough to figure out for an Oregon boy like me, even if I am stuck in the PRK for now. I'll just stick with my beloved USMC digital OORAH! Gotta have at least one EGA in the pattern.

    Happy turkey day folks!

    -T

  19. #19
    anachronism
    Guest
    You can reduce the amount of material removed when blasting by simply turning the air pressure down to the gun. This will reduce the impact velocity of the media. Another method is to simply hold the blasting gun further away from the object you're blasting. Tape off anything that doesn't really require blasting with duct tape, it should last long enough for a pass or two.

  20. #20
    Boolit Buddy
    Join Date
    Dec 2008
    Location
    San Diego
    Posts
    266
    No further progress to report, sorry. I'd hoped to get back on it Sunday, but due to a really great party on Saturday night I just didn't feel like doing too much yesterday. I'll have more to show tonight or tomorrow.

    I did speak with the people at Lauer who assure me as long as the fluid flows, it's still good. I was able to determine the Duracoat package came to me from Lauer on June 2nd and the shelf-life figures published by Duracoat are conservative. In other words, the stuff I have is just fine.

Posting Permissions

  • You may not post new threads
  • You may not post replies
  • You may not post attachments
  • You may not edit your posts
  •  
Abbreviations used in Reloading

BP Bronze Point IMR Improved Military Rifle PTD Pointed
BR Bench Rest M Magnum RN Round Nose
BT Boat Tail PL Power-Lokt SP Soft Point
C Compressed Charge PR Primer SPCL Soft Point "Core-Lokt"
HP Hollow Point PSPCL Pointed Soft Point "Core Lokt" C.O.L. Cartridge Overall Length
PSP Pointed Soft Point Spz Spitzer Point SBT Spitzer Boat Tail
LRN Lead Round Nose LWC Lead Wad Cutter LSWC Lead Semi Wad Cutter
GC Gas Check