Titan ReloadingMidSouth Shooters SupplyLee PrecisionRotoMetals2
Reloading EverythingWidenersRepackboxInline Fabrication
Load Data Snyders Jerky
Page 1 of 2 12 LastLast
Results 1 to 20 of 32

Thread: Homerolled 45 Cal. 20 Gauge Slugs

  1. #1
    Boolit Buddy
    Join Date
    Apr 2009
    Location
    St. Louis Metro, IL
    Posts
    341

    Homerolled 45 Cal. 20 Gauge Slugs

    Hello, I am from Illinois and so I am restricted to shotgun only for deer from a long gun. Currently I am shooting an H&R 20ga Ultra Slug hunter with Accutip slugs. They shoot incredibly well (around 2" or better at 100 yards) but at $13 bucks a box, I shoot 2 boxes per year. 1 to check my scope and a few during hunting. What I would like to do is be able to shoot my shotgun more and get to know it more. To do that I need a much cheaper alternative.

    Things I have been informed of:
    -Using the exact same charge weight, wad, powder, hull, and primer, loading a slug of the same weight will actually reduce pressure
    -Using the same recipe, loading with a lighter slug could produce bloopers, this could lead to load development with faster powders which can be extremely dangerous.
    -Shotgun loading is much different than metallic. Changing one thing can have a dramatic effect on pressure and safety.
    -I would like to discuss the theory behind loading a light sabot-ed 20 gauge load.

    The components:
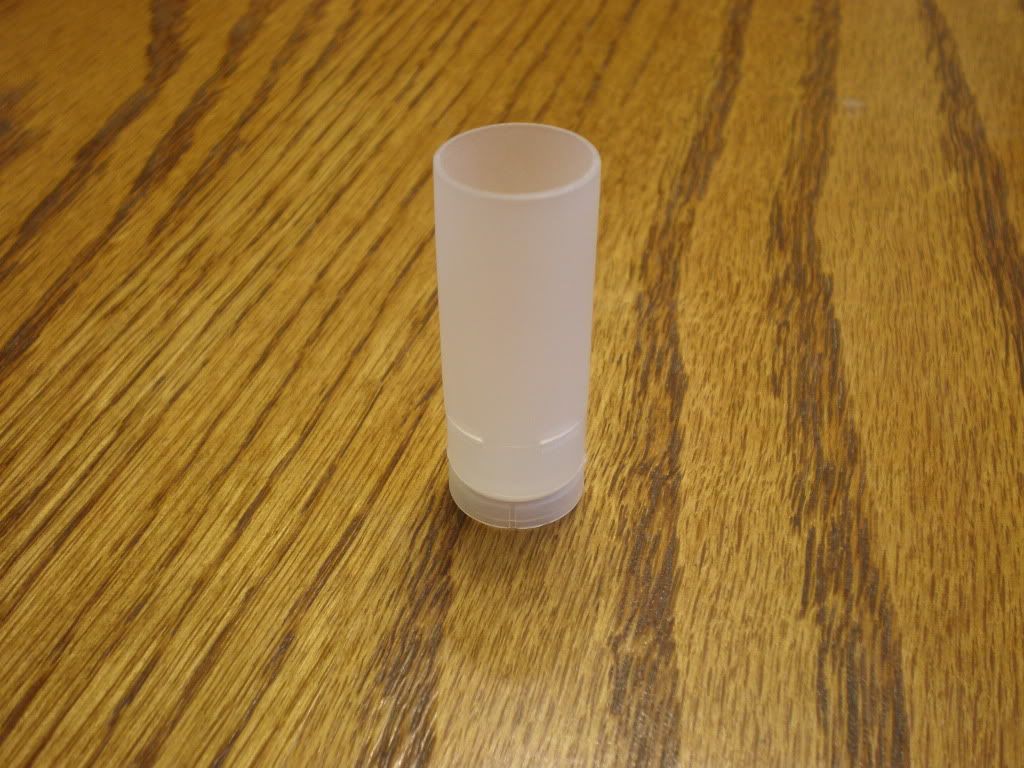
    -An un-slit Steel shot wad from BPI


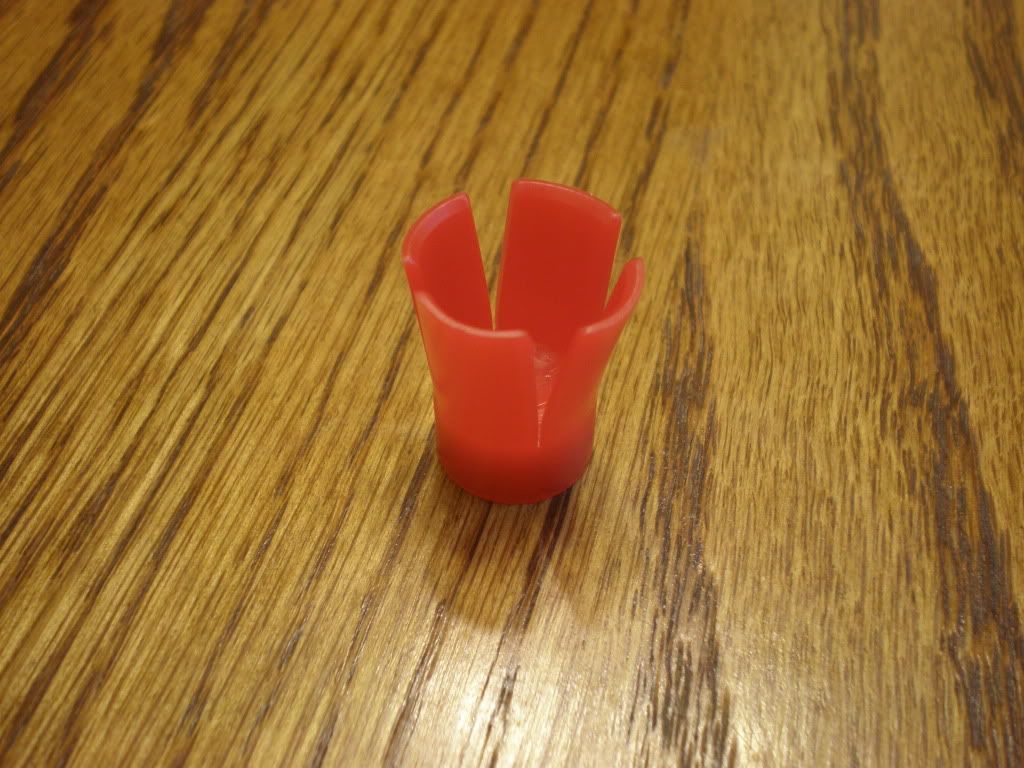
    -A Harvester 54-45 caliber muzzleloader sabot


    I would like to discuss the possibilities of using this in a new straight walled cheddite hull combined with a 250-300 grain lead .45 cal boolet.

    Here is how I am thinking about assembling them:
    -The simplest is keeping the wad full length, fill the wad with hot glue to the point when the muzzleloader sabot is inserted, the tops are flush, then the wad is slit.


    -A shorter sabot can be created by putting much less glue in and inserting the sabot as far as it will go and cutting the wad off. The wad is then slit.


    The only problem with this is some sort of spacers must be used to increase the wad column, but it may produce better accuracy since it is shorter, I am not sure.

    Please share your information and experience with loading slugs.

    Matt

  2. #2
    Boolit Master turbo1889's Avatar
    Join Date
    Mar 2007
    Location
    Montana, U.S.A.
    Posts
    1,256
    I see that you have put up this new dedicated thread to your project; I will quote your original question directed to me that you posted in the "I'm done casting slugs" thread to be added to your post above as background information before I proceed with responding:

    Quote Originally Posted by Matt3357 View Post
    I've got one for you Turbo. I posted this over on SGW and...lets just say I won't be going back after how I was treated for bringing up an idea.

    I am one of the guys you describe that need at least a 100 yard gun and just hate paying $13 bucks a box for 20 gauge accutips. They have shot less than 2" every group I have shot at 100 yards (which has only been 3 groups since I shoot a box before deer season to verify my scope is still accurate for the passed two years) . I would really like to make my own and get to know my slug gun better. So I got to thinking about how I could load a .45 caliber in a sabot and basically recreate the accutip (wishful thinking I know). Another thing I really like about the Accutips is the light recoil.

    So my idea is to take a 280gr 45 cal bullet, put it in a 54 to 45 cal muzzleloader sabot and then put this in an unslit steel shot wad from Ballistic products that is just under .54 on the inside. Cut the wad to length and slit accordingly. I ordered the components the other day to see how the fit together.

    One thing that was brought to my attention was that with such a drastic reduction in load it could result in bloopers which would lead to potentially dangerous load development. Maybe with your experience you can glean some information my way. Please don't say it's off limits or I'll pull my hair out. I just want to discuss the possibilities.

    Thanks Turbo,
    Matt

    First, I will state that I would be the last person to tell you that a project like this is off limits. I have a deep seated utter disgust for the militant religious cult of the "book god worshipers" and nay-sayers in general so I completely agree with you on that point. Their actions are, at the core, Anti-Liberty which is the same root cause mental illness that the Anti-Gunners, Fascists, Communists, and all other sorts of tyrants both large and small are afflicted with.

    I will, however, kindly point out the main pitfalls you are liable to run into with this project.

    1. ~ Nesting wads/sabots has been tried many times before. The main problem that is encountered with such set-ups are accuracy problems. Most, theorize that the reason for these problems is that the resulting multiple layered sabots do not behave in a predictable manner in the bore or after leaving the muzzle during the separation stage. Theoretically this becomes even worse in rifled bore guns because the sabots can spin within each other which can prevent the spin of the rifling from being positively transferred to the bullet which results in an under stabilized projectile (not enough spin) with a randomized rate of spin since the amount of slippage between the layers is not consistent.

    Long story short, you’re going to have to produce a complete glue bond between the two nested components so that they become a single complete unit. Gluing just the base will not be sufficient. You’re going to have to ensure that the side-walls/petals are glued together as well. If it were me the first glue I would try for gluing the petals together would be the slow set thick CA glues available at hobby shops that sell supplies for building balsa wood models. CA glues normally set up within a mere second so the thick gel slow cure stuff has like 30 second or less set up times which would be just about perfect for this kind of application. Giving you enough time to get the petals together nice and square with each other and held firmly together before the glue sets but still not having to wait a long time for the glue to set up. It may not work very well on the particular plastics your wad and sabot are made out of however. If that turned out to be the case my next try would be Gorilla glue which unfortunately has a much longer set up time and require some sort of jig to keep things tight overnight. A piece of pipe with the right size internal diameter on the outside of the assembly and some lengths of dowels or even the boolits themselves on the inside would probably be the first jig I’d try. With either type of glue use only the tiniest drop and spread it so thin you don’t think there is enough to do the job. Both glues are incredibly potent and would work best as a varnish thin layer for this kind of application, in addition the gorilla glue will foam and bubble up while drying if applied in a thick layer which is good for some applications (such as gluing the wood grips on mold handles) but definitely not this application.

    2. ~ I think that you should be made aware of the fact that part of reason the Remington Accutip sabot slug loads are usually more accurate then their competition in most slug guns is very, very simple. I know for a fact that the 12ga. version of those loads uses a 58-cal bullet inside the sabot instead of a 50-cal bullet like almost all other competing loads do. I believe the 20ga. version uses a 50-cal bullet inside the sabot instead of a 45-cal or 43-cal bullet like almost all other competing loads do. Without going into the mathematical details, a larger diameter shorter length bullet is stabilized with less twist then a smaller caliber longer length bullet of equal weight equivalent nose/tail shape. Since the entire idea of a sabot slug load is to launch a smaller diameter projectile with a faster flatter flight path the conventional bullet sizes used for most sabots slugs that being 50-cal for 12ga. and 45/43-cal for 20ga. are operating at the extreme edge of stability an most guns they are used in have just barely a tight enough twist to stabilize them. By simply bumping up to a slightly larger caliber bullet when they developed the Accutip sabot load Remington gained a significant edge in the accuracy department regardless of the exact sabot design or the exact shape of the bullet used. Now in so doing they did sacrifice some ballistic efficiency and the resulting load does not shoot quite as flat as many of its competitors but as you can personally attest too the improved accuracy is worth it.

    Now, back to your “roll your own” project, you are setting yourself up to use 45-cal bullets. That’s a better choice then 43-cal (In case your wondering what the heck is up with 43-cal; bullets used in 44-spl, 44-mag, & 444-Marlin are actually 43 not 44) and you may do quite well with them but I personally would be much more comfortable with 50-cal or even 47.5-cal bullets if you can find muzzle loader sabots to use them that will fit inside the steel wads that you are using, which brings me to my next point of discussion.

    3. ~ With sabot slugs tightness in the bore is absolutely necessary, in fact I wouldn’t go without at least a 0.005” crush fit for the groove diameter of your guns bore. In other words if your bore measures 0.625” in the groove then your finished sabots outside diameter with the bullet inside should be no less then 0.630” outside diameter. Plastic is surprisingly flexible and practically flows like play-dough when you start subjecting it to thousands upon thousands of pounds of pressure it will squeeze down no problem and you want it to squeeze and squeeze hard. It needs to grab the rifling and not “strip” and it needs to grab that slippery little jacketed boolit inside tight enough that it spins right along with the sabot and does not slip inside it which puts you right back at square one previously discussed with reduced and inconsistent spin rates on the projectile and the resulting sabotage that plays on the loads accuracy.


    As far as the length of your sabot and whether or not to use a bunch of hot glue in the bottom of the wad to make a long sabot or make a short one and use filler underneath, my first instinct is to go with lots of glue and a long sabot but I could be wrong. The reason I say that is because in my mind until the bullet separates from the sabot the assembly should fly like a Brenneke slug with a heavy nose and long, light weight tail which I would think would be a good thing.

    As far as powder choice goes; if it were me my first thing I would try would be IMR 4756. It is a good stable burning heavy load powder that is fast enough burning that it does well with lighter weight slugs and at the same time is slow enough burning to allow a long burn curve to get you into the magnum velocity range.

    I think I would also try finding a 58/50 muzzle loader sabot and trying to jamb that inside the steel shot wads to allow me to use larger diameter more stable 50-cal bullets and also to give me a really tightly fitting package.

    I haven’t done this myself though so I’m shooting from the hip on this one and basing a lot of what I’m saying on the attempts of someone else I know who tried to make 12ga. sabots loads by nesting 16ga. and 20ga. shot wads inside 12ga. shot wads and the problems he ran into.

  3. #3
    Boolit Buddy
    Join Date
    Apr 2009
    Location
    St. Louis Metro, IL
    Posts
    341
    I was sure hoping you would respond. I have been reading your posts for a long time and really wanted your opinion on this. I have a few answers and other points to bring up, but am short on time right this minute. I'll try to get back to you this evening after I get done working on my mechanical engineering senior design project.

    Matt

  4. #4
    Boolit Buddy
    Join Date
    Apr 2009
    Location
    St. Louis Metro, IL
    Posts
    341
    Couldn't find a 58-50 cal sabot yet. But I did find a 54-50 and a 58-45. I ordered them from MMP sabots. Back to work.

    Matt

  5. #5
    Boolit Master
    Join Date
    Apr 2006
    Location
    Central Virginia
    Posts
    4,707
    I applaud you on your efforts to date !

    I to shoot a 20 gauge rifled slugger although mine is the Savage 220 . And I shoot the Remington AccuTip 2 3/4" as well .

    I am able to get the ammo at dealer cost of about $10-11 @ box . And usually get 6 or 8 boxes each year . So thats a cost to me of at max maybe $90 a year . That gives me enough for some practice and enough for hunting . I maybe use a slug gun 5 days a year .

    While I understand your reasoning for wanting to "roll ur own" , in my own situation the time saved is worth the $90 to me . And it sounds as if you'll have a fair amount tied up in componenets before to long
    Parker's , 6.5mm's and my family in the Philippines

  6. #6
    Boolit Buddy
    Join Date
    Apr 2009
    Location
    St. Louis Metro, IL
    Posts
    341
    My tinkering mindset is what got me into guns and reloading and eventually into Mechanical Engineering school so the idea that I can figure out how to make my own sabot loads is extremely appealing to me. Plus I have a father and brother that shoot them too. Hopefully when I graduate in May I won't have to worry about the cost aspect of it, but will be able to do it just for fun, and because no one else has been successful at it. Maybe if I can figure out a way to do it, more people will roll their own and retail prices will then come down. I guess I can dream, eh?

    Matt

  7. #7
    Boolit Bub mini14's Avatar
    Join Date
    Oct 2010
    Posts
    63
    eventually the answer to commercial sabots will be found, its just a matter of time.
    NRA Life Member

    "I live back in the woods, you see
    A woman and the kids, and the dogs and me
    I got a shotgun rifle and a 4-wheel drive
    And a country boy can survive
    Country folks can survive"

  8. #8
    Boolit Master
    Join Date
    Apr 2006
    Location
    Central Virginia
    Posts
    4,707
    Quote Originally Posted by Matt3357 View Post
    My tinkering mindset is what got me into guns and reloading and eventually into Mechanical Engineering school so the idea that I can figure out how to make my own sabot loads is extremely appealing to me. Plus I have a father and brother that shoot them too. Hopefully when I graduate in May I won't have to worry about the cost aspect of it, but will be able to do it just for fun, and because no one else has been successful at it. Maybe if I can figure out a way to do it, more people will roll their own and retail prices will then come down. I guess I can dream, eh?

    Matt
    You have a valid point if from nothing more then the monetary standpoint !

    I began loading buckshot in a 10 gauge 2 7/8" shotgun a little over a month ago . Although that was more from the fact that thats the only way I could get 2 7/8" buck loads for a 10 gauge .

    This whole cast/reload thing swings like a pendulum for me !

    I originally got into straight forward reloading of shotgun shells followed by metallic ammuntion . Then later in life got the casting bug for my lever guns . Now I've pruned the amount of guns to cast for down and have reverted back to Ruger singleshots with jacketed bullets . And now I've gotten back into the shotgun game mostly with the 10 and 16 gauges .

    If nothing else I've learned (for me atleast) intrests come and go
    Parker's , 6.5mm's and my family in the Philippines

  9. #9
    Boolit Master turbo1889's Avatar
    Join Date
    Mar 2007
    Location
    Montana, U.S.A.
    Posts
    1,256
    Quote Originally Posted by mini14 View Post
    eventually the answer to commercial sabots will be found, its just a matter of time.
    I think I've already found it, its just they are very, very, very labor and time intensive to build. One of these days I'll get a "how to thread" put together on how to build them. In a micro-nut shell they are paper patching on steroids with precision high tension hand rolled, hard core, parallel strand, paper tubes and nitro cards being used to building the entire assembly completely from scratch starting with paper and glue with no plastic whatsoever used which has the additional benefits of being a bio-degradable load. It takes several days with 4+ hours a day put in to the project to make up a batch of a hundred though doing it by hand one at a time. With the proper automated machinery, pressure activated spray on semi-moist glues, CNC laser cutting machines, and paper tube and nitro card companies as sub-contractors putting in large enough bulk orders to get custom precision sizing on both of those two main components they could be made quickly and efficiently enough to make them a competitor to plastic sabots and maybe even plastic shot wads especially for steel shot where they would effectively be the only bio-degradable wadding that would still protect the bore from the shot. Unfortunately, it would require large scale factory mass production and I don't have several mil. just lying around.

    In addition there is the whole annoying over-powder gas cup primary seal problem for which I have yet to find a way to make satisfactory celulose based stackable bio-degradable replacement for and I am still stuck using the gas seal cups cut from the bottom of plastic shot wads which sort of defeats the purpose of having a load that uses celulose based bio-degradable wadding.
    Last edited by turbo1889; 12-05-2010 at 05:14 PM.

  10. #10
    Boolit Bub mini14's Avatar
    Join Date
    Oct 2010
    Posts
    63
    So you are "steroid patching" undersized boolits to use in a rifled shotgun barrel? That is so very interesting to me.

    Could you post a pic of one turbo?
    NRA Life Member

    "I live back in the woods, you see
    A woman and the kids, and the dogs and me
    I got a shotgun rifle and a 4-wheel drive
    And a country boy can survive
    Country folks can survive"

  11. #11
    Boolit Master
    Join Date
    Apr 2006
    Location
    Central Virginia
    Posts
    4,707
    Quote Originally Posted by turbo1889 View Post
    I think I've already found it, its just they are very, very, very labor and time intensive to build. One of these days I'll get a "how to thread" put together on how to build them. In a micro-nut shell they are paper patching on steroids with precision high tension hand rolled, hard core, parallel strand, paper tubes and nitro cards being used to building the entire assembly completely from scratch starting with paper and glue with no plastic whatsoever used which has the additional benefits of being a bio-degradable load. It takes several days with 4+ hours a day put in to the project to make up a batch of a hundred though doing it by hand one at a time. With the proper automated machinery, pressure activated spray on semi-moist glues, CNC laser cutting machines, and paper tube and nitro card companies as sub-contractors putting in large enough bulk orders to get custom precision sizing on both of those two main components they could be made quickly and efficiently enough to make them a competitor to plastic sabots and maybe even plastic shot wads especially for steel shot where they would effectively be the only bio-degradable wadding that would still protect the bore from the shot. Unfortunately, it would require large scale factory mass production and I don't have several mil. just lying around.

    In addition there is the whole annoying over-powder gas cup primary seal problem for which I have yet to find a way to make satisfactory celulose based stackable bio-degradable replacement for and I am still stuck using the gas seal cups cut from the bottom of plastic shot wads which sort of defeats the purpose of having a load that uses celulose based bio-degradable wadding.
    And with all that being said $12-14 a box for Remington or whomever saboted slugs isn't so expensive after all
    Parker's , 6.5mm's and my family in the Philippines

  12. #12
    Boolit Buddy
    Join Date
    Apr 2009
    Location
    St. Louis Metro, IL
    Posts
    341
    Turbo,

    1. About the gluing. By gluing the petals of the sabot and the wad together, wouldn't it create an extremely stiff sabot that may not open uniformly from sabot to sabot? It seems as though the hot glue that is used as filler has also permanently bonded the sabot to the wad. I cannot break it off for anything with my hands. I have not tried mechanical means yet. I was amazed that the hot glue actually adhered to the plastics as it usually just pops free. More experimenting must be done.

    2. The size of an Accutip slug is actually only .45. After you brought up the larger caliber possibility, I bit the bullet and cut one open. The bullet is 260 grains, .45" diameter, and .8" from base to bottom of tip. The Greenhill formula recommended a twist of 1 in 35" and H&R ultra sluggers are 1 in 28. Another thing I measured on the Accutip was the wad diameter. With the bullet in place, the OD was 0.625". I am only at 0.610". They have a very simple yet very effective wad placed over a felt wad. Might take some notes from them on wad design. I think the 58 - 45 sabot I ordered will put me in the right zone for diameter, I just hope the wad material will be tough enough to take the rifling.

    3. I think I am going to meet somewhere in the middle for wad length. I noticed on the Accutip wad that the front was chamfered on the inside. This I suppose is to allow it to flex inward to become started in the bore without high pressure. I am going to set my sabot around half way up the wad, replicating the Accutip as closely as possible in that regard.

    More to come later this week hopefully. More pictures too.

    Matt

  13. #13
    Boolit Master

    Join Date
    Aug 2005
    Location
    Wyoming
    Posts
    3,047
    If someone gets the bug and needs some 50 caliber heavy cast bullets I have a few that came with a mould that I sent to Kodiak1 in Canada.

    They are from a lyman mould for the 50-70. I think I can dredge up the mould number if needed.

  14. #14
    Boolit Master turbo1889's Avatar
    Join Date
    Mar 2007
    Location
    Montana, U.S.A.
    Posts
    1,256
    Matt,

    1. ~ Yes, gluing the petals of the sabot and the wad together could create an extremely stiff sabot that may not open uniformly from sabot to sabot. I think at the very least though, you need to apply glue to the side walls to form a bond between the two layers below the sabot petals (almost half the length of the inner red sabot by your pictures) and maybe cheat it up just a little into the base of the petals. I don't think you realize how much torque we are dealing with. In fact, this a good place to apply some of that ME study of yours on some rather simple calculations. We know the velocity of the load at the beginning of its trip down the barrel is zero and we have a good idea of the kind of muzzle velocity we want right? All we need is the length of the barrel and we can easily calculate the average linear acceleration, you also have the twist information which allows us to convert the linear acceleration to rotational acceleration. Just treat the boolit inside the sabot as a little fly-wheel and estimate its inertial resistance to this acceleration force and you will have an estimate of the torque forces that the glue bond between the inner and outer layers must withstand. You have the diameter and weight information on the bullet, all you need is that pesky "I" value that describes the mass distribution. I would just use the formula for a simple homogonous cylinder which is going to most likely result in a slight over estimate unless the boolit you are using has a huge hollow point. I think you will be amazed how high of a torque load we are talking about; I'd do the math myself but I'd have to go dig out the books and I don't feel like it right now.

    2. ~ Glad you sacrificed a load for dissection; I think you will find that in the long run it was a good investment. Put the components in a zip lock and keep them like forever, you will be surprised how many times you go back to that stuff again and again for measurements and the like, and I don't just mean the boolit and sabot. Keep it all; with the powder, weight the charge and then use it for fertilizer and put a note in the bag with the charge weight information. No, you can't just use just any substitute powder at that charge weight but you can use that information to figure out what the proper burn rate is if you’re trying to match the factory loads. If for example, its a 40 grain charge then you should look towards a group of powders with a burn rate such that it puts you in that neighborhood for your charge weights separately deduced from other data used as reference material. The 45-cal in the factory load is good news for you with your set up.

    3. ~ Only live fire testing is going to help you figure out which length and sabot combination works best, but we can at least use some logic and clues to figure out a good place to start.

  15. #15
    Boolit Buddy
    Join Date
    Apr 2009
    Location
    St. Louis Metro, IL
    Posts
    341
    On the length of sabot issue. I got to thinking about it and I think the more to the center of mass the bullet is, the less issue I will have. Especially since I am filling the base with hot glue. A rogue air bubble could throw the sabot off balance and cause it to spin wildly out of control. The longer the tail on the bullet, the more dramatic the effect. Once this semester is over, I will sit down and look at the physics of it more, but right now I am crunched until after the 15th.

    Matt

  16. #16
    Boolit Buddy jbunny's Avatar
    Join Date
    Apr 2008
    Location
    central bc, canada
    Posts
    360
    have u ever thought of knurling the bullet so it would minimize slipping
    in the wad??

  17. #17
    Boolit Buddy
    Join Date
    Apr 2009
    Location
    St. Louis Metro, IL
    Posts
    341
    I have thought of that, but was not going to do anything about it until it presented to be a problem. Taking it one step at a time....that is when I have time.

    Matt

  18. #18
    Boolit Buddy
    Join Date
    Apr 2009
    Location
    St. Louis Metro, IL
    Posts
    341
    Turbo,

    I got my 58 to 45 cal muzzle loader sabots from MMP today. Great suggestion! They are snug in the wad, but with the accutip bullet in there at .449 diameter, it runs around .634 OD of the wad. It is a bit tighter than I was hoping, but the good news is, when I remove the bullet, the wad reduces down to around .610 so I can play with the OD with bullet size. I am going to take a couple of wads to work tomorrow to measure the OD with different sized gauge pins in place of the bullet with a better set of calipers. I am excited. This might actually go some where in the near future.

    Matt

    P.S. Here is a teaser for my senior design project.


  19. #19
    Boolit Master turbo1889's Avatar
    Join Date
    Mar 2007
    Location
    Montana, U.S.A.
    Posts
    1,256
    Some sort of vegetable or fruit flash freezing machine? Reason I say that is it looks like it has a refrigeration compressor assembly, but I could be way, way off.

  20. #20
    Boolit Buddy
    Join Date
    Apr 2009
    Location
    St. Louis Metro, IL
    Posts
    341
    Harder to tell than I thought. You are in fact way way off. It is a shot dripping system. I am recreating the littleton design with some major improvements. Basically I am attempting to control as many variables as possible to make the process as repeatable and consistent as possible. That "compressor" is a small pump that pumps the coolant through the heat exchanger and into the little tank just below the ramp where it overflows back into the big tank. It should be able to handle around 100 lbs an hour. Turned in the design paper yesterday to finish out this semester and now have to build it next semester. Should be very interesting.

    Matt

Page 1 of 2 12 LastLast

Posting Permissions

  • You may not post new threads
  • You may not post replies
  • You may not post attachments
  • You may not edit your posts
  •  
Abbreviations used in Reloading

BP Bronze Point IMR Improved Military Rifle PTD Pointed
BR Bench Rest M Magnum RN Round Nose
BT Boat Tail PL Power-Lokt SP Soft Point
C Compressed Charge PR Primer SPCL Soft Point "Core-Lokt"
HP Hollow Point PSPCL Pointed Soft Point "Core Lokt" C.O.L. Cartridge Overall Length
PSP Pointed Soft Point Spz Spitzer Point SBT Spitzer Boat Tail
LRN Lead Round Nose LWC Lead Wad Cutter LSWC Lead Semi Wad Cutter
GC Gas Check