Anyone feel like fabricating some nice cocking levers for these 909 guns? I'm tired of snappin' them in half........need one that will last forever.


|
   
   
|


|


Anyone feel like fabricating some nice cocking levers for these 909 guns? I'm tired of snappin' them in half........need one that will last forever.


You got a pic of it on the rifle? Does it just pull straight back?
How does it work?
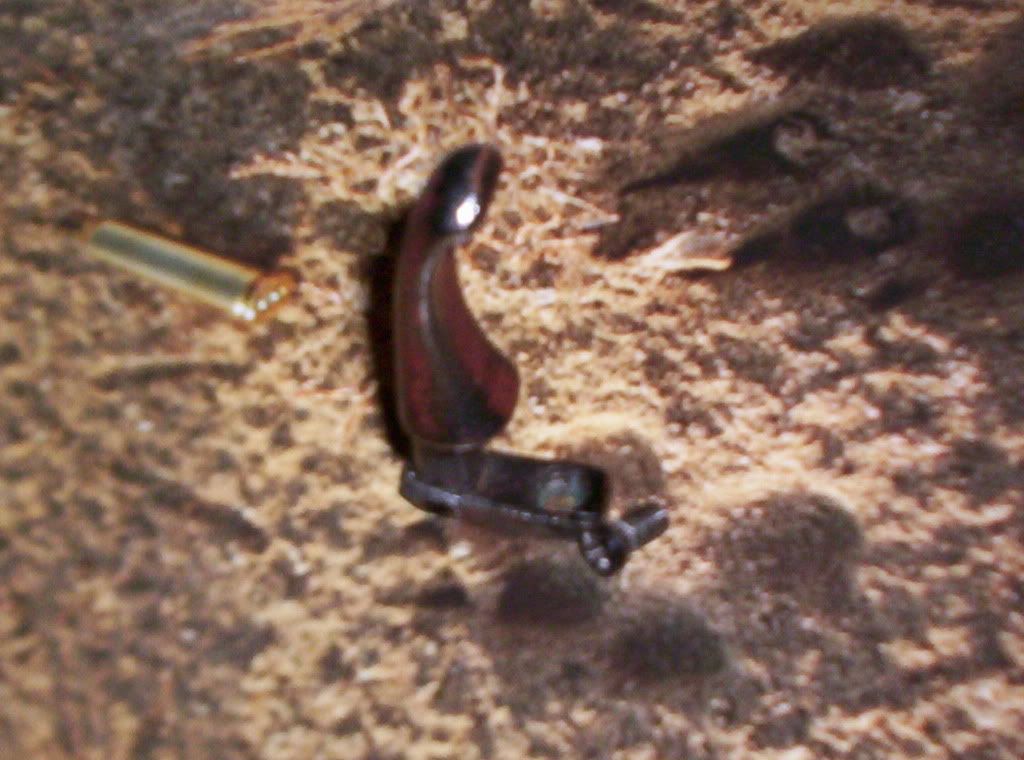
It looks like it's cast.
Originally Posted by PatMarlin

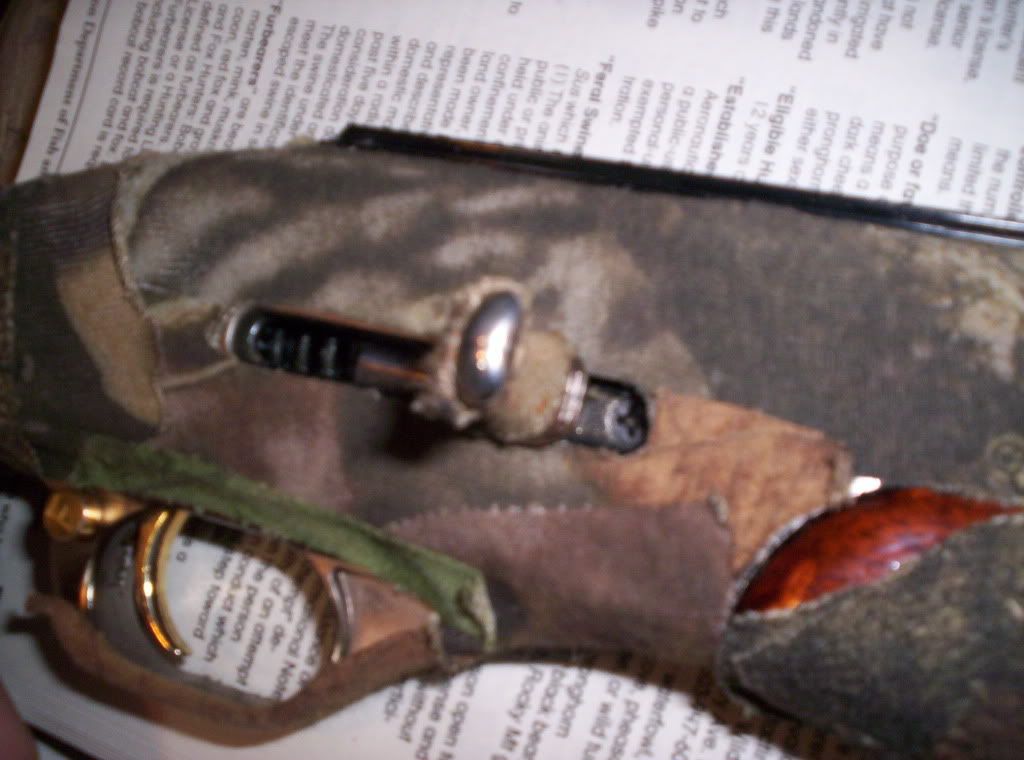
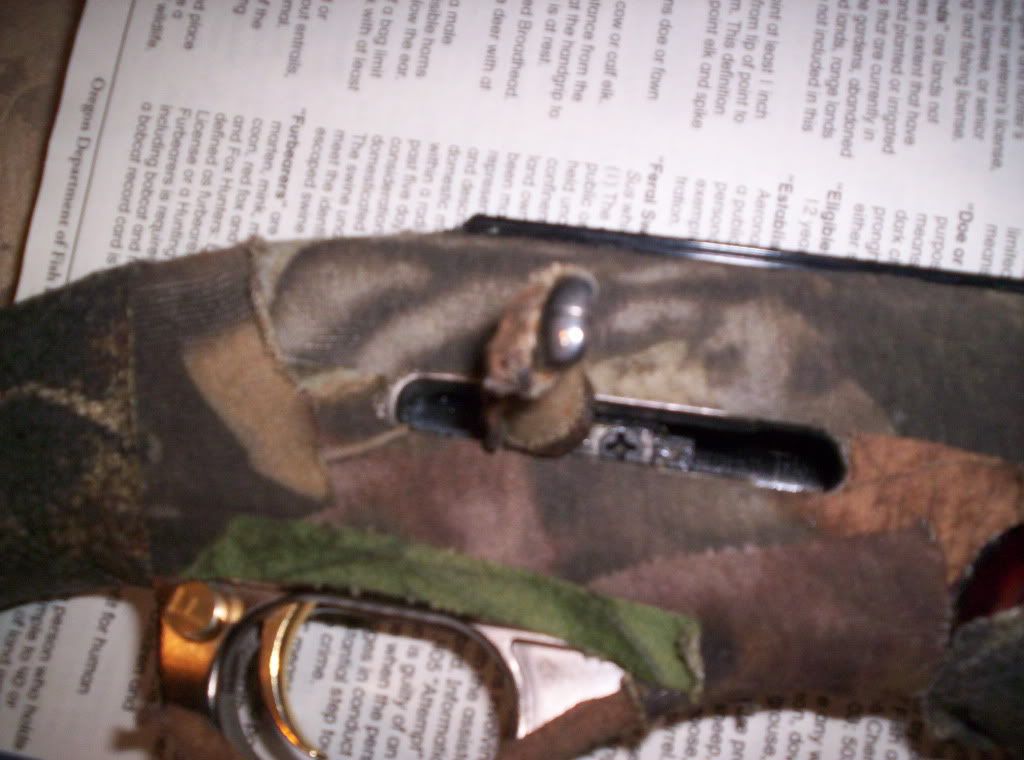
Yep, pulls straight back. The lever slides into a channel that is cut-out in the hammer, and is secured by the screw. Shown inside the receiver here. You can see how the back of the lever goes up against the back of the "channel" in the hammer.
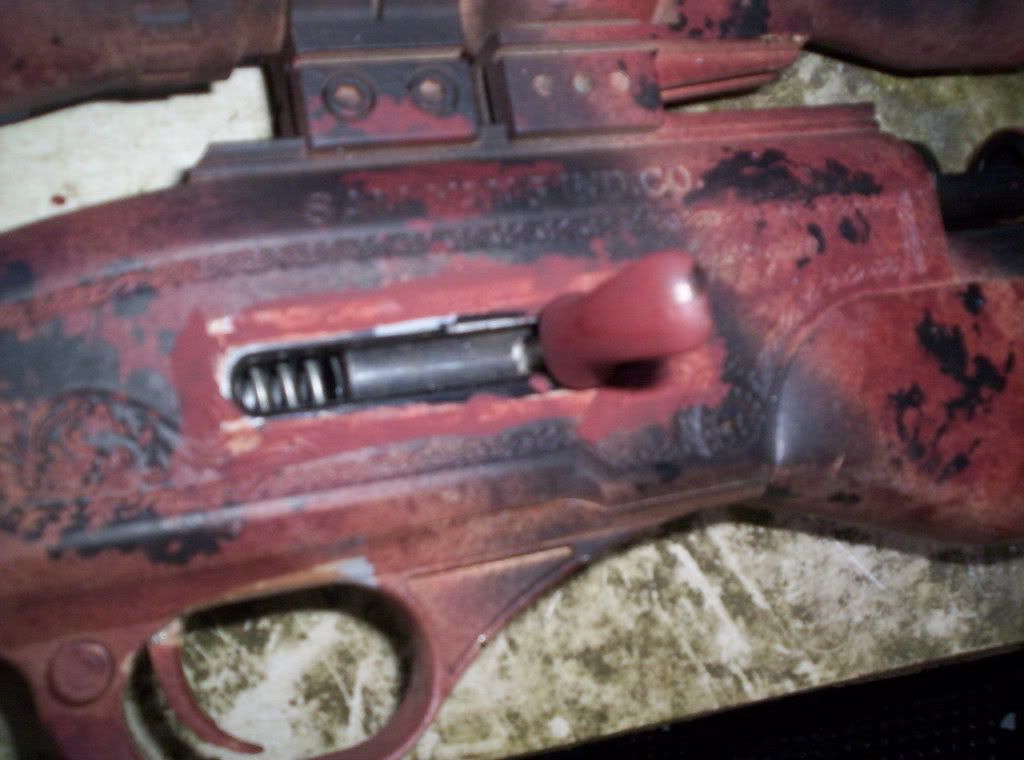
Well since it rides in that slot, that's probably why it has no support in corner where it breaks. It looks like cheap cast forged metal.
I would think it needs to be machined out of a block out of strong steel to make that laid back "L" shape. You could even weld a handle on it. Is there a lot of pressure on the pull back?
Also instead of pulling high at a 90 dregree angle like it does, I would think it would be better to have a handle pull lower and set back farther. That would keep the forces more inline, instead of pulling at the 90 degrees right over the area that breaks.
Yes there isn't much support for the lever. The lever is very, very cheap.
Can't weld the lever to the hammer; it needs to be removable in order to dis-assemble the rifle.
Last edited by Butcher45; 07-27-2010 at 01:19 AM. Reason: spelling
Should any proto-types be made available, I'd happily test them out
Is that lever assembly that broke all one peice?
Yes. The part that seats into the slot is about 3/4 inches long, 1/4 inch wide and 1/8 inch thick. The handle part is 1 3/4 inchs long.
Here's a rough idea of what I'm thinking of:

This should help show the parameters of the design. The surface of the hammer is a bit less than 3/8 inch from the surface of the receiver.
Un-cocked position
Cocked to low-power position
Cocked to high-power position

This is something I've been thinking about as well. I haven't broken my cocking latch but, it does appear to be a weak link in the system.
If I get some time this evening I'll show you the drawing I'm been working on as a replacement of the cocking handle. I't's really nothing complicated.
My idea wasn't all that different than Pats'. It would require a slightly longer retaining screw though.
My idea was that a slightly sturdier cocking lever would also add mass to the cylinder that hits and opens the air release valve.
Of course this may slow your lock-time just a hair but, with the heavier cocking lever you could now replace the cocking spring with a slightly stronger spring to compensate and hopefully you'll end up with slightly better performance for your troubles.
HollowPoint

It looks to me like you need to send a broken one to Pat and let him make prototype in the spare time that he does not have. I think his idea of moving the pull point back is a sound idea to start if it doe snot interfere at the end of the bolt stroke.
also if there is no interference I would put a fillet on the front upper side of the handle to mount plate as it will be stronger and not give a point of entry for the crack to start.
It would not have to be near as long as in my drawing, and the height would be the same as your bolt. I wish I had my CNC mill up and online. I could knock one of those out pretty fast.
Strengthening one of these cocking lever does look like it would be easy going with a CNC machine.
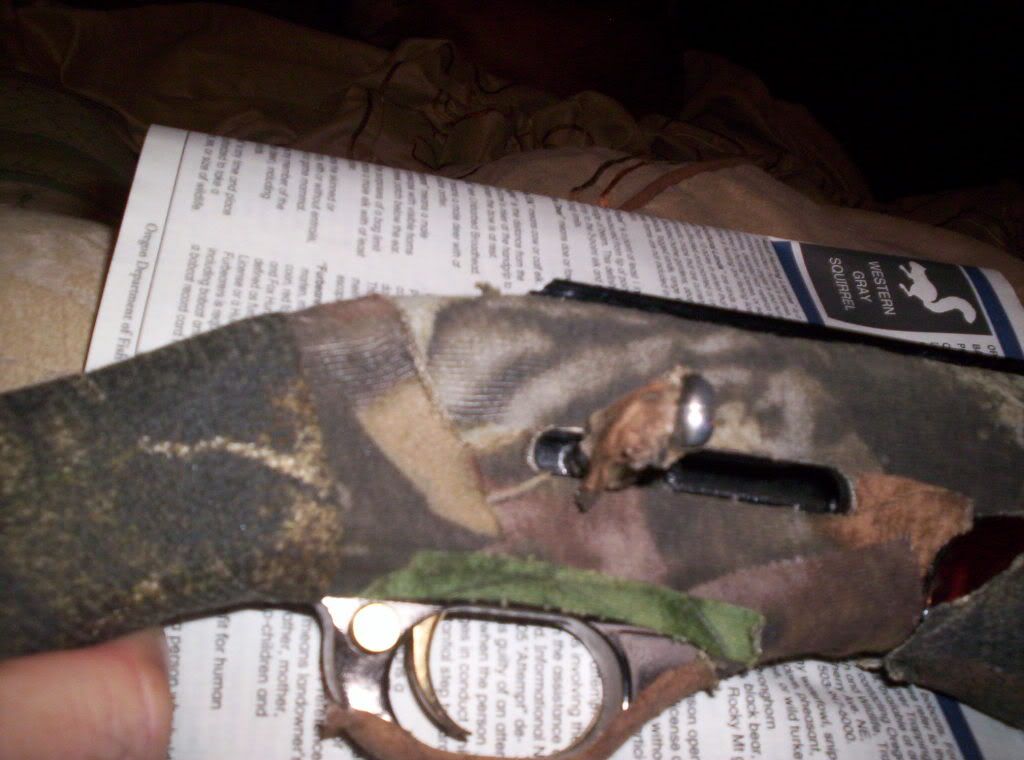
Here's a couple pics I took of my factory cocking lever. The profile view shows the inherent weakness of these levers; especially since it made of cheap cast alloy of some sort.
Another down side to this design is the fact that when the lever is pulled back, it has the tendency of tilting the cylinder out of alignment so that it doesn't allow this same cylinder to slide straight back as smoothly as it should into the cocked position.
If these pics load the way their supposed to it should include an image that depicts the idea I had in mind as a replacement for the existing cocking lever. I started out with a lever idea that looked similar to the existing cocking lever but after looking at Pat Marlin's drawing I kind of like it better (along with the logic behind it) so I changed mine a little.
It's nothing to radically different; just a little chunkier to mitigate the chance of breakage.
HollowPoint
Last edited by HollowPoint; 10-01-2010 at 05:39 PM.
Still wondering if you got a 909, or a 909S.
I did send out these 909 tuning instructions I received from a guy on the Yellow way back when, to a guy I don't know from another forum. He says that he found them useful.
"If you slot the sides of the valve body, ad weight to the hammer, open the transfer port to .360, open the .24 restriction where the barrel slides over the receiver as much as possible you get an even 300fpe with 200g ammo."
Keep in mind, that Sam Yang at some point started using a narrower transfer port, and possibly a different valve sometime along the way.
Here are his responses over a period of time. He was tuning a 909S.
Hey,
I'm about ready with my tuning project!
There were problems along the way, but they are fixed. I had to cast (of chemical metal) strengthening to the end of transfer port (to that ending part which goes into the barrel) because it fell off when I was drilling it to 9 mm.
I think my gun is from newer edition and has smaller walls for its transfer port, but I managed to make enough room to get the port to the ultimate 9 millimeters. Some parts I first drilled to 8 mm and then ground manually to somewhat 9 mm, afterwards. It was quite a job... I also polished the transfer port pretty shiny and made all the curves smoother.
I also drilled the valve body to 9 millimeters. 9 mm is the maximum also there, because the valve (which is made out of plastic) is 12 millimeters with its brass coating/jacket; the plastic part is the gasket and holds the pressure, though the brass jacket could not hold the pressure: the system would probably leak, if one goes over that critical 9 millimeters.
The hammer and hammer spring are still original and in process (if I happen to do something with them).
It will be hard to put more weight to the hammer, because then I must make some modifications to the spring or other parts (because: just like with transferport, there are built in limits in hammer, spring and valve trinity, namely, not too much room for modifications). For example, if I'd grow the length of hammer, I should cut the hammer spring shorter or the whole thing grows out of picture and keeps the main valve open when in rest. It's pretty much the way... if you add with one hand, you must take with the other...
You remember my 909S tuning process...?
I think it's about ready, finally. I chronographed that strange 909, and got pretty fine numbers: 785 feet per second with 300 grainer slug, 405 FPE. And what the best I could get three shots with almost the same numbers. With 400 grainer I could get even better numbers, but that bigger slug is not as accurate as the 300 grainer...
Details of the gun:
Transfer ports are at least 8 mm everywhere (somewhere it's over 9 millimeter), ports are grinded mirror-smooth, valvebody is 9 millimeter, and there's stronger hammer spring. I had to make new bushings to the transfer port all along the way from valvebody to the barrel.
And, I changed longer barrel (over 30 inches long), it is smoothbore! I have designed special slug with which I could shoot one inch groups 55 yards (50 meters). One reason for smoothbore is that I could shoot shots with it, because I live in the town and near the town it's better to shoot shots only (and hunt small pests), slugs could be shot far in the forrest only...
I came across those same instruction a while back and down loaded them just in case I decide to try this on my own. It doesn't seem to difficult.
Initially I didn't understand what alot of the reference numbers were about but, having taken the gun apart it now make alot more sense to me.
I think I'm going to go with the stronger/heavier cocking lever and cocking spring for starters. While I had it laid out on my bench the other day it just looks like those two modifications alone will be enough to give me a slight increase in performance without alot -no turning back- of alterations.
If these two small changes don't do enough for me then I'll seriously consider the mods listed in those instructions.
Do you happen to know what the exact size and compression strength the cocking-spring is?
I finished up my work early today so I took that extra time I had and installed the receiver mounted peep sight I mentioned in one of my other posts. Nothing fancy, just functional. I milled down the front and rear factory sights and dove-tailed the front for a "Globe Front Sight."
If I get some more free time next week I'll start on the heavier cocking lever then move on to replacing the spring. I think I've figured out an easy way to add a little more mass to the cylinder that impacts and opens the air valve; and it doesn't require any alterations.
More to come. Oh yea, I forgot to mention; my 909 is the one with the single air reservoir. I think it's the 909S.
HollowPoint

I spoke to LI Bob about this problem a week or two ago . He said he machined the lever to except a cap allen screw and milled the lever grove to except it. . But on a gun with a really heavy spring he has removed the lever and back were the nob would normally be he has drilled and taped the hammer to take a large diameter bolt handle . But he said that it had to be exactly centered or the gun would not choch and hold . Hope this might help . I have thought about haveing something done with this as well . Marvin
The 909S is nothing to sneeze at out of the box. A 248grainer goes about 665fps, and a 305grainer about 616fps from what I'm told.
One way to add some weight to the hammer is to put a .45 or .50caliber roundball between your spring and the inside of the hammer. I think that the spring would have to be shorter than the stock one, though (not enough room to avoid binding-up the spring).
Looking forward to seeing the results of your mods. The best tunes I have seen with these rifles, used the stock spring (maybe just tweaked a little?). Porting, polishing, and mods to the valve/valve springs work seem to be where it's at.
The 909S has be tuned for some crazy power by BGMF.......as reported by a customer of his (only go by customer claims in the airgun-tuning business) using a 3000psi fill: 718fps with a 305grainer, 780fps with a 248grainer, 816fps with a 220grainer, 825fps with a 205grainer, 718fps with a 305grainer, 633fps with a 415grainer!
Those numbers are all the first shot; the second shot is usually about 40-50fps slower with a 909S. It is tricky to find the boolit/fill pressure combination that will give you two identical shots for the same POI@50yards with that rifle but I am sure it can be done.
Last edited by Butcher45; 07-28-2010 at 10:29 PM.
 Posting Permissions


| BP | Bronze Point | IMR | Improved Military Rifle | PTD | Pointed |
| BR | Bench Rest | M | Magnum | RN | Round Nose |
| BT | Boat Tail | PL | Power-Lokt | SP | Soft Point |
| C | Compressed Charge | PR | Primer | SPCL | Soft Point "Core-Lokt" |
| HP | Hollow Point | PSPCL | Pointed Soft Point "Core Lokt" | C.O.L. | Cartridge Overall Length |
| PSP | Pointed Soft Point | Spz | Spitzer Point | SBT | Spitzer Boat Tail |
| LRN | Lead Round Nose | LWC | Lead Wad Cutter | LSWC | Lead Semi Wad Cutter |
| GC | Gas Check |

 Reply With Quote