


05/13/2020 Update: The link to this article is here:
https://www.hensleygibbs.com/TCD/art...castingpot.htm
I am building a new casting pot, and wanted to document my experience in this post for all to see.
Why am I building my own pot when I can purchase a Lee or Lyman pot? I wanted a pot that held at least 100 lbs of lead, and also could be foot activated for production purposes.
What I am trying to construct is an improvement over the pot I have used for many years. Here is a photo:

This pot works great, but has a few faults. One of which is that it takes way too long to heat up for use. Half filled, it takes about 2 hours for the pot to come up to temperature. That fact, and along with the other problems I have had with it, I decided to build an improved (I hope) design.
Here are the materials laid out:
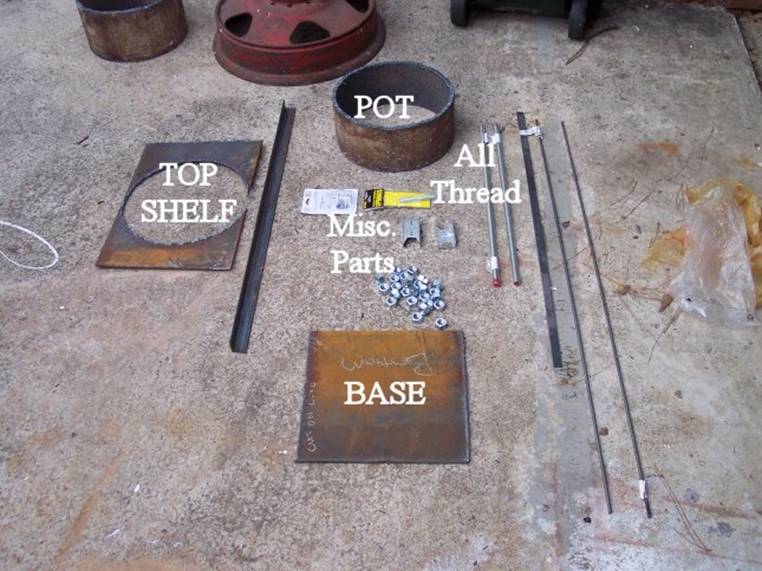
Last week I concentrated on getting all the raw materials. Here is a list of materials, and their associated cost. I will add more materials as I purchase them.
$25 - 12" x 12" x 3/8" Steel Pipe Section (I cut this in half for my pot)
$25 - 13" W x 60" L x 1/4" Steel Plate
$45 - 3 - 6" 1500 Watt Electric Range Elements
$45 - 3 - Maytag Ceramic Element Connectors
- 2 - 5/8" x 24" All Thread Rod
- 26 - 5/8" Hex Nuts
- 1 - 3/8" x 24" Angle Iron
- 1 1 1/2" x 24" Angle Iron
- 2 - 3/8" Round Rod
$25 - 1 - 220V Switching Relay (Part of Temperature Control
$10 - 3 - LEE 20lb Pot Spouts (I need 3 to ensure spares)
$10 - 2 - LEE 20lb Pot Spout Rods
$50 - Consumables (Welding Rods, Grinding Pads, etc...)
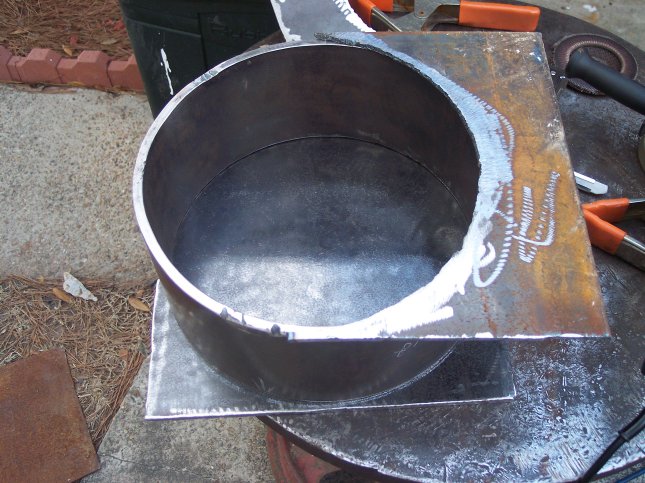
This week I cut the 12" x 12" pipe section in half. My pot dimensions are 12" Diameter, 5.5" tall, by 3/8" thick. I also cut the bottom plate and the top shelf plate. This is what they looked like after grinding all the pieces:
Today I completed tacking the top shelf, the pot, and the bottom plate together. Here is a photo with a 16oz bottle of coke for scale:
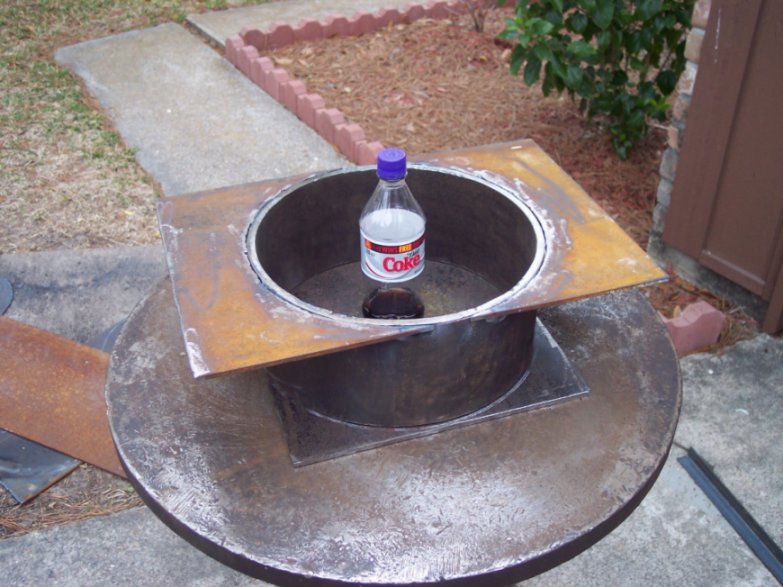
This weekend I expect to do the welding on the pot base, shelf, and anywhere else it needs.
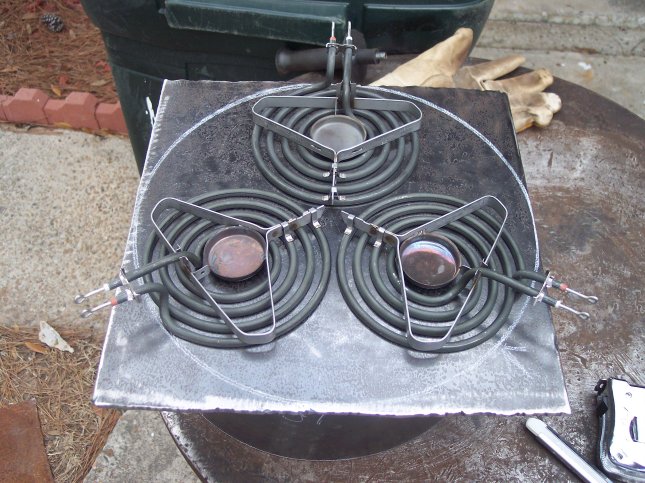
Here is a photo of testing out the element placement:
More to come....

|
   
   
|


|

 Reply With Quote


