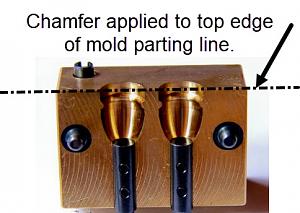
I ran the grind stone over the edge again, but I had a firmer grip and I cut away a tad more then I meant to. I can see the chamfer when the mold is closed, my finger nail falls into the valley, and it is about the same size as the other vent lines… but no finning. I got 70 good boolits with sharp edges in one hour. So far, so good.
*
I think I still have a problem with venting, but I think it has something to do with all of the venting. I can watch the lead slowly sink into the cavity, after I shut off the fill valve on my bottom pour. If I am real careful to build a thick sprue puddle over one cavity, and then move to the next cavity, I can get two good boolits. If the run-over from filling the first cavity makes it’s way to the second cavity, I won’t get good fill out.
*
When this mold arrived new from Midway, I adjusted the alignment pins so I could only get a 0.002” feeler gage between the two halves. I am going to push the alignment pins out until I can get a 0.004” feeler gage between the two halves when the mold is closed. Let’s see what that does.
*
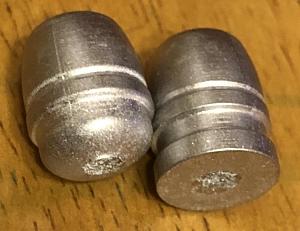
Here’s the worst example I have. The two boolits came from the same pour. My mold was plenty up to temperature, lead spilled off the hot sprue plate like water, and I had already cast about 40 good boolits.


 Reply With Quote


