MidSouth Shooters SupplyRotoMetals2WidenersLee Precision
Snyders JerkyRepackboxReloading EverythingInline Fabrication
Titan Reloading Load Data
Page 3 of 11 FirstFirst 1234567891011 LastLast
Results 41 to 60 of 203

Thread: Paper Patching...my way.

  1. #41
    In Remembrance
    montana_charlie's Avatar
    Join Date
    Feb 2006
    Location
    West of Great Falls, Montana
    Posts
    8,414
    I plan to try both ways, Don, to see which is faster...easier...or maybe just more interesting.

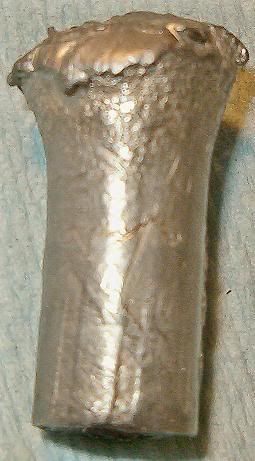
    So far I am not having problems with torn patches, even when I totally soak the paper.
    I found a cheap plastic roller for wallpaper seams at the paint store. Two passes with that puts some stretch on the patch without tearing, and then the heavy wetness makes the patch suck onto the bullet like a magnet.

    Yeah, the drying takes longer but it's winter time, so there's no hurry to get 'em loaded.
    I'm sure you know that keeping cows happy in cold weather leaves precious little time for shooting...

    CM
    Retired...TWICE. Now just raisin' cows and livin' on borrowed time.

  2. #42
    Boolit Grand Master Don McDowell's Avatar
    Join Date
    Jan 2008
    Location
    Hell Gap Wy
    Posts
    6,098
    Well I'm not sure what kind of weather we got here any more.
    For most of December and starting into January, we were in bone cracking windchill, no snow to speak of.
    Now today the NWS has issued a redflag warning for this afternoon and evening.
    Cold or hot I don't care, I just wish the wind would knock it off. I finally decided to fire a handful of paper patch rounds I had ready for testing yesterday,took 22 minutes windage just to get on the steel at 270 yds.
    Long range rules, the rest drool.

  3. #43
    In Remembrance
    montana_charlie's Avatar
    Join Date
    Feb 2006
    Location
    West of Great Falls, Montana
    Posts
    8,414
    Quote Originally Posted by Don McDowell View Post
    took 22 minutes windage
    Probably would have taken less if your wristwatch was set to Daylight Savng Time.
    CM
    Retired...TWICE. Now just raisin' cows and livin' on borrowed time.

  4. #44
    Boolit Grand Master Don McDowell's Avatar
    Join Date
    Jan 2008
    Location
    Hell Gap Wy
    Posts
    6,098
    well now there ya go, I didn't even have my watch on. Yupper yup bet that was it.
    Long range rules, the rest drool.

  5. #45
    Boolit Master Lead pot's Avatar
    Join Date
    Jan 2006
    Posts
    3,579
    CM.

    If you have some good paper that takes water like a ink blotter.
    Instead putting the whole patch in the water or what ever you use and pour a little on the counter top or your patching board and just drag the patch through it and just cote one side of the patch, if you have good paper that is all you need to do and the patch will stay put and wont pull apart when you tighten it..
    I used to wet patch but stopped long ago.
    Wet patch if you want but dry patching works just as good.

  6. #46
    In Remembrance
    montana_charlie's Avatar
    Join Date
    Feb 2006
    Location
    West of Great Falls, Montana
    Posts
    8,414
    Well, I gave Rick's mould a quick try today.
    I did not have time to make up some 16-1 alloy, so I used some old mystery metal ingots that I have had in a box for about thirty years.

    I also didn't take time to properly clean the mould. A quick dousing with carburetor cleaner and a shot of graphite was all I did...and the wrinkles proved it was not sufficient.
    But, I was just wanting to get a read on the as-cast diameter of the bullets it produces...and get a look at how the base comes out.

    However, I did manage to surprise myself. I had cut the sprue and tipped the mould over to let it fall off. I noticed some bits of lead stuck to the bottom of the blocks, so I spent a few moments rubbing it off. While doing that, I heard a quiet 'thump'.

    As it turns out, you don't need to open the mould to let paper patch bullets out. These just slide out through the top, if the sprue plate is swung out of the way.

    Then, I let one slide out partway and gave it a twirl as though I was screwing it back in to the cavity. It showed no sign of being an egg-shaped bullet in an egg-shaped hole. I couldn't even feel the parting line go past.

    This mould appears to be tight, smooth, and round...

    CM
    Retired...TWICE. Now just raisin' cows and livin' on borrowed time.

  7. #47
    In Remembrance
    montana_charlie's Avatar
    Join Date
    Feb 2006
    Location
    West of Great Falls, Montana
    Posts
    8,414
    After too much time wasted...er...spent on other things, I have finally built some loads to try. May even be able to shoot them today...

    These are loaded with the Dan Theodore 'Wasserberger Mile' bullet (with the Money nose) with grease grooves eliminated...and a diameter of .450".
    The cartridge on the left has one of the 'samples' sent to me by Arnie Moos, and the one on the right is from the mould that Rick Kalynuik made for me.

    Due to some 'illogical thinking', I managed to compress the powder too much in those with the Kalynuik bullets, but I'll shoot them anyway to see what effect that causes.

    Paper is 9-pound onionskin which brings the finished diameter up to .456" with two wraps...which is a slip-fit into my fireformed 45/90 cases.
    Patches are .920" wide so they lay .020" past the ogive, leaving .15" to fold under the base with no pesky tails.
    (These were wrapped freehand, as I haven't made a patching board, yet.
    So the base fold varies a slight amount from bullet to bullet.)


    The naked bullet is out of my mould from Rick, but it is a 'cull'. That's why it isn't loaded in a case.


    Using two firm strokes with a plastic (wallpaper seam) roller on saturated paper causes the patch to stretch a predictable amount. so, a 2.656" patch will grow long enough to wrap twice...and leave a 1/16" gap between the ends.

    Why a 2.656" patch? Because I can get exactly three from each 8.5-inch strip of paper. Of course, the width of the patch and the angle on the ends all work together to allow that to work out so exactly.

    Anyway, after these are 'burnt up' I will have the proof in the pudding about whether patched-to-groove is a reasonable approach to paper patching with black powder.

    CM
    Last edited by montana_charlie; 02-22-2009 at 05:02 PM.
    Retired...TWICE. Now just raisin' cows and livin' on borrowed time.

  8. #48
    Boolit Master

    Join Date
    Apr 2008
    Posts
    4,947
    Those look real good. Like I want mine to look like.
    Lookin forward to range results.

  9. #49
    Boolit Master
    Join Date
    Dec 2006
    Location
    Gillette Wyoming
    Posts
    970
    Charlie,

    I would offer the suggestion that you back off the width of the patch having it up over the Ogive may cause you some problems. the bullets at 20-1 only show rifling up to about .750 or so on the sides of my bullets I dont patch mine up much higher then that anymore, accuracy is well? Very good.

    The lunger
    Kenny Wasserburger

  10. #50
    In Remembrance
    montana_charlie's Avatar
    Join Date
    Feb 2006
    Location
    West of Great Falls, Montana
    Posts
    8,414
    Quote Originally Posted by Kenny Wasserburger View Post
    Charlie,

    I would offer the suggestion that you back off the width of the patch having it up over the Ogive may cause you some problems.
    Thanks for the suggestion, Kenny.
    I am certain it was made for sincere reasons, and my thanks are equally sincere, but...
    (You probably guessed there would be a 'but', didn't you?)

    If you open your calipers to 20 thousandths and look at the gap, you will probably agree that it is such a small thing it may not be enough to matter. Plus, my bullets are a fair bit 'fatter' than yours, so the rifling should cut that leading edge even if it's a tiny bit past the ogive.

    Those are the 'but's' based on 'logical thought' that I feel may apply to the question.

    But (here comes another one)...
    I did get out to shoot up all of those reloads. And, I managed to find quite a few paper samples to examine. Looking through them, there were some constant themes that ran through all that I could find.

    - First off, there were no big pieces of paper. Everything I found would fit the definition of 'confetti'.

    - Some were segments of the part that was folded under the base. This was a clean strip about .15" wide which had some soiled 'feathers' leading off at 90 degrees to the length. The clean part is from under the base, and the soiled part is what was left of the 'side' of the patch. The rifling had slit the side into 'feathers' right up to the point where the paper turned under the base.

    Of course each 'feather' is very short as you couldn't expect the entire thing to remain attached.

    - Also found a good number of long, thin strips that are obviously cut from the side of the patch. They are the same width as the rifling, and as long (basically) as the width of the original patch.

    I haven't looked them over under magnification, yet. I will be curious to see if some strips are 'clean' from being an 'underwrap'...while others are dirty from being part of the outer wrap.

    Just to keep them from disappearing, I stuffed them into empty cases sitting in the loading block. Tonight I will dump them out and try to 'analyse' how each piece came to be whatever it is now.

    If they are as interesting as I think they might be, I will take some pictures...

    CM
    Retired...TWICE. Now just raisin' cows and livin' on borrowed time.

  11. #51
    Boolit Master
    Join Date
    Sep 2005
    Location
    Arkansas
    Posts
    752
    If your results are less than satisfactory two things to try are with the paper further up on the oglive and lower down. It is something that you can both control and adjust. your rifle will tell you what it likes. One of the three will likely give better results than the other two.
    The man who invented the plow was not bored. He was hungry.

  12. #52
    Boolit Bub
    Join Date
    Jan 2009
    Location
    Kalifornia
    Posts
    66
    +1 on the wall paper seam roller.
    Oldie ones r wood, newer, hard rubber, newest r plastic.

  13. #53
    In Remembrance
    montana_charlie's Avatar
    Join Date
    Feb 2006
    Location
    West of Great Falls, Montana
    Posts
    8,414
    I didn't find anything remarkable enough about my spent patches to make photos worthwhile.
    It's enough to say that all of the paper was finely shredded, and (I feel certain) fell free right at the muzzle.
    I was shooting into a light breeze, and all of the paper bits were behind the muzzle...with a fair percentage being on, and behind, the bench.

    As to accuracy, it was not impressive.

    The rounds loaded at full COAL:
    The first three of these were fired at a gong, partially to check the sight setting, and mainly to see if any kind of fouling management was needed between rounds. The second round loaded without tubing or wiping, but it was tight. The third round would not get closer than a quarter inch from seating the rim until a damp patch was run through.
    One patch was sufficient to chamber that round, so I stayed with that 'technique' for that whole batch of loads.
    So, 12 rounds were fired while wiping between shots...but only wiping with one damp patch. I know it is common to run two damps followed by a dry, but I was interested in knowing how little fouling management is required to simply get the next round to chamber.

    The patch was your standard 1 3/4-inch round flannel, dampened with moose milk, and 'speared' in the middle on a nylon brush.
    After passing through, the patch was shaken, spun, jiggled, and dinked with until it fell off of the brush...then the rod was extracted from the bore.

    The 100-yard group was not impressive...about six inches high and wide, and pretty evenly scattered in and around the 4.4-inch bull. Being 'donated' bullets, I don't know what alloy they were cast from.

    I spent quite a bit of time just peering up through the bore...looking for paper rings, leading, and any other signs of trouble. I didn't see any, but it was obvious the bore was not getting cleaned very thoroughly.
    It was also apparent that the BP fouling was very dry and crusty. This was unexpected because the load did include a .125" grease cookie under the bullet.
    Maybe the cookie needs to be bigger...or greasier.

    Anyway, there were no 'mechanical difficulties' with this load and bullet. More development is obviously required to produce something approaching 'accuracy', but a person could hunt with this degree of performance...if he kept shots to 100 yards.

    The 'short rounds':
    I had seven rounds loaded with bullets from the Kalynuik-made mould. These drop a little large in diameter, so I assumed they would need to seat a bit deeper in the case than the others.
    I built one trial round with some hard felt substituting for the grease cookie, and set about adjusting seating depth so it would chamber. (I'll say a word about that felt substitute at the end of this post.)
    Eventually, I got the op wad so far down in the case I refused to go any deeper...and recompressed all of them to that depth. They were about 2 tenths deeper than the other batch of loads...which made for a lot of compression on the powder charge.

    While chamber checking the finished loads, I realized cases were 'swelled' too much to chamber. To cure that I ran them all through a backed off full length sizer with the decapper removed. I ran them in just deep enough to allow easy chambering.

    Two things happened during that 'resizing'.
    - The case necks got squeezed down so the bullets were no longer a 'slip fit'.
    - And, I realized that it may not have been 'bullet depth' that I was fighting when I compressed the powder so far. The failure to chamber may have been caused by 'fat' cases...not 'long bullets'.

    When fired, I did not wipe between shots.
    I figured the bullet was so far back from contact with the leade that fouling would not prevent chambering...and it was true.
    So, I fired them all as though I was shooting jacketed bullets with smokeless powder.

    Again, the 100-yard group was not impressive...but not as bad as I envisioned. About four inches high and five wide, it stayed on the 8.5 x 11 paper even though it was a bit low.

    Rick has offered to correct the size of this mould, but it's bullets seem to shoot 'fairly well', all things considered...and it makes pretty ones. The one thing that bothers me is that some of the strips of patch seem to have been 'crumpled' somewhat when fired. The narrow strips have an accordian look that makes me think the fatter combination doesn't pass through the leade quite as nicely as it should.

    I would call this a 'mechanical difficulty' which load development probably can't overcome.

    (A guy with a .450 sizing die (or smaller) might be happy with this mould but Lee doesn't make one...and I am not of the school that likes to modify bullets after they are cast. I only mention this because it seems like a shame (to me) that Rick will just toss it in the trash when I return it to him.)

    About those felt wads as substitutes for a grease cookie...
    Although I carefully figured all of my numbers for the building of a load, the first round needed a bit of 'adjustment' as it was a bit too long to chamber. My mistake was I didn't consider the thickness of the patch folded under the bullet base when calculating everything else.

    So, I plopped the case under the powder compression die to push the 'stack' down 4 thousandths further.

    That made the grease cookie bulge outward (hydraulically) to create a convex ring around the case that was over chamber diameter. That ain't cool, Bubba.

    So, for later 'adjustments' of stack height I used 1/8-inch felt to simulate a grease cookie and maintain proper stack dimensions...and didn't put a cookie in until the rest of the stack was at final compression.

    That bulge was ugly...but it won't happen again.

    CM
    Last edited by montana_charlie; 02-23-2009 at 02:13 PM.
    Retired...TWICE. Now just raisin' cows and livin' on borrowed time.

  14. #54
    Boolit Master

    Join Date
    Apr 2008
    Posts
    4,947
    Charlie, I would like to say, I appreciate all the information you diligently present.
    I am wrapping smokeless loads, though, the .303 British also can be used with black powder.
    I look forward to your developments.
    Great work.

  15. #55
    Boolit Grand Master Don McDowell's Avatar
    Join Date
    Jan 2008
    Location
    Hell Gap Wy
    Posts
    6,098
    Charlie a simple phone call to Lee will get you a .450 size die, provided you make arrangements to pay them the 25$ or so they'll want for it.
    Long range rules, the rest drool.

  16. #56
    Boolit Mold
    Join Date
    Oct 2006
    Posts
    28
    Quote Originally Posted by montana_charlie View Post
    Now, about that 'stretching'...
    Stroking very wet (fragile) paper with a finger can easily tear it in two. A small roller would (perhaps) do the job more reliably.
    I'm talking about a hard rubber roller, something like what a printer would use to ink a plate of linotype text...but not as big. Something an inch (or so) wide, and an inch in diameter...with a handle on it like a paint roller.
    It needs to be hard...like the platen on a typewriter.

    Anybody ever seen something on that order...?
    CM

    Hmmm...wallpaper seam roller...?
    The roller printers use is a brayer. It's a very heavy, hard and dense type of chemically resistant, non porous rubber, and in good condition should be perfectly flat and parallel. They can be quite expensive new.

    Smelting is what mines do to get metal from rock ore. Bullet casting is neat, but we are still just melting the lead and sometimes adding a little tin or antimony for flavor.

  17. #57
    Boolit Grand Master Don McDowell's Avatar
    Join Date
    Jan 2008
    Location
    Hell Gap Wy
    Posts
    6,098
    Couple more things for you to think about.
    That 1/16 inch gap between the paper ends is going to grow the minute that bullet gets bumped up. If you would recover a bullet you'll see what looks like another land groove on the bullet only it will be going the same direction as the angle of your paper cut. That doesn't help your accuracy any. Lengthing the patch to make up for the expansion will tighten groups.
    You'll likely have to rework and rethink your powder compression. If you think the powder you are using likes x amount of compression you'll need to add enough grains to make up for the bullet being seated further out of the case, either that or use filler wads to get to the seating depth you wantand compress the same amount as you would with a grease groove.
    Long range rules, the rest drool.

  18. #58
    In Remembrance
    montana_charlie's Avatar
    Join Date
    Feb 2006
    Location
    West of Great Falls, Montana
    Posts
    8,414
    Quote Originally Posted by Don McDowell View Post
    Lengthing the patch to make up for the expansion will tighten groups.
    I understand what you are saying, Don. The most the bullet can bump is 4 thousandths, but I'll adjust the patch with another pass with the roller, anyway.

    You'll likely have to rework and rethink your powder compression.
    Yep, I have already started. The compression I ended up with on the first two batches (after 'adjustments') was way more than I wanted...
    CM
    Retired...TWICE. Now just raisin' cows and livin' on borrowed time.

  19. #59
    Boolit Grand Master Don McDowell's Avatar
    Join Date
    Jan 2008
    Location
    Hell Gap Wy
    Posts
    6,098
    Charlie that 1/16th inch wide .004(actualy .004+ 1 thickness of paper) rib on just one side of your bullet isn't going to do you any great favors as far as accuracy goes.
    Last edited by Don McDowell; 02-24-2009 at 12:37 AM.
    Long range rules, the rest drool.

  20. #60
    Boolit Grand Master Don McDowell's Avatar
    Join Date
    Jan 2008
    Location
    Hell Gap Wy
    Posts
    6,098
    Ok one last try


    This bullet was recovered from the clay bank behind my 200 yd paper range. You can see the "gap" running from bottom right to upper left
    Long range rules, the rest drool.

Page 3 of 11 FirstFirst 1234567891011 LastLast

Posting Permissions

  • You may not post new threads
  • You may not post replies
  • You may not post attachments
  • You may not edit your posts
  •  
Abbreviations used in Reloading

BP Bronze Point IMR Improved Military Rifle PTD Pointed
BR Bench Rest M Magnum RN Round Nose
BT Boat Tail PL Power-Lokt SP Soft Point
C Compressed Charge PR Primer SPCL Soft Point "Core-Lokt"
HP Hollow Point PSPCL Pointed Soft Point "Core Lokt" C.O.L. Cartridge Overall Length
PSP Pointed Soft Point Spz Spitzer Point SBT Spitzer Boat Tail
LRN Lead Round Nose LWC Lead Wad Cutter LSWC Lead Semi Wad Cutter
GC Gas Check