I used to work for a water meter company, we had mahogany crates from south america bring in bronze castings all the time. Most of those crates and boxes went home with staff to make furniture.

|
   
   
|


|


I used to work for a water meter company, we had mahogany crates from south america bring in bronze castings all the time. Most of those crates and boxes went home with staff to make furniture.


I store them in 30 and 50 cal metal ammo cans. Everything is in the trapezoidal 1lb Lyman molds, and when stacked alternating they pack very tightly together. Everything in a can is the same and the can is labeled. I then use the Harbor Freight 1000lb dollys, which are almost the exact same width, with a piece of 3/4 ply cut to bridge the open section and make them completely flat. Ammo cans go on those 3 deep and 2 high. Since the can handles fit in the bottom, the stacks are pretty darn stable. Those can then roll under whatever available space you have. I keep them in the corner of my garage underneath some adjustable wall hanging shelving, and just adjusted the bottom shelf to give me that much room. About 1000lbs of alloy on wheels in a 2'x2'x3' space, organized and easily accessible.

A small ammo can full of lead is ALL I want to lift.
A MFRB is too darned heavy to lift
watch out for plastic containers. They are all affected by UV light and this is what will break them down. use wood if possibel
Sent from my SM-G892A using Tapatalk
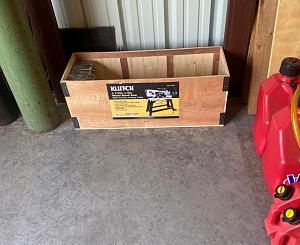
I stack mine in the crate that my horizontal bandsaw came in. Lucky for me, it was such a nice box I hated to throw it out or disassemble it. Here it is before I recast all these into my Redneck Gold molds.
NRA Benefactor

Gzig5 ... where you been? You asked for suggestions, 45 to date, and not ONE word from you which you like best.
Regards
John
I have very little storage space, so it is going to go under my bench in the combo reloading room/machine shop/furnace room in the basement. I was going to make a few plywood boxes that would stack but found a couple of 3 lb steel coffee cans I used to store brass in and added handles to them. HF also had their small plastic ammo boxes on sale for $4 this weekend so I grabbed a few of them. Now I have the Lino, WW, and scrap dive weights in the coffee cans and ammo cans, three each. I still have a 20" cube of soft lead muffins that is stacked in the garage. I think I'll probably knock out the plywood boxes out this weekend and get that stuff into the basement and put the smelter setup away. I need every inch of floor space in the garage because I need to move my 73 Cuda over so my wife can park in the garage. She has not been amused to have to clean the van off every morning in sub-zero temps.Originally Posted by John Boy

The plastic ammo cans work OK but I don't trust them and didn't fill them up. I'll make the boxes about the same volume as the coffee can so I can move them. Need to decide on my marking method. Sharpie for now but want to use stamps.
I've used labelers with sticky-back tape, or printed labels (laser printer) and scotch / shipping taped those on, those work pretty well too. Sharpie is easy to erase with Isopropyl. Stamps are fairly permanent.


I use old milk crates to store alloy in.
I cast COWW into corn stick shapes, soft into muffin shapes. When I started out, I got a metal lettering punch set and marked each ingot with L, WW, or R. My lino is in a 5 gallon bucket. My pewter is cast in stainless condiment cups purchased at Walmart marked P, and solder is marked S with tin content written with a Sharpie.
Last edited by gbrown; 02-21-2021 at 02:25 PM. Reason: Additional info
One of my father's favorite statements: "If I say a chicken dips snuff, look under his wing for the snuffbox" How I was raised, who I am.

I built my own wood crates. I started out with tall skinny crates but found them to be unstable when stacked.
The shorter fatter crates stack better.
They are built large enough so the 2.5 lb. ingots fit with a bit to spare, enough room so my fingers can lift out the layers of ingots. The Lee and Lyman ingots stack in easily too.
I get about 60 lbs. in each crate. They can be built as tall as you want to hold as much as you want. I stopped at a height so 60 lbs. is an amount I can move around without to much trouble.
I built them out of scrap rough cut 1x4 lumber left over from other projects for the ends. 1/2 thick plywood for the bottoms. I used my router table to cut 1/2" grooves a 1/2 inch up from the bottom of the ends to fit the plywood into. For the sides I cut a 2x4 into 1/4" thick strips. Used glue and small nail to hold it all together. Added some of the 1" boards to the top edge of the ends with sheet rock screws. This lets one crate stack on top of another.
I have pics I the home made tools thread.
Leo
Last edited by 44magLeo; 02-21-2021 at 03:23 PM.
Don't avoid stamps for fear that the alloy will change before the stamps go away!
Spell check doesn't work in Chrome, so if something is spelled wrong, it's just a typo that I missed.
44mag Leo. I tried finding you on Homemadetools with no luck. Can you be more specific. I'm interested in your method.
 Posting Permissions


| BP | Bronze Point | IMR | Improved Military Rifle | PTD | Pointed |
| BR | Bench Rest | M | Magnum | RN | Round Nose |
| BT | Boat Tail | PL | Power-Lokt | SP | Soft Point |
| C | Compressed Charge | PR | Primer | SPCL | Soft Point "Core-Lokt" |
| HP | Hollow Point | PSPCL | Pointed Soft Point "Core Lokt" | C.O.L. | Cartridge Overall Length |
| PSP | Pointed Soft Point | Spz | Spitzer Point | SBT | Spitzer Boat Tail |
| LRN | Lead Round Nose | LWC | Lead Wad Cutter | LSWC | Lead Semi Wad Cutter |
| GC | Gas Check |

 Reply With Quote