The other thing that I do...which is outside of the box...is that I do NOT crimp my loads. I HATE the idea of crimping a shotgun hull, because it essentially destroys the hull. The crimp will just ensure that the hull will split within a few firings - and thus must be cut down to be used again, or thrown away.
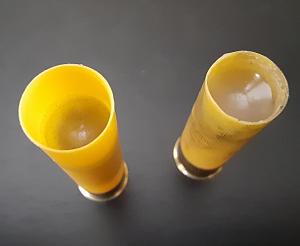
Instead, I place an overshot card on top of the slug, then seal the shell with wax. Ordinary paraffin wax. I dribble in melted wax, then tilt the shell over and spin it, so that the wax is distributed in a concave shape - higher on the edges than in the middle. Thus, a relatively small amount of wax forms a pretty strong seal. I have run tests on this...and it requires an amount of force only a few ounces different (sometimes less, sometimes more) than required to push open a star crimp from the inside. Of course, most everyone uses a roll crimp on slugs...but I couldn't get conclusive test results when I tried a comparison test with roll crimps (and my wax seals). I get clean burning of the powder in the shells and good accuracy. So, my wax seal method does work. The wax releases cleanly from the inside of the hulls, with no partial blockage, as with an opened crimp...so the passage of the payload from the hull to the forcing cone in the barrel is smoother (and I'd like to think) more forgiving, than with a crimp. No bloopers and a clean powder burn indicates that the pressure build inside the shell is acceptable. Also, I often use 3" hulls for these loads, to give the slug a longer "head start" inside the shell and put the transition point between the hull mouth and the forcing cone closer together. I don't know if this helps...but it certainly doesn't hurt.
Anyway, those who think I am crazy...go ahead and let me have it. Here is a photo of a couple of completed shells. Maybe I am crazy for stepping outside the box a bit...but my methods DO seem to work. I will post photos of my targets, after my next range trip.


 Reply With Quote