RotoMetals2Reloading EverythingSnyders JerkyLoad Data
Lee PrecisionInline FabricationRepackboxTitan Reloading
MidSouth Shooters Supply Wideners
Results 1 to 15 of 15

Thread: brass annealer project

  1. #1
    Boolit Master corey012778's Avatar
    Join Date
    Jan 2008
    Location
    Staunton,VA
    Posts
    895

    brass annealer project

    I started an homemade brass annealer. I tried one a few years ago a failed badly. guess leak of knowledge, tools, and proper well everything. trying to make the body with what every I had to laying around, cheapest motors I could find. these time. have a pretty good size dc motor planning on using good lumber and a collection of hand tool, power tool, and table saws, even metal saws and welder at my disposal, oh and a lot more knowledge. maybe these will get my butt in gear to do the reloading room remodel started too. lol

  2. #2
    Boolit Master
    high standard 40's Avatar
    Join Date
    Jan 2009
    Location
    South Louisiana
    Posts
    1,213
    Do you have a design in mind. I built my own a couple of years ago based on this plan..

    https://docs.google.com/document/d/1...t?pref=2&pli=1

    https://www.youtube.com/watch?v=YzM7ArN9fOs


    Mine works awesome. Adjustable feed rate, adjustable torch position, and adjustable for the time the flame contacts the case neck.

  3. #3
    Boolit Master


    Join Date
    Sep 2007
    Location
    East Texas
    Posts
    3,647
    Quote Originally Posted by high standard 40 View Post
    Do you have a design in mind. I built my own a couple of years ago based on this plan..

    https://docs.google.com/document/d/1...t?pref=2&pli=1

    https://www.youtube.com/watch?v=YzM7ArN9fOs


    Mine works awesome. Adjustable feed rate, adjustable torch position, and adjustable for the time the flame contacts the case neck.
    Nice!

  4. #4
    Boolit Master corey012778's Avatar
    Join Date
    Jan 2008
    Location
    Staunton,VA
    Posts
    895
    Excite one i am building. Have drum and motor mated and tested if I centered. Not using the cake pan. Using a coffee can. Just gotta cut it. Lucky for me, where I need to is right at one of the ridges. Need to figure out what method to use.

  5. #5
    Boolit Master


    Walter Laich's Avatar
    Join Date
    Aug 2005
    Location
    Cypress, Republic of Texas
    Posts
    3,495
    My DIY annealer is one that looks like it has a circular saw blade horizonal on top.

    do have to place the brass in the holes in the saw blade but works great and has dropped my case failure rate from 9% to 1-2%

    main reason is to allow cases to expand to fill Marlin rifle chamber--Marlins always seem to have generous chambers and with .45 Colt being a straight walled case blowback can be a problem
    NRA Life
    USPSA L1314
    SASS Life 48747
    RVN/Cambodia War Games, 2nd Place

  6. #6
    Boolit Master

    lefty o's Avatar
    Join Date
    Dec 2012
    Posts
    2,187
    lots of good homemade annealers on youtube to get ideas from.

  7. #7
    Boolit Master corey012778's Avatar
    Join Date
    Jan 2008
    Location
    Staunton,VA
    Posts
    895
    little up date. I decide to build a frame and use cheaper paneling for the sides and back. maybe the top. saving the partial board for the reloading room remodel, had more then I thought. used a 12in section of 1x6 for the base. I have a section of 1x2 I may use for top. have to make mounting brackets for the motors. did not have the ones like use in the instructions (did not want to wait a month for them to come in either) and could not find the brackets I have. going to use aluminum for those. fun of cutting and drilling those.

  8. #8
    Boolit Master slim1836's Avatar
    Join Date
    Mar 2010
    Location
    Burleson, TX
    Posts
    2,123
    Quote Originally Posted by high standard 40 View Post
    Do you have a design in mind. I built my own a couple of years ago based on this plan..

    https://docs.google.com/document/d/1...t?pref=2&pli=1

    https://www.youtube.com/watch?v=YzM7ArN9fOs


    Mine works awesome. Adjustable feed rate, adjustable torch position, and adjustable for the time the flame contacts the case neck.
    I did the same setup and love it. For under $100 bucks it was worth it.

    Slim
    JUST GOTTA LOVE THIS JOINT.

  9. #9
    Boolit Buddy

    nvreloader's Avatar
    Join Date
    Jan 2016
    Location
    Western NV
    Posts
    194
    Here is some more DIY posts on a case annealer projects,
    some where around pg# 13, (on the first post listed), there is a case advancement addition, work very well.
    Be sure to read all the pages in each post, as there is hidden gems, to be learned.

    https://www.ar15.com/forums/Armory/D...434088/?page=1,

    https://68forums.com/forums/showthre...ealing+machine,


    HTH,

    Tia,
    Don

  10. #10
    Boolit Master corey012778's Avatar
    Join Date
    Jan 2008
    Location
    Staunton,VA
    Posts
    895
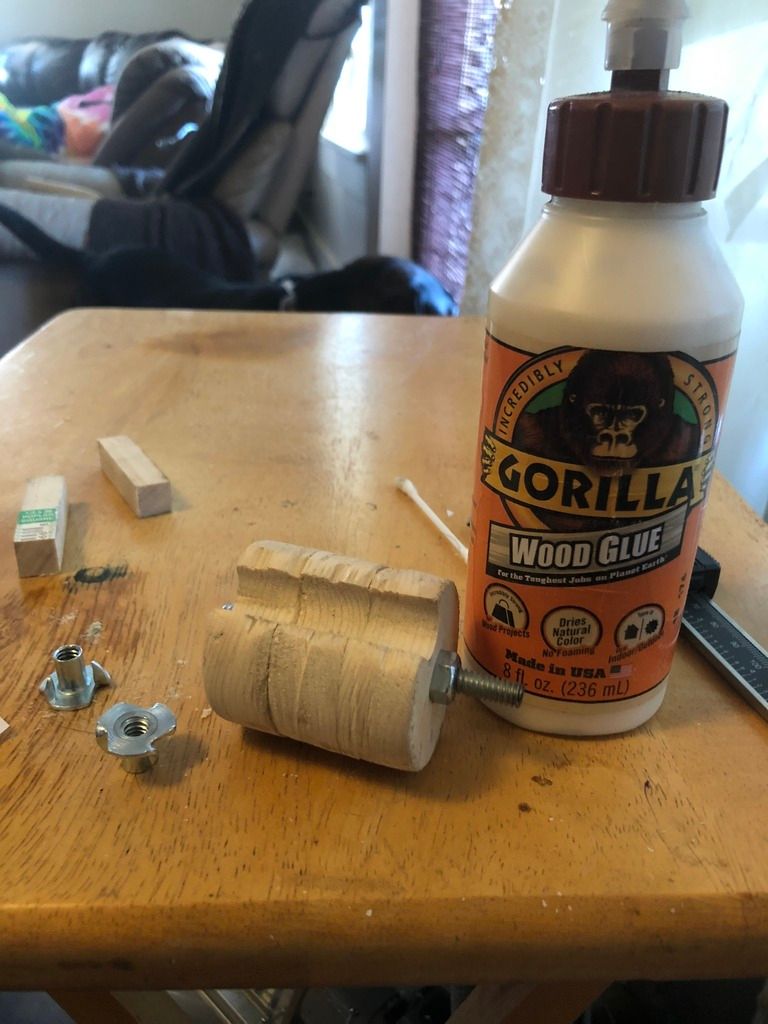
    another update. custom motor mounts are done going to have to do spacers to get everything back for the drums to be more flush. also have the feed drum made but not finished. made out of wood need a lot more sanding and don't have any paper under 100grit and only had small pieces of 100 and 150 grit. have to grind the shaft to fit the coupler I have.


  11. #11
    Boolit Master corey012778's Avatar
    Join Date
    Jan 2008
    Location
    Staunton,VA
    Posts
    895
    Started to do the test on the Annealer, the coffee can I used is out of shape (guessing from all the fitting/mating) Metal is too thin, other problems have shown up and can’t be fixed because of the thinnest. I have the pan on order that was listed in the part list. All my diy parts are working well. My wood feed drum looks like it is going to work well.

  12. #12
    Boolit Grand Master jmorris's Avatar
    Join Date
    Aug 2007
    Posts
    5,284
    I’m not sure how many hundreds of folks that have built annealing machines with my “blades” but it makes for a pretty simple machine that doesn’t require any extra parts to go from 22 Hornet to 50 BMG or anything in between.
    Attached Thumbnails Attached Thumbnails 5D5403B8-0ECB-4E2D-A614-24540300D982.jpg  

  13. #13
    Banned
    Join Date
    Jul 2016
    Posts
    2,911
    Quote Originally Posted by high standard 40 View Post
    Do you have a design in mind. I built my own a couple of years ago based on this plan..

    https://docs.google.com/document/d/1...t?pref=2&pli=1

    https://www.youtube.com/watch?v=YzM7ArN9fOs


    Mine works awesome. Adjustable feed rate, adjustable torch position, and adjustable for the time the flame contacts the case neck.
    I looked at that and instead of having 2-speed controllers, I was going to tie the 2 together with a belt or ? so they turned at the same speed, set the timing mechanically once and you're done.

  14. #14
    Boolit Master corey012778's Avatar
    Join Date
    Jan 2008
    Location
    Staunton,VA
    Posts
    895
    Pulley and shaft coupler on a motor, just a shaft and same size pulley. 1:1 ratio. Two pwm controllers allows to adjust the speeds to what works best for what case your doing.
    Just make a check sheet of what the led tells of the two.

    I do change what I do I have a 10” round aluminum. But that is one of the failures from my last attempt.

    Once I have these one done may give a try at the. Figuring spacing would be the challenge. Could buy a cheap saw blade and work from there hum

  15. #15
    Boolit Master corey012778's Avatar
    Join Date
    Jan 2008
    Location
    Staunton,VA
    Posts
    895
    it lives it works, just need to do some finishing work and needing some minor adjustments to the feed drum. having a jamming issue that I think I can fix with how I made the drum and the mounting system. other then getting to 5 or less pieces of brass, it is consistent on feeding the main drum.

    to do still.
    trimming and filing the hopper
    adjusting the feed drum out (fix a jamming problem)
    mount the back panel.
    finishing work on the feed ramp
    adjusting the main drum timing for annealing
    mounting the cover for my led read outs
    paint
    labeling the controls

Posting Permissions

  • You may not post new threads
  • You may not post replies
  • You may not post attachments
  • You may not edit your posts
  •  
Abbreviations used in Reloading

BP Bronze Point IMR Improved Military Rifle PTD Pointed
BR Bench Rest M Magnum RN Round Nose
BT Boat Tail PL Power-Lokt SP Soft Point
C Compressed Charge PR Primer SPCL Soft Point "Core-Lokt"
HP Hollow Point PSPCL Pointed Soft Point "Core Lokt" C.O.L. Cartridge Overall Length
PSP Pointed Soft Point Spz Spitzer Point SBT Spitzer Boat Tail
LRN Lead Round Nose LWC Lead Wad Cutter LSWC Lead Semi Wad Cutter
GC Gas Check