Looks good. Gets easier with each experience powder coating. Have fun and you have got a good looking boolit too.

|
   
   
|


|


Looks good. Gets easier with each experience powder coating. Have fun and you have got a good looking boolit too.


If you need a thicker coating do a preheat on the bullets <150 degrees, then tumble. But don't go over 150, less is better, more is a mess.

First batch I tried, I did heat it up.
Probably made them to hot as the powder, and boolets, all stuck together.
They did coat better than the second batch, but I think the coating was to thick and clumping.
I'm going to try and make a small tumbler to coat.
Shaking for that long can get boring.
So far, I'm liking PC.
Worse part about it is picking them up one at a time to stand them up.
The screen helped a bunch.
If you preheat you have got to use a Glass Thermometer to monitor the temp for consistent results.
As far as a bullet tumbler you can't buy one that works as well for PC as this one. All that is needed is a small tumbler, recycle code #5 painter's bucket w/lid, plywood, rubber mat, all threads, and hardware.
I think the next time I cast up some Lee 312-155s I'm going to try cutting the bottom off of a used plastic ammo tray. I'm thinking I could just lay out the tray on my baking sheet, and drop the coated boolits base down and then lift off the tray leaving the boolits in nice, neat rows. Right now I'm using those trays for my 9mm and 45,dropping them in nose first and then flipping them over onto the tray. Don't have to worry about shaky hands or wonky rows that way
That sounds like it would work.
My oven is really small, so probably not enough room to lift the tray off.
I'd lift the tray off before putting them in the oven
They will tip over.
My screen is working great.
Originally Posted by abunaitoo

Those look really good to me, that screen is an ingenious idea.
You only need thicker for looks and to build up boolit diameter

Note: I messed up. I wrote this after reading post 29 (missed an entire page of following posts). I left it as is.
I live in a high humidity zone (6 miles from the Ocean, Southeastern North Carolina) and had mixed result more often than not at first.
By trying out suggestions from this site, I feel that I have made BIG improvements in my routine.
I now get reliable good results with a lot less effort.
I recently did a batch with good note taking & some pictures so that I could share. See link at bottom of post.
Comments on your proposed method:
Skip the cleaning step after goind through the lee sizer.
At times, I have used a little lube during push through sizing before coating. I used beeswax with no problems (any residue just makes a boolit pick up powder better and has never affected smash testing results). If needed, try: Wipe a very thin film of beeswax on 10% to 20%, mix them back in with the bulk & shake em up. Size away. Alternately you should probably try "no lube" seating since it would just be easier.
There are a lot of #5 "reusable" containers that are "free" after you use up the product they came with. Most of which are very thin. This category worked fine for me for at first. However, after a handfull of sessions they started to have splits resulting in a big mess more than once. Go ahead & start out with what ever you have. Start looking for something better. A dollar store is not a bad place to look.
The black ASBBs are "the safe bet". Others may work, but a whole container of black does not cost that much.
My dollar store parchment paper works great, my previous off brand NSAF was a PITA. With parchment paper, getting the right cook temp will probably allow you to re-use it until you physically damage it. I am still on my first sheet.
I am real happy with my cook temperature and time. It is no higher than it needs to be, it works for me with my powder and was based on some trial runs.
I suggest that you: Cook just a few at a time for 17 minutes starting when you put them in a prewarmed oven. Start with say a setting of 400 �F. Do a smash test. Repeate with cook temp reduced in 10 �F increments. Find the temperture that is just good enough to pass a smash test with YOUR powder and YOUR oven. Use ~ 10 �F above this value as you initial "standard" for "margin". In production mode, you want your batches to have the same time exposure after the powder starts to melt. For me, the melt starts right at 350 indicated on my PID. You can also do pretty good by just taking notes early on an coming up with a "time adder". Some folks like to start the batch with a cold oven and have a longer "adder" to account for getting up to melt temp. Some like to pre-warm. Some just like to watch for melt. After you think you have a routine, take a batch of reject boolits and try them out at 10 �F under your "standard" temp and use a duration a minute or two under your "standard". If they dont pass the smash test, adjust as needed. You want some margin.
For your questions:
I started out all hand stacking. The "plastic ammo tray method" is way better. For my 35s, 44s, & 45s I have suitable plastic trays that make it pretty easy to stack as shown in the photos at the link. I have hand placed standing "no gas check" 30 cal Lee 170s without too much trouble. I hope to find a plastic ammo tray from some 32 handgun round before I need to do my next batch of the Lee 170s. People have figured out how to "not stand" boolits, but none of their posts have temped me away from the standing apporach.
Any functioning toaster oven should be workable. The method I described above can get you a good temp setting and duration allowance. If do not have a convection oven and if you "dense stack" be sure to select your smash test boolits from the middle of the tray. Honestly you probably only need your thermometer to check out the oven regulation.
Post 26 at: http://castboolits.gunloads.com/show...d-PC-too-stick
Last edited by P Flados; 08-23-2018 at 11:39 PM.
I put an oven thermo in, and bring it up to temp.
Just trying it out, so didn't want to spend much on it.
Working OK so far.
May spring for a oven thermo witha remote probe.
If i can find a cheap one.
You can get a cheap pyrometer/temperature meter/thermometer with a thermocouple for less than $20 on amazon with prime. Get a two channel for +/- $20. Many/most of the cheaper ones come with the small k type wire thermocouples which are just fine for sticking into a toaster oven. If you get the stainless probe stye thermocouples as well then you can use them in your lead pot and mold heating plate (that is why a 2 channel unit).
Swamp
LINK #1
Link #2
I have that.
Use it for repairs.
Never thought of using it for this.
I will try it.
Thank you
I don't know if this was mentioned:
If you shake and bake then stand your bullets on the gas checks to bake them the powder on the bottom of the gas check will melt of course and depending on several factors may stick to what you are baking on and stick well enough to actually pull the gas checks off when you go to free them.
This is why I choose to gas check and size the already PCed boolits in one step.
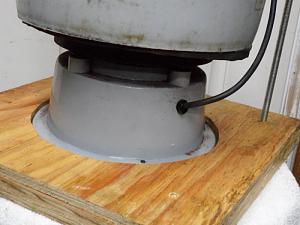
Motor
The pan I use is the one I used to use for pan dip lubing.
Bottom is coated with thin coat of lube.
I did heat it and wipe off most of it, but not all.
PC boolets didn't stick to much.
I'm thinking of trying to spray the pan with PAM next time.
Had a chance to try them today
M1 Carbine
Lyman 311359 115gr GC. Sized to .309.
I4227 at 11.5, 12.0, 12.5.
Shot about the same as un-coated. Which is good to me.
11.5 was the best, but the others were not far behind.
I did have some fliers, but probably because I didn't weigh each boolet.
I just wanted to see if they would shoot as good as un-coated.
I happy with it.
One thing I noticed, and it could have been the weather.
When I reloaded and closed the bolt, I noticed a slight puff of smoke(?) out of the barrel.
Never noticed it before. But I wasn't watching for it either.
Are you guys trying to reinvent the wheel? Just do what the old timers have been doing here for years and you will get perfect PC bullets every time. Sticking bullets? Put your bullets on a silicon baking mat, something that was introduced first on this site about 5 years ago. The bullets just drop off, even when tumble coated and the bases are PC. I am still using the same silicone mats my wife gave me back in 2012 that have cooked tens of thousands of bullets. My wife originally bought my 3 mats in a package for $10 at Costco, but you can find them on Amazon. The mats were 1/2 Baking Sheet size and had to be cut down to fit my toaster oven. When the bullets are placed base down the PC leaves a flat base and tend to fill in the sprue cut. Also the bullets don't slide on the silicon like they do on parchment or non-stick foil so the tray is easier to place in the oven without toppling bullets. Setting you bullets in grease to cook sounds like a good way to contaminate the PC bond.
As far as thermometers; I have never seen a toaster oven that didn't have a glass door. So instead of spending your money on some Chinese electronic thermometer, simply put a Glass Taylor Oven Guide thermometer, about $12, on the oven rack where you can read through the glass door. That way you can monitor the temperature with instant results and set your time accordingly. These glass thermometers will last you forever or until you drop and break it. You do have to clean the glass door every once in a while so you can read the thermometer.
Well said by one of the wheel maskers


IMHO one of the biggest problems with powder coating boolits is attempting to do it somewhere other than in air conditioning. That part of it I do in my air conditioned, de-humidified basement, using an empty non-recommended container (a 2 lb. smokeless powder cannister with a screw-on lid that has the # 2 in the triangle on the base - a # 5 in a triangle on the base is recommended). I use Smoke's clear with air soft BBs. Dump the boolits (about 200 Lee 125 gr. RN from a 6-cavity mould) into the empty smokeless powder container with the BBs and put in about 1 teaspoon of powder. Don't have to shake it much. Pour into a colander that allows you to shake off the excess powder and BBs. Pour boolits onto parchment paper in a stainless steel tray and cook at 400 degrees Fahrenheit for 15 minutes after boolit coating turns from white to clear and shiny. From there I dump directly into water in the hopes of recovering some of the BHN lost in the heating process. Big Boomer
Made some more yesterday.
Came out about the same as the last batch. Which is good.
Hardest part with this is standing them up.
Pain doing it one at a time.
I use an evil looking medical tool to pick them up.
One at a time.
The screen I made works great.
 Posting Permissions


| BP | Bronze Point | IMR | Improved Military Rifle | PTD | Pointed |
| BR | Bench Rest | M | Magnum | RN | Round Nose |
| BT | Boat Tail | PL | Power-Lokt | SP | Soft Point |
| C | Compressed Charge | PR | Primer | SPCL | Soft Point "Core-Lokt" |
| HP | Hollow Point | PSPCL | Pointed Soft Point "Core Lokt" | C.O.L. | Cartridge Overall Length |
| PSP | Pointed Soft Point | Spz | Spitzer Point | SBT | Spitzer Boat Tail |
| LRN | Lead Round Nose | LWC | Lead Wad Cutter | LSWC | Lead Semi Wad Cutter |
| GC | Gas Check |

 Reply With Quote