So true my friend.Originally Posted by GWS

The main issue I have with it is that it's so easy to say just use a 1/2" long screw no matter what plate you print. Plus, the cover only comes in to play when you are printing a very tall plate.

|
   
   
|


|


So true my friend.
The main issue I have with it is that it's so easy to say just use a 1/2" long screw no matter what plate you print. Plus, the cover only comes in to play when you are printing a very tall plate.
Yes it is more designed around a flat or pan head head screw, not something like a allen wrench screw like you normally find in metric (whatever you call those) Unfortunately the spacing became really tight there and I couldn't make the hole any deeper without breaking the the no less then .4mm rule. I can take another look at it though.
Also keep in mind the bevel is there to assist in a clean print. That whole no support thing. Although with such a small hole probably not as much of an issue.
I just don't see it that way, I guess. I plan to have a clutch with each and every plate I print. so each will be a plate assembly that includes a clutch and a handle.....I just don't like trying to get a plate out without a handle. I guess one could use a coupler nut and a cap screw over the nyloc. and use your 1/2" bolt. But I don't see it as being a hard thing to buy 1 1/4 screws for the taller plates......cheaper than most other options.
One thing I was thinking of doing is remaking the lid/handle the same diameter as the clutch parts as Ed did, so the same lid fits all, but then the wide lid fits all too....just leaves a little reveal that I doubt hurts anything or looks bad......will test that theory tomorrow....and if suitable a picture.
I like keeping it simple to a point.....as long as simple joins with easy.
Any Ace Hardware store has Phillips head flat head machine screws, metric or SAE. But the best fit under the clutch is the 6-32 flat heads.....and they fit better than any of the metric sizes.....not to mention easier for Americans everywhere to find locally. That size head recesses just perfectly. I wouldn't change a thing.
IME, even a small hole has to be cleaned up without a bevel......IMO it's perfect the way it is....just go get a 25 cent machine screw, nyloc and nuts...
Last edited by GWS; 02-18-2021 at 01:28 AM.
Why not add the handle to the design of the cover or screw the handle to the cover as a future add-on. You could pre-set holes with the design of the cover for the mounting handle as an option that way? The cover could be extended a bit further over the collator plate and screwed in as well...
I had the same issue when I printed my first clutch plate. My plates from 1.3.3 had fit well but when I printed the clutch plates I had that binding at the same points at the other two. I ended up filing back the case feeder body as my eyes couldn't see anything off in the motor mount position or the angle. It could very well be my printer though as it's been acting up lately. Will tune it up and try another plate to see if it's any better. Somewhat worried it may be the body that is off, not the plates.
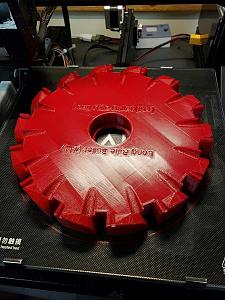
Finished product
The handle really can't be part of the cover, because the cover is only used on tall plates. That is why Ed and GWS's handle solutions are so different. It would have to connect directly to the collator plate. Plus the cover is really designed to just snap in and be easily removable. I may throw something together at some point here.
Would love to hear your result after the printer tune.
Hard to disagree with this. It was designed around a 1/2" 6-32 flat head.
I am considering adding another 10-15mm to the 7mm and 308 rifle bullet dropper die bodies. GWS I believe you have a hornady rifle die? If so, what is the OAL of the die?
Interesting. Keep us updated.
Is there any truth to the printer being out of round, or was that just an optical illusion in the pictures?
Thanks GWS,
I actually increased the die body on the .308 and 7mm dies a bit more to handle the longer cases. Also created a dedicated 300BO die set.
I see you did that without changing version number..... sneaky
I will be home in 30 minutes I will post pics of the Hornady bullet feeder dies.
I am glad that you are increasing the length.
Keep in mind that’s a .45ACP pistol die I am posting.

Last edited by thump_rrr; 02-18-2021 at 06:41 PM.
750 BF and case feeder all set. Decided to print up another feeder and the Lee APP. Base slide, 9mm Bullet Slide, Main Bracket all good. Printed up some inserts. 9mm works great! Extended one about 3mm for bullet feeding to make it a little smoother. .223 brass has me perplexed.
I did my due diligence and searched the forum here for any reference to make sure I didn't miss anything. Apologize if I missed something simple. .223 case insert fully seated does not allow for the case to clear. I must be doing something wrong, right? Please see the pics below and let me know....please be kind if I am doing something stupid!! lol
Thanks in advance!
I have the 9mm, .44 and .45 Hornady Feed dies, let me know if you need any measurements...
I was waiting on the generator to match. v1.4.2 posted.
Looks good. The bracket is designed to have a nut between the bottom and the frame like in this picture. That should give it the correct clearance.
You mentioned making a longer insert for the bullets. When I was messing around with the really short .45's lablover sent me, I realized combining the brass and bullet insert for pistol probably wasn't the best idea, so I am going to make those separate parts like they were originally.
Last edited by TylerR; 02-18-2021 at 08:10 PM.
OK. Thanks! That's what I was thinking, but then the 9mm Bullet/brass insert would be too short for bullets. If it helps in making the dedicated 9mm bullet insert, I decreased the internal diameter of the insert to 9.5mm. Works really well.
Thanks again! I'll put the nut on.
 Posting Permissions


| BP | Bronze Point | IMR | Improved Military Rifle | PTD | Pointed |
| BR | Bench Rest | M | Magnum | RN | Round Nose |
| BT | Boat Tail | PL | Power-Lokt | SP | Soft Point |
| C | Compressed Charge | PR | Primer | SPCL | Soft Point "Core-Lokt" |
| HP | Hollow Point | PSPCL | Pointed Soft Point "Core Lokt" | C.O.L. | Cartridge Overall Length |
| PSP | Pointed Soft Point | Spz | Spitzer Point | SBT | Spitzer Boat Tail |
| LRN | Lead Round Nose | LWC | Lead Wad Cutter | LSWC | Lead Semi Wad Cutter |
| GC | Gas Check |

 Reply With Quote