RotoMetals2RepackboxLee PrecisionTitan Reloading
MidSouth Shooters SupplySnyders JerkyWidenersLoad Data
Reloading Everything Inline Fabrication

Thread: Making that Bullet Collator

  1. #3541
    Boolit Mold
    Join Date
    Nov 2020
    Posts
    2
    Quote Originally Posted by thump_rrr View Post
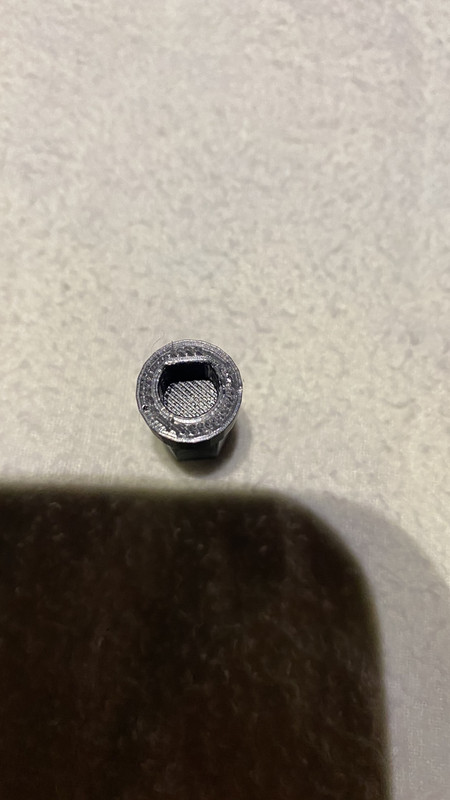
    Have you tried printing a proper hex adapter with a flat in it?
    I didn’t get the depth right on this one so I was printing another when I lost power.

    Sorry for the crappy images but I’m working with a headlight on.

    Negative, I looked into some adapters previously and heard a lot of people say that they tend to break easily. Plus, making that is way outside of my skill set, all I have made so far was an adapter for an endoscope and a foot for a swing; both were very rudimentary things yet took me a LONG time to make not having any knowledge of CAD. lol

    The plates I re-printed with the new dimensions worked perfectly.

  2. #3542
    Boolit Master TylerR's Avatar
    Join Date
    Dec 2008
    Posts
    2,002
    Quote Originally Posted by thump_rrr View Post
    How big a UPS do you have?
    So far it went out for 2 hours this afternoon and it’s been out again since 7:00pm and the estimated restoration time is 10:30pm.

    I can understand a few hours worth but anything longer than that you probably need a generator.
    Yeah i am on house genertor too so that helps

  3. #3543
    Boolit Mold
    Join Date
    Nov 2020
    Posts
    2
    Quote Originally Posted by TylerR View Post
    Any professional opinions of removing some the the plastic between the sensor and the metal? Will that make any difference?
    I think you will just get the sensor closer to the brass/bullets, the closer to the object the better. We use the big 30mm proximity sensors on trucks at work to cut out the PTO when things are open or in use, they are generally 3-5mm away from the ladders etc. so they like to be very close.

    One could always run a spade or forstner bit through an old drop tube for testing instead of designing a new assembly.

  4. #3544
    Boolit Mold
    Join Date
    Dec 2020
    Location
    MN
    Posts
    18
    Doesn't the copper jacket impede the detection of the sensor? I believe the reduction in sensitivity can be as much as 75% when detecting copper. So if the range is normally 12mm when detecting copper it could be as low as 3mm. Additionally the shape of the object matters as well, the IEC spec for these sensors is determined by using a square flat piece of 1mm thick carbon steel that is equal to the surface area of the sensor. In other words you could completely remove the plastic of the drop tube and the limiting factor would remain the copper jacket and the shape of the bullet. I don't think there is much that could be done other than getting a bigger sensor.

  5. #3545
    Boolit Mold
    Join Date
    Dec 2020
    Location
    MN
    Posts
    18
    I'm trying to attach the bullet feeder to my dillon case feeder using the dillon hang brackets. Do I need to drill a hole through the dillon case feeder in order the attach the bracket? I'm struggling to understand how the two brackets work together.

  6. #3546
    Boolit Buddy
    Join Date
    Sep 2011
    Posts
    145
    Quote Originally Posted by Macscotts56 View Post
    I'm trying to attach the bullet feeder to my dillon case feeder using the dillon hang brackets. Do I need to drill a hole through the dillon case feeder in order the attach the bracket? I'm struggling to understand how the two brackets work together.
    Going by memory the way I see it is that it hooks onto the Dillon and bolts to the collator.
    Look at the very first picture in the manual.
    You can see it hooked onto the Dillon case feeder.

    I have a Hornady myself.

  7. #3547
    Boolit Buddy
    Join Date
    Sep 2011
    Posts
    145
    Quote Originally Posted by g1500 View Post
    Negative, I looked into some adapters previously and heard a lot of people say that they tend to break easily. Plus, making that is way outside of my skill set, all I have made so far was an adapter for an endoscope and a foot for a swing; both were very rudimentary things yet took me a LONG time to make not having any knowledge of CAD. lol

    The plates I re-printed with the new dimensions worked perfectly.
    Barring another power failure I should have one printed in the next 45 minutes.
    I’ll post pics and if someone wants a copy of the STL file I’ll find a way to send it.

  8. #3548
    Boolit Mold
    Join Date
    Dec 2020
    Location
    MN
    Posts
    18
    Quote Originally Posted by thump_rrr View Post
    Going by memory the way I see it is that it hooks onto the Dillon and bolts to the collator.
    Look at the very first picture in the manual.
    You can see it hooked onto the Dillon case feeder.

    I have a Hornady myself.
    Yeah, I saw that but I was hopeful that I was just missing something, I really didn't was to drill a hole through my casefeeder.

  9. #3549
    Boolit Master TylerR's Avatar
    Join Date
    Dec 2008
    Posts
    2,002
    Quote Originally Posted by Macscotts56 View Post
    Yeah, I saw that but I was hopeful that I was just missing something, I really didn't was to drill a hole through my casefeeder.

    Drilling the hole is optional. It should just hang off the side.

  10. #3550
    Boolit Master TylerR's Avatar
    Join Date
    Dec 2008
    Posts
    2,002
    All drop tubes have been modified to have 2mm clearance between the sensor and the hole itself. If you have a sensor that cannot reliably detect 2mm I would suggest using another sensor. As I have said I have no issues using the suggested Autonics PRD18-14DN2, or the one originally posted by GWS.

  11. #3551
    Boolit Master GWS's Avatar
    Join Date
    May 2019
    Location
    New Mexico
    Posts
    1,355
    Me neither.......I was a little concerned about .223 cases, but I finished the build except for putting the electronics into my bigger box. (with the relay, and am using the little 5v power on the 12v motor, and it runs cool, slow, and perfect....no speed control.) So, I was surprised that I am having zero problems. Now, I did add another sweeper to the base.....two is better than one.....no more soldiers trying to get fed at once, no more jams and the collator shuts off every time.....and this is .223 even.

    Video below to prove it..........thanks TylerR! your base and my proximity switch mates together for .223 cases just fine!

    What's more if I replace the rotating plate and the lower tube with the .308 counterparts, it works exactly the same for that too. I love simple.

    Last edited by GWS; 01-26-2021 at 11:55 AM.

  12. #3552
    Boolit Master

    Rcmaveric's Avatar
    Join Date
    Jul 2017
    Location
    Jacksonville, FL
    Posts
    2,356
    Looking at the link I posted. Copper is harder to detect than lead. Lead is half the impedence iron. Copper is more that 75% less than lead. Oddly brass is about the same as lead probably due to the zinc in it.

    Capacitive proximity sensors can be used to detect a range of materials. They make adjustable ones. Problem is has either be designed for the material or have the sensitivity be adjustable. Getting one with the largest range will help.

    https://www.instructables.com/How-to...ive-Proximity/

    Can't vouche for the validity, but makes sense. The magnets will amplify inductive signal theoretically increasing range and sensitivity.

    Maybe look for one designed for 3D printers. They would be calibrated to detect aluminum

    Looking at the picture I posted refer to material influence. Multiple the material influence on your sensors rated distance will give you a more accurate sensing distance. From what I just researched most sensors are calibrated for FE 360 steel and thats what their rated distance is for. You will need one double or triple extended.
    Last edited by Rcmaveric; 01-26-2021 at 08:49 AM.
    "Speak softly and carry a big stick; you will go far."
    ~Theodore Roosevelt~

  13. #3553
    Boolit Man
    Join Date
    Nov 2018
    Posts
    84
    TylerR: Thanks for the tweak on the drop tubes. I printed a 1/2 top of the 10mm to test with 300blk brass and the less than ideal sensor and it works well now. I've also ordered the one you've had better success with.. just taking forever to get it in hand. I also never though about this but moving to the proximity sensor I can now print all clear petg tubes :P was a horrible idea when I did for the photo sensor

  14. #3554
    Boolit Master TylerR's Avatar
    Join Date
    Dec 2008
    Posts
    2,002
    Quote Originally Posted by djinnpb View Post
    TylerR: Thanks for the tweak on the drop tubes. I printed a 1/2 top of the 10mm to test with 300blk brass and the less than ideal sensor and it works well now. I've also ordered the one you've had better success with.. just taking forever to get it in hand. I also never though about this but moving to the proximity sensor I can now print all clear petg tubes :P was a horrible idea when I did for the photo sensor
    Awesome. I am glad to hear it made the difference.

  15. #3555
    Boolit Master TylerR's Avatar
    Join Date
    Dec 2008
    Posts
    2,002
    Quote Originally Posted by lablover View Post
    I also have some hitech coated 160s if you want some for testing. I’d be happy to send you some on my dime. I can’t wait to see the results because these are tough little suckers
    I got your package lablover. Let the games begin!

    Just curious are you using hex interface, or pin thru shaft? Which motor again?
    Last edited by TylerR; 01-26-2021 at 11:06 AM.

  16. #3556
    Boolit Master GWS's Avatar
    Join Date
    May 2019
    Location
    New Mexico
    Posts
    1,355
    Quote Originally Posted by djinnpb View Post
    TylerR: Thanks for the tweak on the drop tubes. I printed a 1/2 top of the 10mm to test with 300blk brass and the less than ideal sensor and it works well now. I've also ordered the one you've had better success with.. just taking forever to get it in hand. I also never though about this but moving to the proximity sensor I can now print all clear petg tubes :P was a horrible idea when I did for the photo sensor
    Waiting for the pictures.....especially on the clear tube! Never seen clear see-thru 3d prints.....
    Last edited by GWS; 01-26-2021 at 11:58 AM.

  17. #3557
    Boolit Master TylerR's Avatar
    Join Date
    Dec 2008
    Posts
    2,002
    Lablover, I have already done some initial tests with some existing collator plates, and it's fairly clear what the issues are. I am right now printing a new plate where I basically "tightened the screws" a bit. I have reduced the diameter of the shaft hole, reduced the size of the bullet holes, and I changed the plate diameter to 181mm, which technically leaves .5 mm of clearance to the side of the collator. I can see one of the main issues is the nose of the bullet not making contact with the ramp to begin the flipping process. Depending on how my new plate works I will consider more changes from there, possibly with the ramp itself.

  18. #3558
    Boolit Master TylerR's Avatar
    Join Date
    Dec 2008
    Posts
    2,002
    Quote Originally Posted by GWS View Post
    Me neither.......I was a little concerned about .223 cases, but I finished the build except for putting the electronics into my bigger box. (with the relay, and am using the little 5v power on the 12v motor, and it runs cool, slow, and perfect....no speed control.) So, I was surprised that I am having zero problems. Now, I did add another sweeper to the base.....two is better than one.....no more soldiers trying to get fed at once, no more jams and the collator shuts off every time.....and this is .223 even.

    Video below to prove it..........thanks TylerR! your base and my proximity switch mates together for .223 cases just fine!

    What's more if I replace the rotating plate and the lower tube with the .308 counterparts, it works exactly the same for that too. I love simple.
    Love to hear the success story my friend. And the videos are always nice.

  19. #3559
    Boolit Master GWS's Avatar
    Join Date
    May 2019
    Location
    New Mexico
    Posts
    1,355
    Quote Originally Posted by TylerR View Post
    Love to hear the success story my friend. And the videos are always nice.
    Yup! Now I'm the first ever to run an RCBS Pro Chucker 7 loading rifle right.........with auto collated case and bullet feeders!...since RCBS sure never made them. So what do you do with 7 stations loading rifle using military LC cases already prepped? (sized, deprimed, swaged, wet tumbled, and trimmed)

    1. Case Auto fed
    2. M-Die neck expanded for bullet feeder, Primed on the down stoke.
    3. Powder Charged
    4. Video Powder Cop
    5. Bullets collated and fed into M-die case shelf
    6. Bullets seated
    7. Case necks snugged.

    Now I really am going to clean the reloading room! Thanks again.....been a fun project!

  20. #3560
    Boolit Master TylerR's Avatar
    Join Date
    Dec 2008
    Posts
    2,002
    Quote Originally Posted by GWS View Post
    Yup! Now I'm the first ever to run an RCBS Pro Chucker 7 loading rifle right.........with auto collated case and bullet feeders!...since RCBS sure never made them. So what do you do with 7 stations loading rifle using military LC cases already prepped? (sized, deprimed, swaged, wet tumbled, and trimmed)

    1. Case Auto fed
    2. M-Die neck expanded for bullet feeder, Primed on the down stoke.
    3. Powder Charged
    4. Video Powder Cop
    5. Bullets collated and fed into M-die case shelf
    6. Bullets seated
    7. Case necks snugged.

    Now I really am going to clean the reloading room! Thanks again.....been a fun project!
    All this talk makes me want to go out and buy a RCBS Pro Chucker 7

Page 178 of 361 FirstFirst ... 78128168169170171172173174175176177178179180181182183184185186187188228278 ... LastLast

Posting Permissions

  • You may not post new threads
  • You may not post replies
  • You may not post attachments
  • You may not edit your posts
  •  
Abbreviations used in Reloading

BP Bronze Point IMR Improved Military Rifle PTD Pointed
BR Bench Rest M Magnum RN Round Nose
BT Boat Tail PL Power-Lokt SP Soft Point
C Compressed Charge PR Primer SPCL Soft Point "Core-Lokt"
HP Hollow Point PSPCL Pointed Soft Point "Core Lokt" C.O.L. Cartridge Overall Length
PSP Pointed Soft Point Spz Spitzer Point SBT Spitzer Boat Tail
LRN Lead Round Nose LWC Lead Wad Cutter LSWC Lead Semi Wad Cutter
GC Gas Check