RepackboxSnyders JerkyLee PrecisionInline Fabrication
Reloading EverythingLoad DataMidSouth Shooters SupplyWideners
RotoMetals2 Titan Reloading
Page 1 of 3 123 LastLast
Results 1 to 20 of 45

Thread: Giving it a try

  1. #1
    Boolit Master Toymaker's Avatar
    Join Date
    Nov 2012
    Location
    Winterville, Georgia
    Posts
    576

    Giving it a try

    The rifle is a Pedersoli 1885 High Wall in 38-55. The twist is 1:12. I'm using Starline 2.125" brass, new and trimmed to 2.125 - 2.126. Really pleased how the trimming came out. I slugged the bore all the way through, the first 6 inches from the chamber and the last 6 inches at the muzzle. The measurements for all three sluggings came out the same. Bore = 0.372"; Groove = 0.379". The goove was dead on, the bore could be +0.0005" so I'm not going to worry about it.

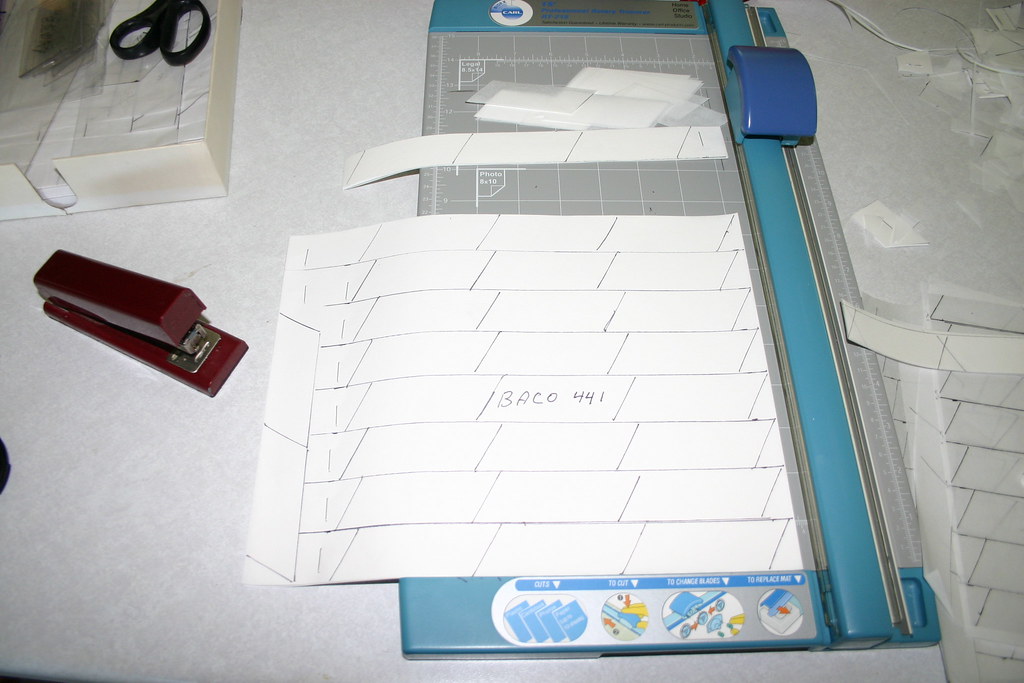
    To start I want to patch to bore diameter, or close. I test wrapped 10 different papers and settled on A) BACO 9# Onion Skin wrapped 3 times (0.3733"). Down the line I'll probably try B) Aquabee Layout Bond, 2 wraps (0.3754") and C) Staples Notebook paper, 2 wraps (0.3741") as they were close.

    The bullets are the BACO 0.365", 300 grain pure lead slicks. Actual measurements were 0.364" and 299.5 to 300.8 grains. The average length of 10 was 1.16875". Very nice looking bullets.

    I had to mess and fiddle with getting the paper the right length so it didn't overlap. I thought I had it and wrapped 10 bullets, leaving them to dry over night. Next morning I found that 7 were actually overlapping edges so I took them apart and started over. Took me a couple of tries before I figured out that the paper was still stretching as I rolled them bullets. After learning that lesson I watched carefully and stopped before getting an overlap. I dried these 7 in the oven and they look great. I took the micrometer to all 10 and found the 3 that dried overnight were 0.3729" (yea, all 3). The 7 oven dried ranged from 0.3731" to 0.3734". This is amazing because it isn't me - I'm a bumbling fool with 11 thumbs.

    Next is working on the load. But I wanted to share the bullets. I've enjoyed and learned from this forum and wanted to share. Comments welcomed.

    Click image for larger version. 

Name:	DSC00001.jpg 
Views:	65 
Size:	47.7 KB 
ID:	179977

  2. #2
    Boolit Grand Master

    Join Date
    Mar 2013
    Location
    Northwest Ohio
    Posts
    14,556
    3 wraps may give you some release problems with the patch. Are you wetting the patch when wrapping? Wet paper will stretch more than dry does. Try setting a spounge in a plate of water and let capilary action bring the water to the top surface. This will very lightly dampen patches set on it. Set 3-5 patches on it and start with 1st patch set it off and replace with another. Wrap bullet and repeat working thru the patches replacing each used. The number of patches sets the time moistening on the spounge. I have also used a mixture of Lee sizing die wax ( the water souluable one) and water mixed 4 parts water to 1 part wax. This makes a good wetting agent and a little lube to the patch along with a light water proofing. Its kind of interesting waching thepatches on the spounge as they will curl some when set on it then slowly uncurl again as the moisture evens out and the patches normalize. Ive been using Seth Cole paper to wrap 40 and 45 cal bullets. Its .0018 thick. So with your .365 dia bullet + (.0018 X4 layers ) = .3725 or so. I like about .030 gap between the edges this is because when the paper covers the begining edge there is a light radius there that can cause a tighter fit to be proud sometimes. Cut a patch thats a perfect match on the ends and measure cross the seam and 90* top it may be a thousandth or so proud. Wrapped with a small gap between the bullets come out very round and true. If possible recoveer your patches when fired this will tell you alot about how they are performing. You may eed someone watching to see where they go.

  3. #3
    Boolit Master Lead pot's Avatar
    Join Date
    Jan 2006
    Posts
    3,579
    Toymaker
    Three wraps is not ideal unless your using very thin old type writer copy paper like they used under the carbon sheet. It is less then 1-1/2 thousands thick then you will get good separation with three wraps. But again I know a fellow that uses printer paper that would be like using three wraps of onion skin and gets very good accuracy using it.

    Try this for getting your correct patch length.
    Take a strip of your patch paper and if your using three wraps make four tight wraps around your bullet and take a sharp knife and cut through the wraps down to the bullet base. Unroll the strip and use the inner most slit on the paper and use the first and third slit from the bullet and cut your taper. This will get your patch length where the ends meet if you had the strip tight on the bullet.
    Wet patching tends to stretch the patch, this will give you a over lap where dry patching wont do this.
    When you have the correct length with the angle cut, I like a 50 degree patch angle my self.
    Take some brass sheet stock you can find at a hobby store or use some plastic that most things now get packaged in that you might use some bad words when getting the product out and make a template of your proper fitting patch to use for cutting more. Make one for wet wrap or dry, they will be different in length.
    Get out and shoot and have fun.

  4. #4
    Boolit Master Toymaker's Avatar
    Join Date
    Nov 2012
    Location
    Winterville, Georgia
    Posts
    576
    Country Gent - got your message also. Thank you. A friend loaned me his copy of Wright's "Loading and Shooting Paper Patched Bullets - A Beginner's Guide". Anybody who will "guarantee" following his process will get 3 MOA results got my attention. It was also well laid out and simple to follow, plus he uses stuff you'd have on hand without buying a mess of new stuff. So I'm following it to see what happens.

    I am using wet patches. I dry wrap first to make sure I have the patch straight. Then I unwrap until I can see the base of the bullet. Then I measure to make sure I have the patch in the right position, wet the patch under a dripping faucet and wrap. I have a patching board that I'll use to check what I've done and roll the patched bullet to get things tight. This is more involved than it needs to be, but I want to become confident with things before simplifying.

    Lead pot - I did pretty much exactly as you suggested for making a template. Mines temporary, made of two thin sheets of very hard wood (Quebracho) sandwiching a layer of JB Weld. It works surprisingly well. I set up a 40° angle. My problem with the overlap was in my rolling technique after wrapping. I was rolling too much, stretching the paper, making it thinner, and getting an overlap. Once I figured that out I was able to adjust and things worked out perfectly.
    Remember, I'm bumbling along with 11 thumbs.
    Current issue is with the grease cookie. I know I can eliminate it since I'm able to wipe between shots but I want to use it to start. I charge the case, insert the card wad and get it to the proper depth, then invert the case and press it into the sheet of grease to cut a cookie. When I turn the case up to insert the over-wad the grease is trying to come out of the case. I figure the seal is air tight and air pressure is pushing the cookie out.

  5. #5
    Banned


    Join Date
    Feb 2013
    Location
    NJ via TX
    Posts
    3,876
    i'm a newbie to the ppb, too. i prefer wrapping dry, just lots easier and the paper shreds to confetti when exiting the muzzle. i don't want to use a grease cookie, i want as much powder in the case as possible (.45-70) and get in at least 80 grains of swiss 1-1/2 with a deep bullet seat and 83 grains with a 1/8" seat. a bit more recoil than 65 to 68 grains, but man do those slicks fly fast and straight!

    randy wright's ppb book is excellent, even though it's 90% about grease cookie loads. but i think he mentions, or was it brentd?, to prick the edge (next to the case mouth wall) of the gc to allow trap air to be released which allows the cookie to seat firm on the over powder wad card. the over cookie cars is 'sposed to seal up that prick hole.

  6. #6
    Boolit Master Lead pot's Avatar
    Join Date
    Jan 2006
    Posts
    3,579
    If your wiping between shots you don't really need a lube wad. Just add a second wad if your using a .030" over the powder.
    If you cut the lube wad with the case just stick a pearl head stick pin or straighten a paper clip and stick it through the lube wad this will let the air out so it stays down.

  7. #7
    Boolit Master Lead pot's Avatar
    Join Date
    Jan 2006
    Posts
    3,579
    This is how I cut my patches.
    I draw out a sheet and use it for a patty. Then I run it through a scanner and make several sheets with the pattern and staple one sheet with the pattern to 15 blank sheets and put a staple through every strip to hold them in place when I cut it. Then I use the roller cutter and cut 16 sheets at once. This takes me less then a hour to cut over 300 patches.

    IMG_0538 by Kurt, on Flickr

  8. #8
    Boolit Master Toymaker's Avatar
    Join Date
    Nov 2012
    Location
    Winterville, Georgia
    Posts
    576
    I finally had the opportunity to disassemble my test round. It sat around for 4 days which would be less than normal because I try to keep one or two boxes ahead of need for competitions. The lube definitely saturated the wads above and below and contaminated the powder charge. I had cut the wads from a 0.03" sheet of fiber/rubber gasket material and they were soaked through. I suspected this would happen because it is designed to absorb oil and swell to seal the joint.
    I rebuilt the cartridge using commercial veggie/fiber wads to see if that will do any better. Because I would have the time to wipe or blow between shots I know I don't need the lube cookie but I want to test a "full deck" before I start simplifying. Can always use that space for a little more powder. I was pleased with two things 1) As suggested, pricking the lube cookie did let the air our and the cookie didn't try to ooze out, and 2) As I put things together I checked measurements against the first test round. The final OAL was within 0.006" so I'm feeling pretty good about the process and my technique.

  9. #9
    Boolit Grand Master

    Join Date
    Mar 2013
    Location
    Northwest Ohio
    Posts
    14,556
    My wad cutter for the 45 cal cuts a wad around .460-.465 dia this depends on material being cut some what. but the larger dia gives a better seal witht the case. I have used a playing card wad also to help seal things up. They are roughly .020 thick and plastic coated. My wad seater is hand operated and has a .060 spring loaded pin in it to poke the hole in the grease cookie and dosnt affect other wads when seating them. Maybe a thicker base wad would seal and not allow lube to pass thru as easily.

  10. #10
    Boolit Master Toymaker's Avatar
    Join Date
    Nov 2012
    Location
    Winterville, Georgia
    Posts
    576
    The Walters Veggie Fibre wads @ 0.03" seemed to do the trick. They did not absorb the lube and contaminate the powder. Neither did the lube leak around them.

    Shooting yesterday had mixed results. My range maximum is only 100 yards and the position I was in had clogged holders at 100 so I had to set my frame at 75 yards. I measured everything, cases were selected for 2.126" length, grease cookie (0.08175"), 2 wads (0.03125" each), seating depth (0.20") to figure the volume of powder (Olde Eynsford 2F). The powder was trickled through a 24" drop tube and the depth checked with an indicator gauge. Every load was checked. NO additional compression was added. OAL on each cartridge was within 0.006". The powder charge weighed 47.9 grains, but volume was what was important. Two blanks were fired, wiping between each. Rounds 1 - 5 were fired, wiping between each shot. Elevation and windage were adjusted slightly and rounds 6 - 10 were fired. Results were not great, but they were better than they have been. That's an 8" black bull - I modify the X and 10 ring for sighting.
    Click image for larger version. 

Name:	11 8 16 target.jpg 
Views:	19 
Size:	33.7 KB 
ID:	180384
    Fragments of the paper patches were found, but none of the wads. Someone at the range told me that the patches were cut by the rifling (obvious) and this was bad. Further they said the leading edge of the rifling was likely the culprit and I wouldn't get any accuracy until that edge was reamed slightly so the edges were relieved. The information I have says this isn't bad unless there is leading. Cleaning showed no indication of leading. The barrel is being treated for leading again this morning and will be cleaned after lunch.
    Click image for larger version. 

Name:	11 8 16 patch pieces.jpg 
Views:	19 
Size:	97.9 KB 
ID:	180385 What say you?

    My plan now is to increase the powder charge by 5 grains, determine the volume and load up 10 more cartridges with enough compression to give me my OAL.

  11. #11
    Boolit Buddy dave roelle's Avatar
    Join Date
    Jul 2010
    Location
    conroe texas
    Posts
    341
    The higher charge weight and resulting harder "bump up" will be a positive for improving fired bullet fit and so accuracy.

    Ask your range guy how many PP rounds he's put down range

    Keep on having fun

    Dave

  12. #12
    Boolit Grand Master

    Join Date
    Mar 2013
    Location
    Northwest Ohio
    Posts
    14,556
    My patches outer wrap is cut and the inner wrap is heavily engraved. It shows the lands markings full length. From all ive read and seen you want the patch to cut as it aids the release of the bullet when fired. I recover most of my patches withing 5' of the muzzle normally. I havent ever recovered a wad either. They may lay flat and become a" frisbee" and go about anywhere. I ussually recover the outer wrap in strips and the under in the wrap with the fold over base still attached. If possible when testing chronograph the loads as you work up. Watch extreme spreads and or standard deviation, as you get to the sweet spot on charge and compression these go down and accuraacy up. I have some loads that are almost single digit ES consistantly. I normally work up in 3 grn increments and then test again at low and high and middle of the best performing 2 loads. IE 51 and 54 to start were 2 best then retest with 51,52.5, and 54. I chronograph all of these to see where they are running at and the ES and SD numbers.Thios ussually finds a welbalanced accurate load pretty quickly. Every thing Ive read and seen says that outer wrap should be cut and shreads or confetti and under intact with the engraving markings showing. Patches shouldnt be burnt or seriously discolored. You want them to release right at th muzzle or as close as possible to it. A patch that stays on the bullet really messes with accuracy

  13. #13
    Boolit Master Toymaker's Avatar
    Join Date
    Nov 2012
    Location
    Winterville, Georgia
    Posts
    576
    Wooo Hooo!!! Yesterday's test kept everything exactly the same except I boosted the powder charge by 3 grains. Of course that increased the compression to keep the OAL the same. I was also able to shoot these through the chrony. They averaged 1,373 fps with a standard deviation of 8. This batch definitely gave me a group. Next step is to increase the powder charge by another 3 grains.

  14. #14
    Banned


    Join Date
    Feb 2013
    Location
    NJ via TX
    Posts
    3,876
    congrats - awesome! love it when it the improvements happen!

  15. #15
    Boolit Grand Master

    Join Date
    Mar 2013
    Location
    Northwest Ohio
    Posts
    14,556
    Watching those numbers chronographing gives a good idea when the load is at optimum for compression and pressures. Extreme Spread and standard deviation can tell you alot at times. Glad to hear of your success. Sounds like your getting into the right pressure range to nump up the bullet.

  16. #16
    Banned


    Join Date
    Feb 2013
    Location
    NJ via TX
    Posts
    3,876
    yer right on about using a chrony for load development, wayne. i need to get me a labradar and quit messing with the opticals!

  17. #17
    Boolit Grand Master

    Join Date
    Mar 2013
    Location
    Northwest Ohio
    Posts
    14,556
    I hate to say it but after years of using diffrent chronographs for load development it greatly simplifies the process. The LabRadar just makes it so darned easy to do it. I have used an ohler, Pact, and now the labradar units. The Pact profesional was sent back once for program up-grades even. Wacthing velocites, extreme spreads and standard deviations can really point you in the right direction on load development. They are a very usefull tool and offer other options as well. Knowing velocity ( even better at 2 distances) allows you to calculate trajectory tables for the given load. WIth 2 velocites on a shot BCs can be calculated for a given bullet, with cast a big plus since most cast bullets dont have them available.

  18. #18
    Boolit Master Toymaker's Avatar
    Join Date
    Nov 2012
    Location
    Winterville, Georgia
    Posts
    576

    Running, Screaming into the Boondocks....

    Picked up a Lyman #55 Black Powder Measure. The drop tube on the powder measure is Ύ”. When I dropped a charge it appeared, to me, to fill the case more than I expected.

    I weighted the charge and it was correct. I dropped another charge and it filled the case to the same point.

    The case is 2.1255” long. The charge is within 0.059” of the lip after inserting the 0.03 card wad.


    I dropped a measure into the scale pan, being very careful not to lose any. The weight was what expected.

    Then I trickled the powder down my home-made ½” drop tube. The charge was lower in the case.

    The case is 2.1250” long. The case is within 0.153 of the lip after inserting the 0.03” card wad.


    The charges will be compressed, with the compression die, to the same depth as in the previous two tests to keep the OAL the same.


    CONSISTENCY is the key. My previous two tests used the home-made drop tube.
    By compressing to the same depth as before, the amount of measured compression is going to be greater.

    BUT the compression should be the same, just more of it was provided by using the ½” drop tube.

    And I’ve got more kinks than a twisty tie…………………. HELP.

    Is my previous testing screwed?
    Should I drop my charges into the scale pan and trickle them through my home-made drop tube?
    Am I wondering about nothing and should just go ahead?

  19. #19
    Banned


    Join Date
    Feb 2013
    Location
    NJ via TX
    Posts
    3,876
    i think we each will find what works best for building cartridges. i've given up on powder measures and just scoop into a digital scale that does +/- .02 grains, then drop tube 29" into the case, add wad(s), compress with a BACO die in a lyman M body, ready to accept the pushed in ppg or gg bullet. messing with the powder charge weight, powder compression amount and bullet seat depth are still all part of the game.

  20. #20
    Boolit Grand Master

    Join Date
    Mar 2013
    Location
    Northwest Ohio
    Posts
    14,556
    On drop tubes length is the bigger variable rather than dia. My drop tube is 3' long 1/2" od X 3/8" id aluminum seamless tubing. The end for the case is simply a coned end with tapered hole from .400 at the top down to .300 at the bottom of the hole with the coned end to center the case. Te top is a modified RCBS plastic funnel. The hole was made smaller with JB weld epoxy to provide a trickle effect when pouring slowly into it. I made a 24" one to see the diffrence, Same tubing same ends and got less "stacking" compression from the shorter tube. I use the 3" tube now. The longer tube gives more drop or freefall to the powder and packs it into the case better. If the drop tube is mounted on the measure the powder drop may not be the slow trickle your using when pouring your home made tube. It may be more of a "slug" of powder going down the tube, not the long strung out string that allows powder granuales to bounce and find the best fit in the case.

Page 1 of 3 123 LastLast

Posting Permissions

  • You may not post new threads
  • You may not post replies
  • You may not post attachments
  • You may not edit your posts
  •  
Abbreviations used in Reloading

BP Bronze Point IMR Improved Military Rifle PTD Pointed
BR Bench Rest M Magnum RN Round Nose
BT Boat Tail PL Power-Lokt SP Soft Point
C Compressed Charge PR Primer SPCL Soft Point "Core-Lokt"
HP Hollow Point PSPCL Pointed Soft Point "Core Lokt" C.O.L. Cartridge Overall Length
PSP Pointed Soft Point Spz Spitzer Point SBT Spitzer Boat Tail
LRN Lead Round Nose LWC Lead Wad Cutter LSWC Lead Semi Wad Cutter
GC Gas Check