I wanted to ask other members what they think about trying to salvage this old gun I will post pictures of it see what you think. I already started on the action but, I am thinking this one might be to much work.

|
   
   
|


|


I wanted to ask other members what they think about trying to salvage this old gun I will post pictures of it see what you think. I already started on the action but, I am thinking this one might be to much work.


The pitting on the action looks deep but the internals look pretty good. Will the action be to thin by the time you remove the pits?
Last edited by M-Tecs; 10-21-2016 at 02:37 PM.

You don't the size, or any markings. The action parts are very much in the style of the small Cadet Martinis, but if that is the size it is about ľin. wide breechblock), it is for a larger head diameter - as indeed some sporting rifles were.) If it has the standard military size (1in. wide breechblock) it would most likely be for the .577/.450 round, although there are other possibilities. I have never seen inside one of the large Martinis Westley Richards and others made with the removable action frame, but they certainly did exist. If there is an AF monogram in a circle anywhere, that would be Auguste Francotte in Belgium.
At the very least the internal parts would be of value to someone. If you were really ambitious (Too much work...? I do not understand this. It is a Martini!), you could have a spark erosion firm cut out a mortice in a block of modern steel, like this:
Those sides are very deeply rusted, though. I can't tell how safe it would if you belt-sanded it to remove the pitting. In particular I wouldn't rebarrel or line it for a higher-pressure round, as could be done for the .303 in a sound Martini if an oversize or loose firing-pin is bushed. One possibility would be to sand the sides flat and silver solder reinforcing plates, preferably with Brownells 355 silver solder ribbon.
Here are some pictures of a Martini locally made to the Francotte design. Yours is obviously of the same design, but if it actually was one of those, there would be engraving in Nepali script. Another possibility wasl that a large number of Westley Richards Martinis were supplied to the Transvaal, but the Westley Richards triangle mark and ZAR for Zuid Afrikaansche Republiek would be on the receiver sides, and likely to be effaced by rust.
http://toadhallrifleshop.com/nepali-martini/

Without an internal hammer it wont be a Nepalese rifle.
Rust pitting isnt always the end of a gun. Wouldn't try to sand it smooth. I rescued an old WW2 Femaru, guy I knew gave it to me. It has some pretty deep rust pitting in places. Being a free gun, I just cleaned it up and threw on some cold blueing so it could be fired. None of the rust was in a place to affect structural integrity, its a 32acp not to worried it will blow up.
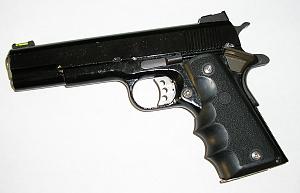
And somebody else gave me a 1911 frame that looked like it had been left out in the rain for a long time. Some pretty deep rust pitting in places, again none in some place that would compromise its integrity. I basically did car body work on it. Filled in the spots vs grinding around it flat. Then some duracoat. It runs hot 7.62x25 with no problems.


Hi, Blackhawk357--metal refinishing used to be one of my specialties, and receivers like the one shown in your photos can be saved. I no longer own a Martini, but as I recall the sidewalls of the receiver are pretty substantial.
First, though, I think you need to create a goal in your head about exactly where you wish to go with this project. Obviously, as pointed out by Ballistics in Scotland (BIS) any distinctive manufacturer engraving is long gone, so it seems to me that a restoration will fall into the category of a shooter rather than a collector piece. As stated by M-Techs, the internals look to be very serviceable. My first question would be how is the bore? If bad, do you intend to replace the barrel? If you do, then I'd suggest that you remove it before proceeding.
There are several ways to reduce or completely eliminate the pitting on the receiver's surface. One way, as mentioned by BIS, might be to use a belt sander, and I have seen very creditable work done with a belt sander. However, be certain that it has a firm backing behind the belt to prevent the belt from pushing in around the work and rounding the edges. You'll probably find a disc sander to work even better as it has the firm backing of the disc. Use a new 60 grit disc, and you'll be amazed and how fast and evenly it cuts. Wear some gloves to protect your fingers and have a small bucket of cold water nearby so that if the piece gets too hot to hold you can just drop it into the water. This is where the image of how you want it to turn out comes in, as are you willing to live with a few of the deepest pits, now greatly reduced, or do you want them all gone? You can change out the sanding disc for progressively finer grits and get a smoother finish, but because of the turning motion of the disc you'll always have swirl marks, so after using 60 grit and then 80 grit I'd finish the job hand polishing with 120 and 220 grits, and even 400 w&d paper if it's going well enough using a smooth wooden sanding block and a little kerosene. As you use each grit polish first top to bottom on the receiver, and then lengthwise to remove the scratches left by the preceding coarser grit. Since it's being done to your satisfaction you will know when you're finished.
There are other methods of doing the job as well. The most basic would be the old tried and true, labor intensive method of using a mill file and draw filing out the pits, followed by the sanding block, kerosene, and progressively finer grits method described above. If you have access to a machine shop you could also remove them using a surface grinder or a milling machine.
Any questions about any of these techniques, post them here or PM me. Good luck on your project.
DG
It won't be a Napalese Gahendra, which internally is a quite different Westley Richards design with a concealed hammer and a frontal lever supporting the front of the block. Here is an action I have which actually was made, to a different but related design, by Westley Richards and made into a rifle by George Gibbs of Bristol.Originally Posted by Tackleberry41

But rifles to the Francotte design, very much resembling the OPs, were certainly made in Nepal, and are currently available through IMI:
http://www.ima-usa.com/original-nepa...condition.html
The condition is pretty alarming, and the barrels were probably often of poor quality, the action probably reasonable.
Thank you so much for the information. I wanted to update some markings I found on the underside of the barrel and receiver.
Just a suggestion. With the deep pitting by the time you sanded/filed all the pits out there probably wouldn't be much of the side walls left. Think you'd be better off to just have the receiver bead blasted and make sure all the rust in the pits is no longer active. Possibly use one of the rust removers which is called evapo rust or something similar and then get it bead blasted and blued. Just a suggestion. Frank
Those markings could be a monogram in the Nepali script, but it is hard to tell. If the rifle was British or Belgian there ought to be proofmarks, mostly illegible but they ought to be on the breechblock.
I don't believe anybody can judge the result of grinding out that pitting from the pictures, and even with the gun in your hands it wouldn't be easy. It is very possible that you could find occasional pits going too deep for removal without making the sides suitable only for a pistol-cartridge rifle. I can't see it being worse than that.
What are the bore and chamber like? It is difficult to imagine them being usable with the receiver in that state, but you never know.

The rifle could be rebarelled in one of the Rook Rifle calibres.This would allow the removal of pitting and keep within a safe margin.
It would be very heavy and bulky for a rook rifle, and most of those bring penalties in terms of the cost of brass and a heel bullet, which is best avoided.
Another possibility if the receiver is badly thinned would be a shotgun cartridge. In much of the US a smoothbore ball gun can be used where rifles aren't allowed, and this would make a very good one. The 12ga cartridge would be too big, for although Greener used it in their GP gun, they needed a larger barrel thread than the ordinary large Martini's 1in. or 25mm. which you most likely have here. While you should make up a plastic dummy chamber to check for insertion, I think the 2ľin. 20ga would be fine, and ample for deer. I doubt if the 3in. would go in, but a slug is shorter than a shot column, and you don't need it.
The chances are that a 20ga would require a new barrel, and I'd certainly replace a Nepali barrel, or one in which the rear sight is screwed into a tapped hole as well as soldered. www.trackofthewolf.com have some good part-octagonal ones. A 28ga might make do with reboring, but would require bushing of the chamber, and many people would consider it inadequate for deer.
Last edited by Ballistics in Scotland; 10-26-2016 at 04:59 AM.
here is one Based on the Greener GP shotgun 32.40 Cal Black Powder.a similar conversion could be done with your rifle and allow for the removal of pitting on the Action.
another view.
 Posting Permissions


| BP | Bronze Point | IMR | Improved Military Rifle | PTD | Pointed |
| BR | Bench Rest | M | Magnum | RN | Round Nose |
| BT | Boat Tail | PL | Power-Lokt | SP | Soft Point |
| C | Compressed Charge | PR | Primer | SPCL | Soft Point "Core-Lokt" |
| HP | Hollow Point | PSPCL | Pointed Soft Point "Core Lokt" | C.O.L. | Cartridge Overall Length |
| PSP | Pointed Soft Point | Spz | Spitzer Point | SBT | Spitzer Boat Tail |
| LRN | Lead Round Nose | LWC | Lead Wad Cutter | LSWC | Lead Semi Wad Cutter |
| GC | Gas Check |

 Reply With Quote
