RepackboxInline FabricationMidSouth Shooters SupplyWideners
Lee PrecisionLoad DataTitan ReloadingReloading Everything
Snyders Jerky RotoMetals2
Results 1 to 9 of 9

Thread: making a Colt/Keith style sight base and front sight

  1. #1
    Boolit Bub LSCG's Avatar
    Join Date
    Dec 2014
    Location
    Texas
    Posts
    31

    making a Colt/Keith style sight base and front sight

    last year I made a few modifications to my Ruger single seven. www.rugerforum.com/phpBB3/viewtopic.php?f=3&t=223644


    one of the things I did to it was to file down the stock aluminum front sight to resemble the front sight on Elmer Keith's No.5. since it was aluminum the only way I could re-finish it was to paint it black which with use would flake and look pretty cruddy.


    so a few months back I got to thinking it would be really cool if could use a pinned in base on the gun so I could change blades whenever I wanted to. well one thing led to another and before long I wound up starting on a Colt flat top target style Base with a Keith style sight blade. rather than solder it on it would utilize a screw just like a regular single six front sight.

    starting out I decided I wanted to do as much as I could with the materials I had on hand. after looking through my steel pile I settled on a railroad spike for the sight base. after cutting off a piece and squaring it up on the belt sander I used a dremal sanding drum to start cutting the channel for the barrel. once I had it roughed out I wrapped various grits of sandpaper around the barrel and continued sanding till the base sat on the barrel pretty well.


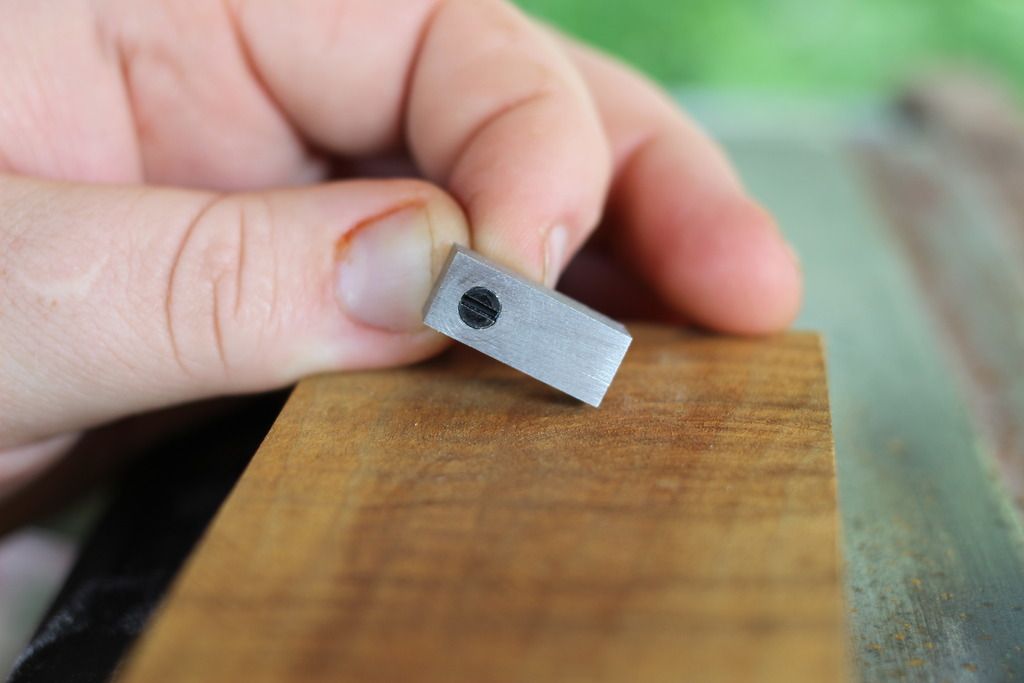
    next I drilled the screw hole. starting with 9/64" for the screw body and then 3/16" for the screw head.


    while that measurement was perfect for the stock Ruger screw, the head of the screw I got to use for this project ended up being slightly bigger. to fix this problem I chucked the screw up in the drill press, turned it on and used a file and fine grit sandpaper to take off some of the screw head diameter.


    Jesus gave me everything when he gave me salvation.
    CBOB0690

  2. #2
    Boolit Bub LSCG's Avatar
    Join Date
    Dec 2014
    Location
    Texas
    Posts
    31
    after Cutting the screw down I deepened the 3/16" hole to the proper depth for the screw.


    next I used a needle file to mark where the sight channel would go. I used a bandsaw to cut the channel and then used several different files to widen it so a sight blade would fit.


    Jesus gave me everything when he gave me salvation.
    CBOB0690

  3. #3
    Boolit Bub LSCG's Avatar
    Join Date
    Dec 2014
    Location
    Texas
    Posts
    31
    all throughout the making of the base and sight blade I was having to make adjustments in order to get it as close to perfect as possible. one of those adjustments was I ended up deepening the sight blade channel. this caused the screw head to stick up. to fix this I deepened the screwdriver slot and then shortened the screw head till it sat flush.


    next I used a 1/16" bit to drill two pin holes in the base.


    Jesus gave me everything when he gave me salvation.
    CBOB0690

  4. #4
    Boolit Bub LSCG's Avatar
    Join Date
    Dec 2014
    Location
    Texas
    Posts
    31
    once I got that done it was time to make the sight blade. again I decided to use the railroad spike. after cutting it out on the bandsaw I thinned it down using the belt sander.


    after tightening the sight blade into the base using a clamp I then drilled the holes though the sight blade.


    Jesus gave me everything when he gave me salvation.
    CBOB0690

  5. #5
    Boolit Bub LSCG's Avatar
    Join Date
    Dec 2014
    Location
    Texas
    Posts
    31
    I then squared the blade up with the base. and did a mock up. looking pretty good so far.


    Jesus gave me everything when he gave me salvation.
    CBOB0690

  6. #6
    Boolit Bub LSCG's Avatar
    Join Date
    Dec 2014
    Location
    Texas
    Posts
    31
    for the pins I took a wore out 1/16" drill bit and heated it up with a torch till the steel softened. I then cut the new pins and put a slight bend in them so they'd stay nice and tight during recoil.


    the blade was a little too wide so using the belt sander and hand sanding I was able to thin it down.


    rough cutting the sight and shaping it with files.


    Jesus gave me everything when he gave me salvation.
    CBOB0690

  7. #7
    Boolit Bub LSCG's Avatar
    Join Date
    Dec 2014
    Location
    Texas
    Posts
    31
    I used Birchwood casey super blue to blue it.


    unfortunately as I aim the gun I can see it's slightly crooked but I think with a little more tinkering I can get it straitened out.

    all in all it turned out better than I expected but only time will tell if it was worth the effort. sure looks good though.
    Jesus gave me everything when he gave me salvation.
    CBOB0690

  8. #8
    Moderator Emeritus


    MrWolf's Avatar
    Join Date
    Apr 2013
    Location
    NE West Virginia
    Posts
    4,902
    Always amazed at some of the ingenuity our members show. Good luck and keep us posted on the fine tuning.

  9. #9
    Boolit Grand Master pietro's Avatar
    Join Date
    Mar 2008
    Location
    New England
    Posts
    5,271
    .

    Nice work - the Gold Standard for sight making.

    .

Posting Permissions

  • You may not post new threads
  • You may not post replies
  • You may not post attachments
  • You may not edit your posts
  •  
Abbreviations used in Reloading

BP Bronze Point IMR Improved Military Rifle PTD Pointed
BR Bench Rest M Magnum RN Round Nose
BT Boat Tail PL Power-Lokt SP Soft Point
C Compressed Charge PR Primer SPCL Soft Point "Core-Lokt"
HP Hollow Point PSPCL Pointed Soft Point "Core Lokt" C.O.L. Cartridge Overall Length
PSP Pointed Soft Point Spz Spitzer Point SBT Spitzer Boat Tail
LRN Lead Round Nose LWC Lead Wad Cutter LSWC Lead Semi Wad Cutter
GC Gas Check