Around here, the AC would be running most of the time during the summer and when the compressor (either AC or air) starts up, there's a greater current draw. As such, I would put them on separate circuits.Originally Posted by Guardian


|
   
   
|


|


Around here, the AC would be running most of the time during the summer and when the compressor (either AC or air) starts up, there's a greater current draw. As such, I would put them on separate circuits.
Live fast, die young, leave a cute widow...

I use a home made tumbler and SS pins for the initial cleaning. Also, my vibratory tumblers have solid lids and I use mineral spirits and car polish in the media. Dust has not been an issue.
I am putting in a utility sink with at least a point of use water heater. Haven't decided between electric and propane yet. That mostly depends on what I decide to do for winter heat.
Had planned to use a wood stove for winter heat, but the double layer chimney will run me about $1500 in parts. I can do propane or electric cheaper in the near term. Long term, not so much. Something to be said for heat that turns on and off immediately, though.
Last edited by Guardian; 03-14-2016 at 10:34 AM. Reason: typo
WANTED: CH AutoChamp Mark IV, V, or Va - PM me if you've got one you'd like to part with.


Mike in OR: If you put the lid on your tumbler you won't have dust everywhere. Mine came off once so I know what you are talking about. I put a lock washer under my Wing Nut to make sure it doesn't come off. I run mine for 24 hours at a whack so it can happen.
Randy
"It's not how well you do what you know how to do,,,It's how well you do what you DON'T know how to do!"
www.buchananprecisionmachine.com
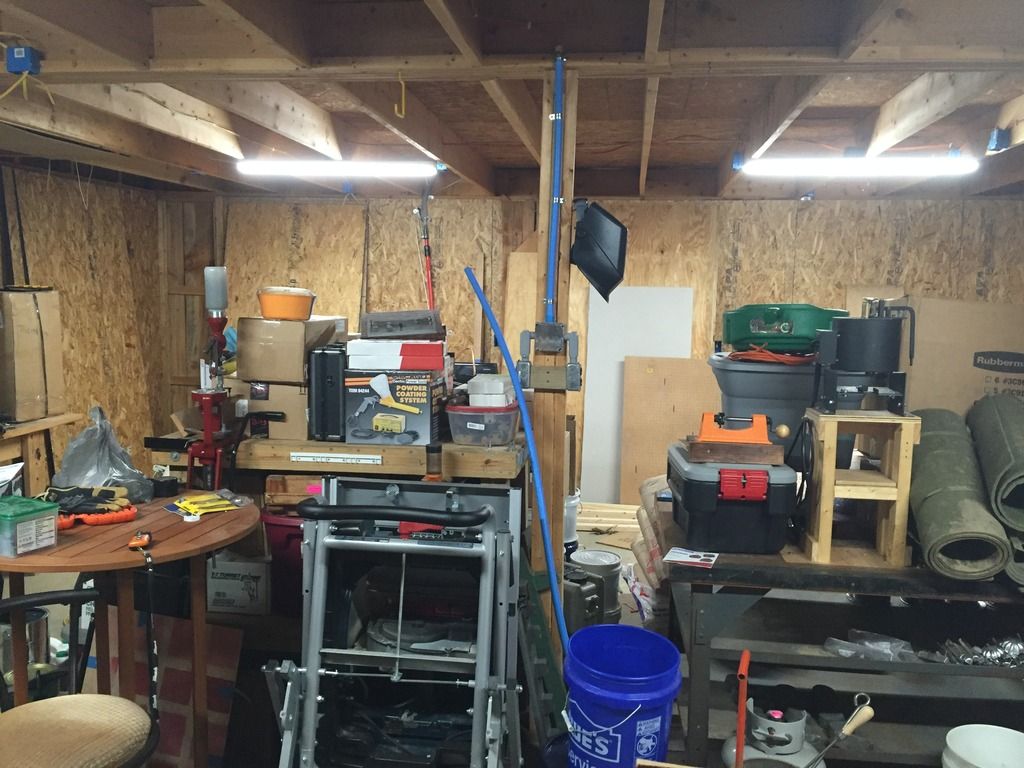
Got two security lights added....terrible photo, but you get the idea.
Picked up insulation and 7/16 OSB for the walls this weekend. This is the wall that the reloading benches will be on. Studs are 24-in OC, so there's a section that has a lot of outlets for the length. Again, not a great photo of the first insulation panel installed, but I didn't feel like opening the front doors to get a better photo.
The OSB panel on the left of the photo has to come down to do insulation. There's another one to the right, just outside the photo. Both are nailed in, so I'll destroy the panels in the removal process. The sink will go to the right, adjacent to the front doors, as it's easy enough to get the water routed into there. It'll just have to come up the outside wall and then penetrate.
I decided to surface mount the propane piping. It was going to be too much trouble to get black iron pipe into the studs, though possible.
WANTED: CH AutoChamp Mark IV, V, or Va - PM me if you've got one you'd like to part with.

Might want to run tubing from the air compressor to the reloading room, and have outlets every six feet or so. I did that at my place in Colorado, maybe 8 outlets in the shop. Made it real nice to not have to drag hose. And, I ran an outlet outside near where we parked to make it easy to air up tires and such. I miss that place.
That is in the plans, but will be surface mounted. I didn't want to have to tear the wall open if there was an air leak. The plan is to put the compressor out back so I don't have to listen to it, but that will be a later venture. I need to pour a pad for it and enclose it (nevermind getting the compressor).
WANTED: CH AutoChamp Mark IV, V, or Va - PM me if you've got one you'd like to part with.


My loading room is 10'X16'.
I have two 10' benches. One at each end.
You can never have enough bench or shelf space.
I have more floor space than needed....dale
How about mounting a hose reel in the ceiling? Remember to put a slope in the air lines (and a ball valve at the end) to be able to drain moisture from the line.
Looks like you are making great progress.

I had intended to tell you to do a complete make-up of your incoming and out-going romex circuits and 'pigtail' for all your 'devices'…now after seeing the pictures…I think you know what your doing in that arena…it looks as if it will pass inspection without a hitch.
Very nice and neat rope work there…it says everything to me about your other skills.
Keep us posted with pictures…OS OK
a m e r i c a n p r a v d a
Be a Patriot . . . expose their lies!
�In a time of deceit, telling the truth is a revolutionary act.� G. Orwell
dudel, Thanks for that bit about sloping the lines. Hadn't thought about it, but will be sure to incorporate it. I do plan on installing a reel in the ceiling, but was planning that for the non-reloading bay where it wouldn't be as apt to get hung on presses and such. I could hang one on each isle and then it wouldn't be draped over a bench. Honestly, I haven't used air with the reloading stuff much in the past. I usually prefer to use the vacuum if I'm cleaning.
OS OK, Thanks for the compliments. I need to take photos of all the walls before I close them up just to remember where wires run in the future. Fortunately, wire color is a big help. Orange is 10 gauge new outlets (some 10/2 and some 10/3). White was existing 12/2. Yellow is lighting 12/2. Black is 6/3. Of course, when I need the info, I'll have to find the photos.
WANTED: CH AutoChamp Mark IV, V, or Va - PM me if you've got one you'd like to part with.
Good point. I use much more vacuum than compressed air in the reloading area. For compressed air, a couple of cans of compressed air for computers are just fine. Also don't have to worry about the moisture content.
Having run lots of compressed air lines, consider using copper instead of PVC. Copper tends to have a cooling effect and will drop the moisture out of the air quicker.
Get a free catalog from TIP (http://www.tptools.com/Air-Line-Hookup.html) Lots of good ideas on plumbing for compressed air. For example orient the "T" fittings with the center up. That way water won't drain into the line.
dudel, The orientation of fittings in another good point. I'd forgotten that. I've never seen copper run for air lines, but the premise makes sense. Why not just have a dryer between the tank and building? Would that not solve the problem?
I assume we're talking mechanical fittings (flared fittings) as opposed to sweated fittings. No way I'd trust a sweated fitting at an air pressure of 150+ psi.
WANTED: CH AutoChamp Mark IV, V, or Va - PM me if you've got one you'd like to part with.
A dryer would help; but even with my dryer, I would still find water at the end of a run. A larger (read $$$) dryer would have undoubtedly done a better job. You want the dryer to do significant cooling to get the vapor out of the air. Copper just helped with the cooling.
I did sweat (solder) the fittings on. No problem at all running 175psi air (though normally it ran at 150psi). Just make sure you get both parts good and clean. Inside/outside wire brush worked for me.
I started with the Island Concept about 5 Years ago. . This was Modeled after working in The printing Industry all my life. .Island maximize space Leaving wall for supply and Other stuf. . mine are mounted on stell Tables . Mounted to cement floor appox 36" wide x 96 long . . . I have 2 But still running out of space
NRA Endowment Member
International Ammunition Association
New York, the Empire State Where Empires were Won and Lost
Islands allow for dedicated work areas in production that do not require so much cleaning up and storing of equipment…I did not say don't clean the mess. You can run parallel operations too.
You can make a 'type of island' just by adding a 'T' to your existing work bench. Imagine how you 'would like' to do things and go from there.
a m e r i c a n p r a v d a
Be a Patriot . . . expose their lies!
�In a time of deceit, telling the truth is a revolutionary act.� G. Orwell
The island will definitely happen...eventually. I've got too many operations that I'm trying to cram into a relatively small space to do otherwise. Swaging, in particular, is one of those things you don't want to disturb once you've got it set up. I also like operations in separate areas. If I can't leave something set up on the bench, it's taking up storage space for something else. I get bored doing the same thing for extended periods of time, so multiple stations allows me to switch between things to prevent it becoming a chore.
The T bench idea has me considering short trunks, maybe a foot, off the main wall to have more defined stations. I don't know if that would prove cumbersome, though. I can only imagine how bad I'd cuss myself the first time I catch the corner into my side while moving from one to another.
Here's a general idea:
The squares represent 6-in and the whole thing is approximate, at best.
WANTED: CH AutoChamp Mark IV, V, or Va - PM me if you've got one you'd like to part with.
Making some progress on the reloading room.
West wall half done. The yellow thing in the left box is half of this contraption: http://www.homedepot.com/p/Blind-Mar...BMWK/100529468 I accidentally discovered them, but they save a lot of time. I'm using a rotozip saw to cut the OSB. I've had a few that I trimmed a little too much off of and had to use shims under the outlets to keep them flush with the wall, yet secure. Overall, I highly recommend the kit.
Back wall electrical run. The orange cable is 10-2 and the white is 12-2.
Framed for PTAC in the back wall. Note the wire connected without a box was a temporary condition so I could run a saw. A junction box was installed later.
OSB up on most of the back wall. Note the box high on the wall. That's where the temp splice ended up, intentionally. I'm planning to use that as a spot to plug in audio equipment. The interior of each box has the circuit number written in it with a marker for ID later.
West wall mostly done. Corner on the left is waiting on plumbing to be done. I'm having to work around all this stuff in the foreground. The outlets in the center of the room are on their own circuits
I'm currently working on installing blocking between the ceiling/floor joists, insulating the ceiling, and installing the ceiling OSB. The joists are 2x10s, but actual width varies between 8-3/4 and 9 inches. I guess they just dried out and shrank. I bought 2x10s to use for blocking, attempting to stiffen the floor above, but I'm having to rip them so they don't stick out beyond the joists. I've about decided to just buy 2x8s to use for blocking and avoid the hassle of ripping every 2x10.
Take the time now to roll a sealer on the chip board, even inside it will dry and start to flake up on the edges, it'll turn an ugly flat color also if not sealed.
I know it's a little late now, but we seal ours front and back with a quick rolling job before we install it.
Sure is nice work you are doing. Something that plagues me is this...right before closing all the walls, I look around and think..."What am I forgetting?"... I always worry about that part, I worry too much too!
a m e r i c a n p r a v d a
Be a Patriot . . . expose their lies!
�In a time of deceit, telling the truth is a revolutionary act.� G. Orwell
Looks great Guardian. I like those little yellow boxes. Gonna have to get a set.
OS, I had the same feeling till I started setting the chipboard/osb/sheetrock with screws. A screw setter keeps the screw from going too deep.
If I need to get back there or I punched a board through the wall, I just unscrew and replace. I could never hit the right spot with the nailer anyways!
OS OK, I'm intending to do a coat of something on the OSB when I've got it all hung. I've got a Titan 440i airless sprayer, so I'm hoping it will go fairly quickly. I haven't decided on what to apply yet. I've got an 80 grit Osborne brush on a polisher that I plan to use to remove the stamps and other markings on the OSB and to promote adhesion of whatever coating. Part of me wants to stain it. Part of me says just clear it. Another says paint it white. What would you go with and why?
I'm also planning to put 1x4s over the OSB joints, at least the visible ones. Overkill? Yeah, but it just as well be something I like looking at.
Like Dudel said, I'm using screws on the OSB. I've cussed the folks that built the barn in the first place for nailing what OSB was in here before. Most of it got ruined while trying to get it off the wall. I'm using concrete board screws due to the wide head. It's tough getting them flush, but the 1x4s will cover 'em anyway. Might take a little persuasion for the 1x4s to lay flat...but I've got big enough hammers.
Dudel, I've been temporarily hanging the OSB to mark the outlets and then pulling it off to cut the holes. The maker of the tool shows use while the paneling or sheetrock is hung, but I was worried about cutting something I didn't mean to. I've found using a chisel tip marker turned wide works well and if I just barely leave an edge of marker showing the fit is near perfect. It likely depends on the brand and type of boxes one is using, though. I started using PVC boxes and decided I didn't like the flimsiness of them. Everything I've put in since has been fiberglass, except for the two outlets in the center of the room that are in steel.
I KNOW where my tools are.....as long as someone doesn't move them.Wife thinks tools should be put up every day. I think they should be put up at the conclusion of the job. It drives both of us nuts. Since she doesn't have to see the inside of the barn everyday, she's allowed me to do it my way. I only get fussed at when she needs said tool for a project in the house and can't find it.
Last edited by Guardian; 07-20-2016 at 04:42 PM.
WANTED: CH AutoChamp Mark IV, V, or Va - PM me if you've got one you'd like to part with.
 Posting Permissions


| BP | Bronze Point | IMR | Improved Military Rifle | PTD | Pointed |
| BR | Bench Rest | M | Magnum | RN | Round Nose |
| BT | Boat Tail | PL | Power-Lokt | SP | Soft Point |
| C | Compressed Charge | PR | Primer | SPCL | Soft Point "Core-Lokt" |
| HP | Hollow Point | PSPCL | Pointed Soft Point "Core Lokt" | C.O.L. | Cartridge Overall Length |
| PSP | Pointed Soft Point | Spz | Spitzer Point | SBT | Spitzer Boat Tail |
| LRN | Lead Round Nose | LWC | Lead Wad Cutter | LSWC | Lead Semi Wad Cutter |
| GC | Gas Check |

 Reply With Quote
 W.R.Buchanan