This is a copy of a modern Shirley action, I am trying to post a few things and it is a learning curve, Thanks oldred

|
   
   
|


|


From a distance, it "shirley" looks like a Ruger No. 1 action, barrel, quarter-rib, etc.
Got any close up pictures of the action?
The barrel is Ruger .375 h&h, the action is from bar stock, Quarter rib is home grown and the sights also, it is a striker firing system, check the publication "The British Falling Block Breech Loading Rifle" by Jonathan Kirton, I have a series of pics of the build, but I'm new to this posting thing, I'll try my best, Thanks Bill T.


Well from what we have seen so far it's darn sure going to be worth the wait!Originally Posted by Billthomas


Although I have none of your talent, I would love to see pictures of your build as I find it fascinating.
"Is all this REALLY necessary?"
"Longest journey starts with the first step" One day I'll post my first attempts and everyone will weep at the waste of metal, I had two friends that were interested in doing a rifle build, neither had any experience, yet both built decent high walls, you just have to jump in. Thanks, Bill T.
I'm impressed and a bit envious.
I would love to build a rifle like that for myself.
Never worry about theory as long as the machinery does what it's supposed to do.
RAH
That's what I have been telling folks also, the two highwalls I did were my first attempts and both were done on a 14x40 lathe using a home made milling attachment since I didn't have a mill then (I have since acquired a Taiwanese built BP clone). I used photos and hand drawn sketches of a disassembled original that was available to me but since then I have discovered the really good plans set sold on E-Bay for around $30 if anyone is interested, I have a buddy who bought the plans and so far they have been excellent. My plan was simple, take my time and build each part as close to perfect as practical and when they were all built it should fit together and become a rifle, well of course it really wasn't that simple but the basic principle worked well for me and I'm sure it could work well for others.
There is a simple tool for tracing the parts if you have them, its only a 3\8 dia. rod cut off on a bias that leaves a sharp point, place in a drill press mount the part on an aluminum sheet that has lay out blue carefully bring point into contact turn on spindle and profile, detail the sharp corners and voila! A hint to anyone building a high wall, when you machine the finger lever leave a 1\2 in. sacrificial piece on the small end, it lets you bolt it down and stops the vibrations and gives you more control. Oldred, you did a fine job with only a lathe, I would like to see a pic of that milling attachment. Bill T.
Unfortunately since I bought the mill I have given away the attachment but basically it was a small milling table I bought from Enco with the center section removed, that is I mounted the table itself directly to the base eliminating one axis. This was then attached to a heavy angle plate that was bolted to the cross slide, this setup gave me access to all axis was surprisingly rigid so when used with R32 collets for the end mills it really worked quite well.
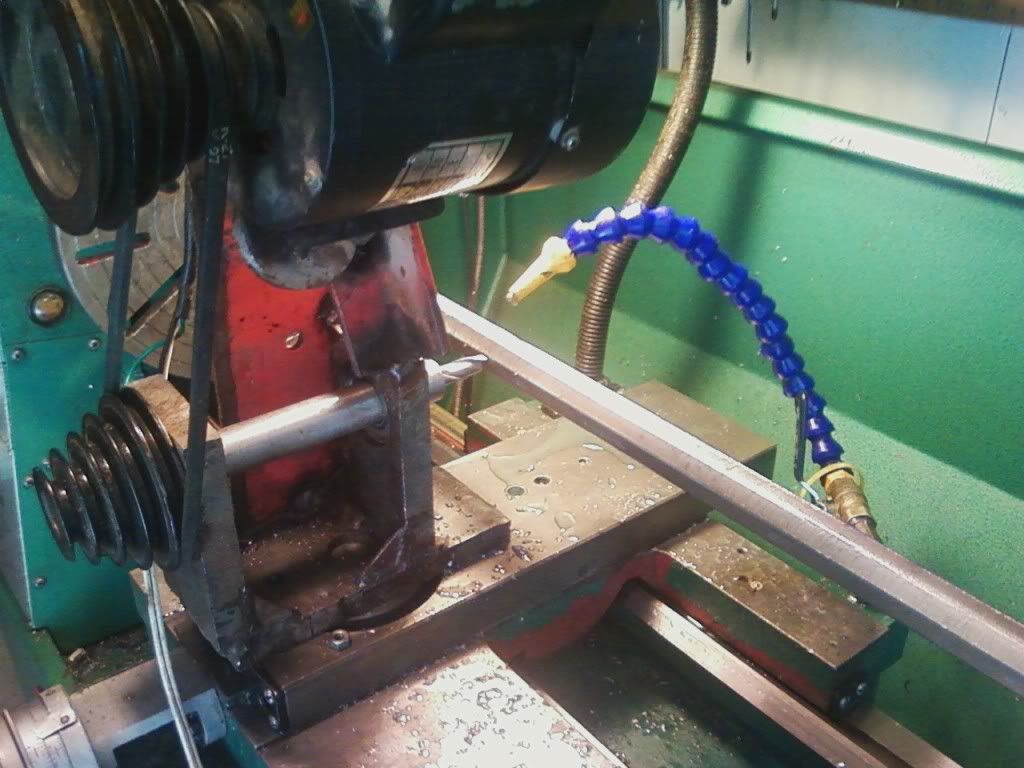
Another home made tool I used was what I jokingly call my "tool post mill" which was basically a jackshaft in a heavy plate frame with a holder for a 1/2" end mill driven by a 1/3 HP motor, this was mounted in place of the tool post. The centerline of the shaft, and thus the end mill, was aligned with the centerline between centers of the lathe and this rather comical setup was used to mill the octagon barrel for the 45-90 rifle from the 2.270" Green Mountain round blank. With that long barrel mounted between centers chatter was a problem at first but this was expected, I simply played with speeds and feed rates to solve that problem.
This is a pic of what I used to contour the barrel, and BTW there WAS a guard over those pulleys when that thing was running.
I am curious, how do you contour the receivers? I did mine with files and stones but while this is time consuming I also found it to be one of the most enjoyable parts of both projects.
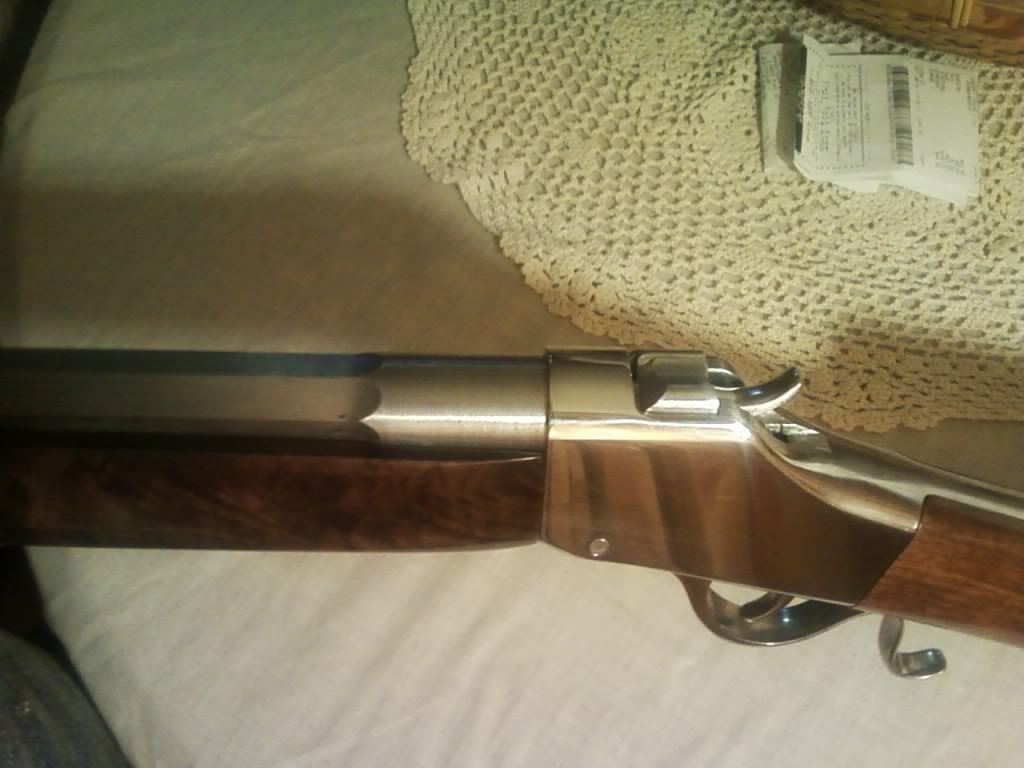
Still in the white after filing/buffing,
I love it, That is as slick as it gets, did you see that in a book or was it a case of sudden flashing lights? I'm definitely making one. I made a cutter from 0-1 tool steel for the stock socket and it works, the first try I used the lathe face plate. The receiver contour needs a cutter made, something simple, now I just 45 the edges on the mill. I screw a short bar in to the barrel threads clamp it in the vise at any position I need and sort of free hand it then finish with a file. Bill T.
More like a case of desperation! I needed a way to contour the barrel and a good deal on a mill hadn't been found yet, the ones I had found were either dilapidated or over priced and sometimes both so I decided to rig up something. I now have a Taiwanese built BP clone that's in great shape so the next barrel I do should go much quicker and easier, that mill sure makes life a LOT simpler!
Don't mean to hi-jack the thread but I am making a milling attachment for my 12" atlas-clausing lathe and intend to use a drawbar for end mill cutters. This is all new to me so any advice on the setup??? THANKS LB
If you are needing help deciding on what type of collets to use then something like this works pretty good,
http://www.ebay.com/itm/10-Pc-ER25-S...item540e67c8b8
This is the type of setup I used and I was quite happy with it, all you need to do is get one with the right taper for your lathe.
Thanks, maybe I can hack out a few small parts.
I think with a bit of patience and determination you can do a lot more than just hack out a few parts, while a mill is certainly a major improvement a milling attachment on a lathe can do a heck of a lot more than some might think. How is the attachment made, does it have a slotted table or is it just a vise attachment?
It is a factory milling attachment with no vise. I will have to make an adapter for a vise. Broke off a HARD Chinese 1/16 drill in it last night..... still trying to drill that out. LB
When I was experimenting with a couple of different ideas I tried a vice type arrangement and found it way too limiting, a slotted table allows nearly as much flexibility as a real mill. Of course the vise is not only useful but it's a necessity sometimes however there are so many set-ups that require clamping to a table that the vise alone is just not enough. I used a small milling table from Enco and removed the center section and just attached the table directly to the base section, this eliminates one axis but that is replaced by using the cross slide. With the slotted milling table just about any set-up is possible, it's a bit of a pain trying to set up in a vertical position like that but once the set up is accomplished it works quite well.
You have my attention on this setup- any pictures?
Sorry but as mentioned in another post I gave it away after I finally got my mill.
Wow, those things have gone up since I bought mine, it was only $89 plus I had a 30% discount offer. Even at the new price they are well worth it, just remove the center section and slide the table back onto the base. Enco often has 20% and sometimes even 30% discount offers and these are even occasionally combined with free shipping, they had a 20% off plus free shipping with no minimum order only about a month ago.
http://www.use-enco.com/CGI/INSRIT?P...&PARTPG=INLMK3
I think they have even a smaller one but IIRC it was too tall, if it stands out too far from the angle plate then flex and thus chatter become a problem. This one however is rather low profile and mounted to the 3/4" thick angle plate I used chatter was not a problem, the backlash is rather excessive but backlash is something that has to be considered with any small mill and must be worked around.
 Posting Permissions


| BP | Bronze Point | IMR | Improved Military Rifle | PTD | Pointed |
| BR | Bench Rest | M | Magnum | RN | Round Nose |
| BT | Boat Tail | PL | Power-Lokt | SP | Soft Point |
| C | Compressed Charge | PR | Primer | SPCL | Soft Point "Core-Lokt" |
| HP | Hollow Point | PSPCL | Pointed Soft Point "Core Lokt" | C.O.L. | Cartridge Overall Length |
| PSP | Pointed Soft Point | Spz | Spitzer Point | SBT | Spitzer Boat Tail |
| LRN | Lead Round Nose | LWC | Lead Wad Cutter | LSWC | Lead Semi Wad Cutter |
| GC | Gas Check |

 Reply With Quote