RotoMetals2Snyders JerkyLee PrecisionMidSouth Shooters Supply
Load DataReloading EverythingWidenersInline Fabrication
Repackbox Titan Reloading
Page 1 of 2 12 LastLast
Results 1 to 20 of 21

Thread: Drilling out lubegroves?

  1. #1
    Boolit Mold
    Join Date
    Mar 2012
    Location
    Scandinavia
    Posts
    23

    Drilling out lubegroves?

    As title says.

    Got a Lee ,452-228-1r that has given me 10.000+ good boolits for my S&W 625.
    want to drill out most of the lubegroves as I'm currently coating instead of lubing.

    Hope to gain: Less banging to make the boolits drop.

    Fear of destroying my favorite mould holds me back.

    thought I'd Clamp the mould in a drill press, fill the cavity i posision with oil and carfully drill out the rearmost grove.
    blow away oil and chaff and repeat for next lubegrove.

    Opinions?
    Other ways to fix this?

  2. #2
    Boolit Grand Master

    Join Date
    May 2005
    Location
    Castlegar, B.C., Canada
    Posts
    7,941
    Ben has successfully drilled out gas check shanks on several moulds and has gotten excellent results but... I would be more inclined to use a reamer. If you set up very carefully and take it slow with a nice sharp drill bit you should be okay based on Ben's results.

    I would ask why you want to drill out the lube grooves in the first place. The lube grooves should not adversely affect powder coating so why not leave the mould alone?

    If you are having trouble with boolits not releasing easily a little Leementing should fix that. A properly Leemented mould should drop boolits easily. Read about Leementing here:

    http://castboolits.gunloads.com/show...ture-diameters

    Longbow
    Last edited by longbow; 07-09-2014 at 07:45 PM. Reason: Spelling

  3. #3
    Moderator Emeritus / Trusted loob groove dealer

    waksupi's Avatar
    Join Date
    Mar 2005
    Location
    Somers, Montana, a quaint little drinking village,with a severe hunting and fishing problem.
    Posts
    19,379
    Sounds like you just need to tune up your mold if they are sticking.
    The solid soft lead bullet is undoubtably the best and most satisfactory expanding bullet that has ever been designed. It invariably mushrooms perfectly, and never breaks up. With the metal base that is essential for velocities of 2000 f.s. and upwards to protect the naked base, these metal-based soft lead bullets are splendid.
    John Taylor - "African Rifles and Cartridges"

    Forget everything you know about loading jacketed bullets. This is a whole new ball game!


  4. #4
    Boolit Master kywoodwrkr's Avatar
    Join Date
    Mar 2005
    Location
    Hodgenville, KY-Lincolns Birthplace
    Posts
    981
    After you drill, ream or whatever, you will still have to some of the steps outlined in link above.
    Why destroy a work horse of a boolit mold to go where, well, where I'd not go unless I had access to a good mill.
    If you can't get the mold to drop after reviewing and using a above link, I'd think you'd have as much or more of a problem trying to de-burr it from the drilling, reaming etc.
    Just my humble thoughts on this.

  5. #5
    Banned

    Blammer's Avatar
    Join Date
    Feb 2007
    Location
    Asheville, NC
    Posts
    10,427
    Personally, I would leave the mould alone, buy another to monkey with.

    IF you do go back to lubing, you know you have a good mould already.

  6. #6
    Boolit Master
    texassako's Avatar
    Join Date
    Jul 2012
    Location
    North Texas
    Posts
    2,038
    I was kind of thinking about the PC crowd when I saw them the other day. Why not get one of the $17 Lee closeouts of the same mold cut with shallow grooves? http://leeprecision.com/new-mold-dc-...be-groove.html . .0075" deep lube grooves is pretty close to slick sided.

  7. #7
    Banned

    Join Date
    Dec 2007
    Location
    soda springs Id.
    Posts
    28,088
    if you do try it I'd be inclined to make my cut's undersized.
    you may not get all of the groove out but you won't change the mold's shape either. [read jack it up]
    by going undersized and compensating for the presses run out it allows you to clean up the rest of the way by lapping.
    of course lapping would remove the sticking issue too

  8. #8
    Boolit Mold
    Join Date
    Mar 2012
    Location
    Scandinavia
    Posts
    23
    Thank You all for quick replies.
    I'll lap it.

  9. #9
    Banned
    Join Date
    Nov 2010
    Location
    Casa Grande, AZ
    Posts
    5,526
    Just keep the mold as is and buy a new one. You stand a good chance of wrecking your mold and ending up with junk.

  10. #10
    ADMIN


    HATCH's Avatar
    Join Date
    Sep 2008
    Location
    Lexington, SC
    Posts
    6,716
    I would think that you would want the lube grooves as it means less resistance when the boolit travels down the bore.
    Or I should say you would at least thing that. Lube grooves mean less surface area that touches the bore.
    On the other hand, you could also say that you would end up with a more accurate boolit with no lube grooves because you would have full contact with the bore.

    I prefer not to remove the lube grooves from my molds even though I intend only to coat from now on out.
    The reason is that coating may be in the "in thing" today but it may change tomorrow.
    Don't like being hammered by the Cast Boolits Staff, then don't be a nail.
    The rules are simple to follow.

  11. #11
    Boolit Grand Master

    MBTcustom's Avatar
    Join Date
    Feb 2011
    Location
    Arkansas
    Posts
    6,994
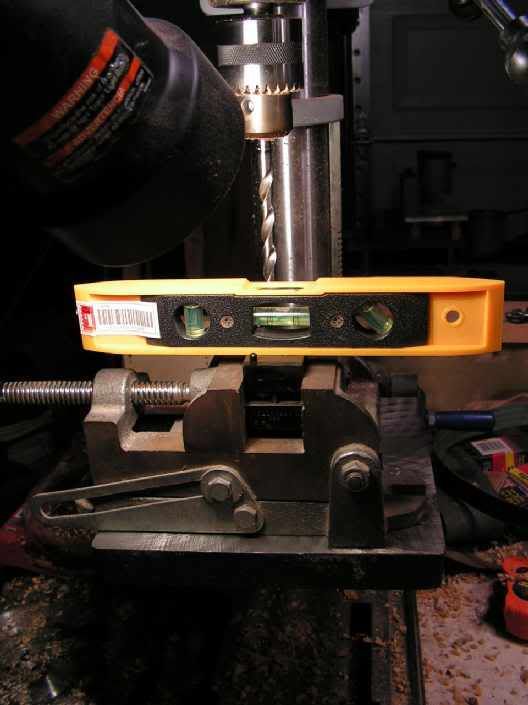
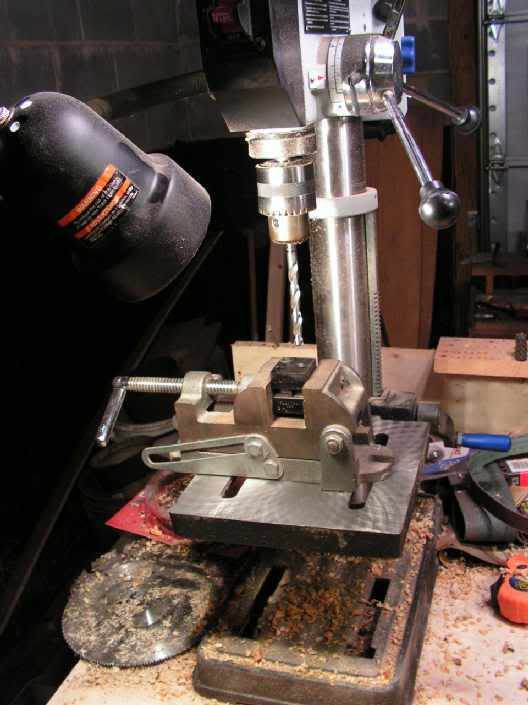
    If you are going to do this, the right way is to use a chucking reamer. Your drill press is satisfactory if you have a stop on the spindle.
    What you have to do is get the reamer and stick it in the chuck (leave the mold on the bench for the moment).
    Adjust the table/stop so that the tip of the reamer is over the table.
    Make fine adjustments until you can touch a piece of paper on the table with the tip of the reamer.
    Play with the spindle until you can touch the paper in the same way every time (slide the paper around under the tip of the reamer to feel how much resistance you are exerting.)
    Once you are confident that you have the feel of it down pat to where you can stop exactly the same every time, then take one of your mold blocks and set the stop/table so that when you are exerting that specific amount of pressure the reamer is stopping just shy of the last driving band.
    Put the blocks together and clamp them.
    Set the drill press to about 200-500 RPM.
    Soak the reamer and hole you are reaming with WD-40 (one of the things it really excels at is being a cutting lubricant for aluminum).
    Hold the mold tightly, but allow it to float as you press the reamer into the cavity. Remember to use the "feel" you learned before with the paper.
    Repeat with each cavity till the job is done, and remember that cleanliness is next to Godliness when doing jobs like this. You want mold blocks, a reamer, and WD-40 in that hole, and no chips from the previous hole when you start each cut.

    The reamer you need is a 29/64" chucking reamer, and can be found on ebay for about $15 delivered to your door like this one:
    http://www.ebay.com/itm/NEW-CHUCKING...item485c261c65

    You can screw anything up if you go about it in a haphazard way and use substandard tools, but if you put your aces in their places, you can almost get away with murder with a standard drill press.

    PM me if I can be of assistance. (If I don't answer, PM me again. I get a lot of PM's and I've lost a few recently.)
    Last edited by MBTcustom; 07-10-2014 at 08:35 AM.
    Precision in the wrong place is only a placebo.

  12. #12
    Boolit Grand Master

    Join Date
    Mar 2013
    Location
    Northwest Ohio
    Posts
    14,566
    I agree with Goodsteel on his methods and set up. Also Beeswax is also a great cutting lubricant for aluminum. Work slow and easy with this. Reamers like slow rpms and heavier feeds. I would do this by hand instead of under power of the spindle. Use the drill press as a reaming stand and turn the spindle by hand. Make sure the table is square to the spindle. Make sure the spindle is set accuratly. Une a cant twist clamp or parrallel clamp to hold the mold so it isnt cocked or skewed when clamped together. C clamps are notorious for twisting and cocking when clamping things

  13. #13
    Boolit Grand Master
    Ben's Avatar
    Join Date
    Apr 2005
    Location
    Cleveland, AL
    Posts
    9,258
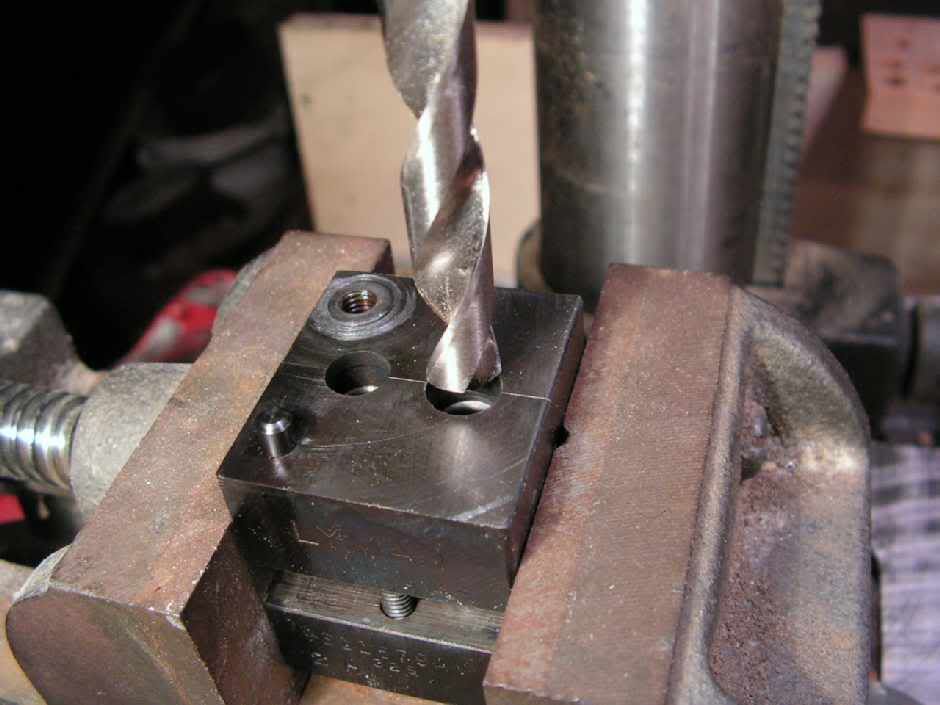
    Would be nice if you had a vise to hold the mold blocks .


  14. #14
    Boolit Master
    Join Date
    Dec 2010
    Posts
    2,139
    I removed a check shank from an RCBS mold a while back using a .3115 reamer. (Press fit 5/16)
    I did it in a Craftsman drill press but I'll admit, I never turned the power on.
    Cutting oil 'o' plenty and opened the top to the drive belt. Turned it by hand. Took me about 15-20 minutes maybe.
    There was a VERY sublet step from the original bottom driving band and the new one I cut. Running it through a .311 sizer removed it and you cannot tell it wasn't cut that way.

    Its doable but but I wouldn't attempt it with a drill bit. Two cutting flutes and the relief angle of a drill bit make that sucker wanna CUT. A reamer is much more gentle and makes a much smoother cut. Reamers are available in any size you can imagine.
    Heres a .452 HSS on amazon for $30.

    http://www.amazon.com/0-452-Chucking.../dp/B005RG7OF6

  15. #15
    Boolit Grand Master

    Join Date
    Apr 2008
    Location
    Phoenix, Arizona
    Posts
    6,213
    You could order a mold from Kaine molds in smooth sided.

  16. #16
    Boolit Grand Master

    Join Date
    Mar 2013
    Location
    Northwest Ohio
    Posts
    14,566
    Reamers are available in .001 increments. Drills 1/64" increments Standard metric are .5 or so millimeters, letter sizes, and number sizes. You can ussually find what you need in there. Drills can also be "adjusted to cut a slightly diffrent size by angles and centers of the cutting points. I was spoiled at work with cutter grinders and cnc cutter grinders. We made drills and reamers as needed for special jobs and cutter grind also serviced production.

  17. #17
    Boolit Grand Master

    MBTcustom's Avatar
    Join Date
    Feb 2011
    Location
    Arkansas
    Posts
    6,994
    Quote Originally Posted by bangerjim View Post
    I have MANY "non-standard" sized reamers too, but the standard chucking reamer set, one of which I have and use regularly, is 1/64 increments. You will spend more on a custom non-standard reamer than a new mold will cost!!!!!!!!!!

    There are other styles called "adjustable" reamers which have 6 long blades that can be moved in or out very accurately in extremely small increment for non-standard size holes. I have a set of those and come in VERY handy! But they have a big nose where one of the adjustment nuts is and would NOT work in a bpoolit cavity.

    Bottom line........just buy a new NLG mold!

    banger
    Hey Jim, its not that big a deal. Did you see the .4531 reamer I linked that could be delivered to your door for $15?
    I don't know where I could get a mold for $15 delivered.
    Your opinion is that it shouldn't be done. Others here have done it.
    State your opinion and let the OP decide.
    It really boils down to the OP's proficiency, and how comfortable he is with his tools.
    Precision in the wrong place is only a placebo.

  18. #18
    Boolit Grand Master
    Ben's Avatar
    Join Date
    Apr 2005
    Location
    Cleveland, AL
    Posts
    9,258
    State your opinion and let the OP decide.
    It really boils down to the OP's proficiency, and how comfortable he is with his tools.

    Sounds like some real good advice .

    Ben

  19. #19
    Boolit Master yondering's Avatar
    Join Date
    May 2008
    Location
    NW Washington State
    Posts
    1,519
    What goodsteel posted is how I do it as well. A 29/64 reamer is perfect for 45 pistol molds. I've found that the small amount of play in a drill press quill is a good thing in this case; it allows the reamer to self-align, following the existing hole within a thousandth or so.

    I don't like using a drill bit as much as a reamer for this kind of thing, but it can work. I run a reamer slow speed, and high feed rate, and do the opposite with a drill bit (for drill bit reaming), high speed and moderate feed. Is that what you do Ben?

  20. #20
    Boolit Grand Master
    Ben's Avatar
    Join Date
    Apr 2005
    Location
    Cleveland, AL
    Posts
    9,258
    yondering :

    Yes, that's pretty much it.

    I keep having people here on the forum tell me ........ " It can't be done."

    I keep doing it. I continue to have success.

    Go figure............

    Ben

Page 1 of 2 12 LastLast

Posting Permissions

  • You may not post new threads
  • You may not post replies
  • You may not post attachments
  • You may not edit your posts
  •  
Abbreviations used in Reloading

BP Bronze Point IMR Improved Military Rifle PTD Pointed
BR Bench Rest M Magnum RN Round Nose
BT Boat Tail PL Power-Lokt SP Soft Point
C Compressed Charge PR Primer SPCL Soft Point "Core-Lokt"
HP Hollow Point PSPCL Pointed Soft Point "Core Lokt" C.O.L. Cartridge Overall Length
PSP Pointed Soft Point Spz Spitzer Point SBT Spitzer Boat Tail
LRN Lead Round Nose LWC Lead Wad Cutter LSWC Lead Semi Wad Cutter
GC Gas Check