You're quite welcome, moose0011, and welcome to paper patching! You're quite right, a few photos would go a long way toward de-mystifying the details. I'll see if I can post some to help. . . . . Okaaaaay, the cell phone photos are stinko, but I may be able to borrow a real camera and post something proper.
Here goes:
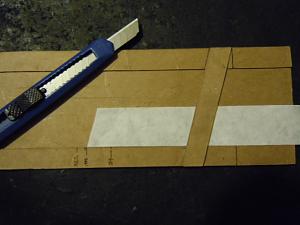
First the patches are cut. For the purposes of this demo, it's plain butcher paper going on a 320 gr. smooth sided .40 cal for a Schutzen rifle.
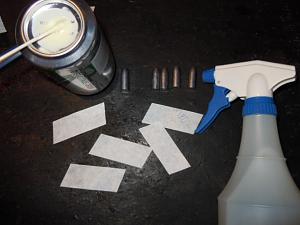
Patches, boolits, spray bottle with water for the patches, and white glue thinned just a touch with water and a swab to apply it with.
A note about drafting vellum. It has sizing on it and will feel slightly slippery when first wetted. I cut my patches and drown them in a cereal bowl of hot tap water, swirling them around a bit to remove the sizing. This also loosens the fibers a bit and facilitates stretching. I once experimented to see just how far I could stretch a patch for a .380 diameter boolit and managed about .080" before they started to tear. The degree of shrinkage on drying was considerably enhanced and it was possible to run them through a Lyman lubri-sizer and lube the grooves in the patch. That's more work than I'm willing to do as a matter of routine, but this kind of durability sold me on 100% cotton vellum and I haven't been disappointed since. My vellum patches are generally cut some .040" short and I roll them on a soft surface to tighten them until the ends meet the way they should. It makes for nicely fitted and tight patches.
I wet butcher paper patches by spraying both sides with water for a not-entirely-soaked texture. This preserves some toughness and the wrap commences. I usually hold it in my hands to wrap, but couldn't take pictures at the same time, so what you see is the how the wrap begins. This direction is for rifling with a right-hand twist, to get the seam to cross a land or lands like an X and ensure a good gas seal. With good obturation, it's not a disaster if the seam runs parallel to the rifling, but just to remove the possibility of seam leakage and burned patches from the equation, it's best to wrap it opposite the rifling's twist. For a pretty boolit, bragging rights and giving the impression you're an old hand at this, keep the leading edge of the patch aligned as you wrap it. With a little practice, they'll look machine perfect.
Once wrapped, lay it on a soft surface like an old phone book, rubber matt and roll it with your hand applying some pressure to tighten the patch. Check it and see if the edges of the patch are touching. If you're PATCHING to final diameter, it's best to have a smidgeon of gap rather than an overlap. An overlap will conspire to hold the boolit to one side in the case, possibly starting it down the barrel off-center. A small gap (010-.030") won't cause it to be off center and will cross a land anyway and obturation will seal it on firing. I prefer to SIZE to final diameter which irons any small overlap into the boolit surface and it's surface is smoothly cylindrical. True, such an indentation moves the boolit's center of gravity ever so slightly off it's center of geometry, but the error is mathematically insignificant, decreasing further as boolit diameter increases. When patching .224's, it may well make a difference, but .458's, probably not. I avoid overlaps on principle, but I've not been able to notice a difference in scores.
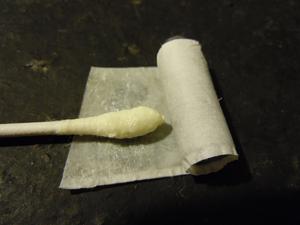
Lift the end of the patch and swab the last 1/2 to 3/4" (about as far as you see the swab reaching onto the patch) with white glue thinned with a few drops of water, like thin model paint, easy to wipe on and not thick and goopy. Not much is needed, but gluing down the corners are important. It's annoying when they are loose and want to get folded over when seating them in the case or when chambering. Roll the boolit to squeeze out any excess and set aside to dry.

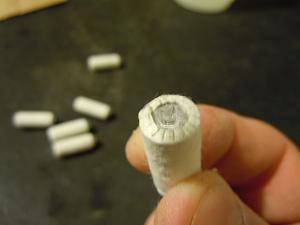
These five are positioned to show the seams. I marked one so it was obvious - as you may have guessed, photography is not my strong suit.

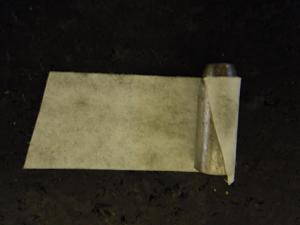
Drying. Not yet dry enough to pleat well, but close.
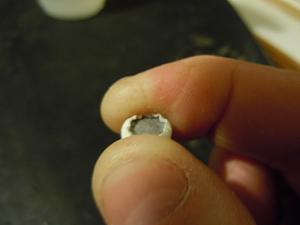
When nearly dry, roll them between thumb and forefinger to cause the paper to pleat like a cupcake paper.

Once completely dry, hold the heel down on a firm surface and give them a twist in the same direction you patched them in order to flatten the pleats. This is to assist in hanging onto the patch when loading as well as keeping the edge from being caught on something and tearing during handling. It also assists in getting it started in the case without bunching up.
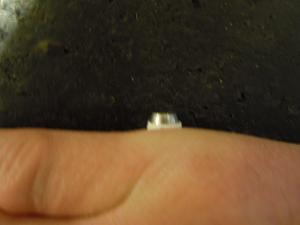
Flattened pleats.
If they are at the desired diameter, the next order of business is to lube them. As in the earlier post, I tumble-lube with Lee Liquid Alox, adding a few drops of liquid carnauba wax which keeps the LLA from being so tacky when dry.
As you can see from the various responses, there's more than one way to skin a cat. As Nrut notes, it's a workable approach to just size the entire boolit to bore+ and patch it to the desired finished diameter. With the right thickness of paper, your .452 push-through die could be just the place to start. My experience shows a patched boolit with two wraps will be paper thickness x 4 -.001, hence, .0025 paper x 4 -.001 will give me .009 increase in diameter, sometimes .0095. Not sure why, it's just how it works out. Achieving the desired final diameter can also be accomplished by patching the boolit as-cast and sizing it in a push-through die, which is usually what I do. Some have reported loose patches with this technique, but hasn't been a problem for me so far. The only potential fly in the ointment I can think of is that your boolit will be groove diameter from heel to meplat, necessitating deep seating to be able to chamber, depending on how much freebore your throat has. To seat to the design depth and still chamber the round with a short throat, the patched bore-riding nose will need to be bore +.001 or so, and the rest will have to be groove +.001 or so. A two-diameter in-out die (Lyman or RCBS style) will certainly do it, but that's something someone here can make for you once you work out what you need. I have read some .458's have generous freebore, in which case Nrut's technique for determining seating depth will also handily reveal the amount of freebore in your rifle's throat. I'd patch a few and start there.
Clear as crystal mud?

That's a lot of details, so feel free to ask questions about whatever is murky.
Good luck and let us know how you do.


 Reply With Quote


