You should spray a few before you build too many of those trays.... I really believe you could tighten up on the grouping and get more boolits coated nicely with that same area.

|
   
   
|


|


You should spray a few before you build too many of those trays.... I really believe you could tighten up on the grouping and get more boolits coated nicely with that same area.
KE4GWE - - - - - - Colt 1860, it just feels right.

Beagle What spacing do you use? Kevin

After I posted I got to thinking. If you used Russel's plate inverted from how he photoed it. Covered the top with AL. non stick foil. Punched the noses through the foil so the basses were up. Wouldn't the bullets get the electrostatic "sp" charge, and be less susceptible to tipping, and be faster to load a tray.


It really depends on boolit size, as to the spacing. I only coat .357 and .45 slugs on mine, so 3/4" works for me. I actually have a little too much space between the .357 boolits at that spacing, but I just haven't gotten around to making two different trays.
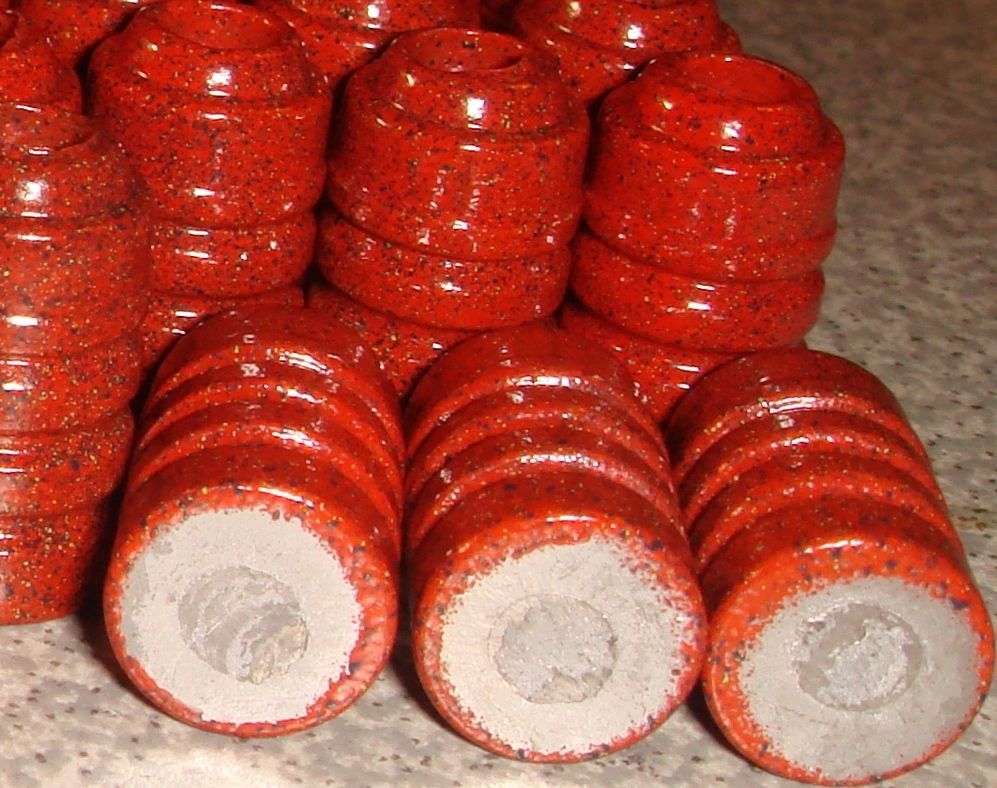
These are .45s.
With the boolits shoved through the foil thing... I found that the powder will migrate down through the hole and make the nose quite ugly, and also cause some flashing on the nose.
One fellow said he wiped his foil with PAM or something similar before poking them through and got good results with reduced flashing, but I have not tried that. There is probably a better way than stacking them on nuts, but it is working pretty good for me. Good enough that I'm not actively testing other methods.
KE4GWE - - - - - - Colt 1860, it just feels right.
That right there on the nose of the bullets:
Is what I am trying to avoid.
Just cut some 12 gauge sheet metal into 8" by 11" for trays. I'm doing gas checked rifle bullets so I place 1/4" washers in a couple of rows, than covered in regular tin foil. Seems to keep them from tipping over pretty well. Thinking of tack welding the washers to a tray and try the non stick foil or maybe some silicone on the tray it self. Yes I did spray powder coat. FYI, HTF has red, white and black powder for $3.99.


I do need to make a tray with some holes for my GC .35 cal boolits. I like the ideas coming up about ways to make GC boolits stand up better.
But I did cast and coat some PB boolits and this is why I like to sit mine up on the nuts, versus just standing them on the foil. I get just a little bit of wrap-around effect and it lets me know that the entire side is coated.

KE4GWE - - - - - - Colt 1860, it just feels right.


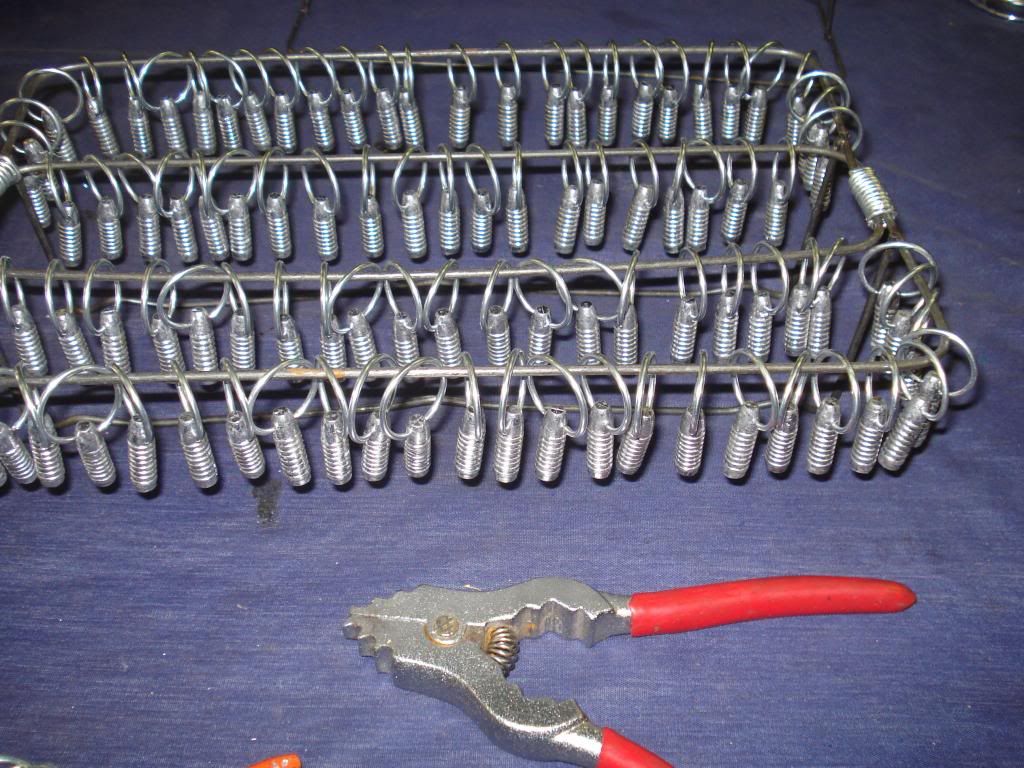
My latest way to PC boolits, Wire rebar racks for footers holds the rebar up when concrete is poured. 14 ga electric fence wire wrapped around a rod and clipped at sharpest angle to form points. I took two racks tied together and flipped upside down placed rings on and clipped them to the boolits. I can not spray today since the moisture way up and I have them place tightly on the rack to test on how many I can spray at a time. So no test results as of yet but thought I share the way my thinking is headed.
http://
Reloading to save money I am sure the saving is going to start soon


Pretty interesting. Will you use a new wire rack each time to make sure the rings contact a bare spot on it? I 'spose there would be a bare spot on the underside of the top of each ring and you could reuse those? We do have a bazillion of those rebar racks sitting around on the jobsites.
KE4GWE - - - - - - Colt 1860, it just feels right.


Well I was thinking of that also not sure how I am going to deal with that right now still tinkering.
Reloading to save money I am sure the saving is going to start soon
My buddy that does the powder coating for my AR500 targets and target stands hangs all his stuff from rebar wire, basically. He has a trolley that hangs from the ceiling. So he runs another rebar wire "leader" from all the other rebar wire hooks, then he clamps the ground wire to that. Then he wheels the trolley with all the stuff hanging from it into his oven.
There is a green plastic type tape he uses to mask off certain areas. In my case, so my stuff can get assembled at the range without tools, I will weld the bolt heads to keep them from spinning. Then he has to cover the threads with that green plastic tape.
Maybe if you could cover some spots with the green tape now, before the first spraying of PC. Then when it gets sprayed again, cut the tape back a 1/4 inch .
I still like this idea:
http://s80.photobucket.com/user/spee...97561162803322


I still plan to build something like that, Russell. I do coat a few flat nose .45s for my Peacemaker, but 90% of my cast boolits are HPs. And that tray would completely remove the "pucker factor" when transferring a freshly sprayed tray to the oven and also the suspense of the dreaded "domino effect".
KE4GWE - - - - - - Colt 1860, it just feels right.


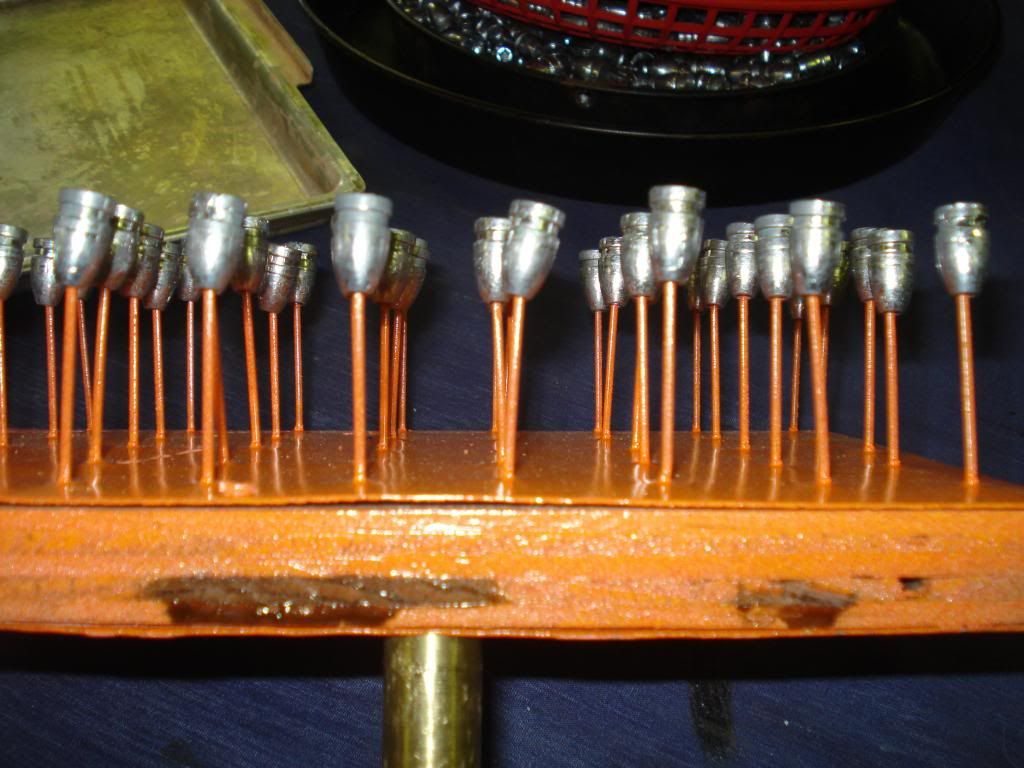
Nash for HP that's has to be the best way of spraying them well I think. What I did was plywood with alum siding and trim nails shot threw it all. Oh the plywood has been baked a few times got some glue or sap out the edge on one of them.
http://
Reloading to save money I am sure the saving is going to start soon
Trim nails... Like a 15 gauge or 16 gauge nailgun for like baseboard and door casing???


Yes nash 16 ga trim nails I use in my cordless trim gun. Now if your thinking along that line here is another ideal for you. Alum sheet also know as renewed street sign add some pc and thumbtacks and bake the PC holds them in place.
http://
Now as far as my other racks I posted here is the results.
http://
I found the spacing was not ideal and was a pain to coat that many at a time. Also yellow is not a very good color to coat with I went back and dumped in some mixed powder I had on hand which was white red. They did not seem to want to take a second coat well but that's what they looked like after two coats.
http://
This shows how much better they coat with less bullets and just yellow.
Today was more of a test to see how the racks worked and some other stuff
http://
You can see the points of contact with the rings on the bullets which is not bad also you can notice the coat thickness.
http://
If you look at these you will notice some darker then others. The dark ones are just yellow the others are when I mixed some white in with the yellow. One thing I have found mixing colors is not as easy as one may think for some reasons one of the two colors stick to the bullets better and not in a mixed or blend. So far I have found is red is the best color for coating the fastest and easiest if you mix yellow for a orange its not to bad either. But plain yellow or white is the hardest to coat with.
Another thing I need to double check my temps I think I got a miss reading when I first started up my ovens. I think my temps are running higher then I think causing the colors to be darker then they should be (burnt) has anyone else noticed this?
Last edited by RP; 01-12-2014 at 09:23 PM.
Reloading to save money I am sure the saving is going to start soon
Really like the thumbtack idea. It doesn't get much simpler than that!
Hmmm...thumbtacks. Not at home right now so can't try it, but I'm wondering if ya can push the bullet base onto the points just far enough to hold the bullets up. I don't imagine that tiny hole will affect accuracy, but I'm just thinking hand guns.
As a sidenote: Yesterday I was ES PCing and was being lazy so elected to spritz some one-shot on the foil between loadings. Let it dry well before placing bullets. I hate messin' with that darned foil! Anyhow, it greatly reduced the tendency for the bullets to stick to the previous paint coat (on the foil). I only have one tray made up so far, and this was a lot faster than redoing the foil.
Thanks RP!
Those yellow hollow points look good!
| BP | Bronze Point | IMR | Improved Military Rifle | PTD | Pointed |
| BR | Bench Rest | M | Magnum | RN | Round Nose |
| BT | Boat Tail | PL | Power-Lokt | SP | Soft Point |
| C | Compressed Charge | PR | Primer | SPCL | Soft Point "Core-Lokt" |
| HP | Hollow Point | PSPCL | Pointed Soft Point "Core Lokt" | C.O.L. | Cartridge Overall Length |
| PSP | Pointed Soft Point | Spz | Spitzer Point | SBT | Spitzer Boat Tail |
| LRN | Lead Round Nose | LWC | Lead Wad Cutter | LSWC | Lead Semi Wad Cutter |
| GC | Gas Check |