If you add FREE29 before final checkout you can get free shipping all month long from Enco on orders over $29. Hope this helps.

|
   
   
|


|


If you add FREE29 before final checkout you can get free shipping all month long from Enco on orders over $29. Hope this helps.

thanks! says it was 20+ pounds got it shipped free!
went home, torched a 9mm case orange and dumped it in water... put the 9mm Redding Crimp die in the press, put a 0.348 punch in the press, could not make the lubed case inside the die more than 1/8"... the forces were too much for my taste so i am glad i got the arbor press and going this route instead...


Thanks, got it shipped free. Been looking for exactly this arbor press.Originally Posted by customcutter

Bill
NRA PATRON LIFE MEMBER
Space for Witty Signature Line FOR RENT...........Cheap
Glad it helped. They run a free shipping several times a month, and sometimes 20-30% off. Even on their on sale items. Once you're on their e-mail list they will send notifications.
I have had some type to look into the archives and plan this one out... i was going to delay this until after deer season and Thanksgiving, but the wife gave me some bonus points for shop time today, i have a three day weekend next weekend, and then my wife is going out to visit her mom the following weekend, so i have a little time to play
this is how i see the 9mm to 30 cal bullet, it will be similar to some aspects of making the 0.224 dies, and some parts of the 10mm/40sw dies... here is the preliminary plan:
This bullet will be patterned after the Berger 30 Cal 150gr FBHP Match Grade bullet.
1) 9mm Draw Down - need to draw the 0.380 OD 9mm case down to 0.305 for core seating... i will try to do this in three draws, annealing after each draw... this seems like a bummer at first, annealing after each draw, but realistically i am not going to swage huge batches of 30 cals... i can see batches of 25 to 50 at a time, and annealing that many with a torch is nothing... drawing puts too much force on my reloading press, so i will do the drawing on an arbor press... plan to modify it some, and attach a die holder to the base and use draw inserts made from tool steel...
2) Making Cores - seems like folks are using 0.25" lead wire for cores on the 30 cal bullets... i picked up an economical Lee 7mm 140gr 2 banger... it is supposed to drop at 0.285, so i will trim these bullets to about 90gr (90gr core + 60gr case = 150gr), then try to size them in a sizing insert i will make to 0.265 or so and see if they will drop in the case...
3) Core Seating - since the cases are 9mm, the casehead is super tough and won't budge when pushing a lead core against it... the advantage of this is that the core seating die can be a thru hole die with a fairly large eject punch, i plan to make one similar to what i did here with the 10mm/40SW dies:
http://castboolits.gunloads.com/show...=1#post2232644
this thru hole core seating die is far easier than making the type that was required for the 0.224 dies!
4) Point Forming Die - and let the fun begin... i believe 30 cal has an 8S ogive, and it will be made just like the 0.224 pointing die... make the d reamer, 2 flute finish reamer, heat treat, bullet laps, and get it on...
1) 9mm Draw Down
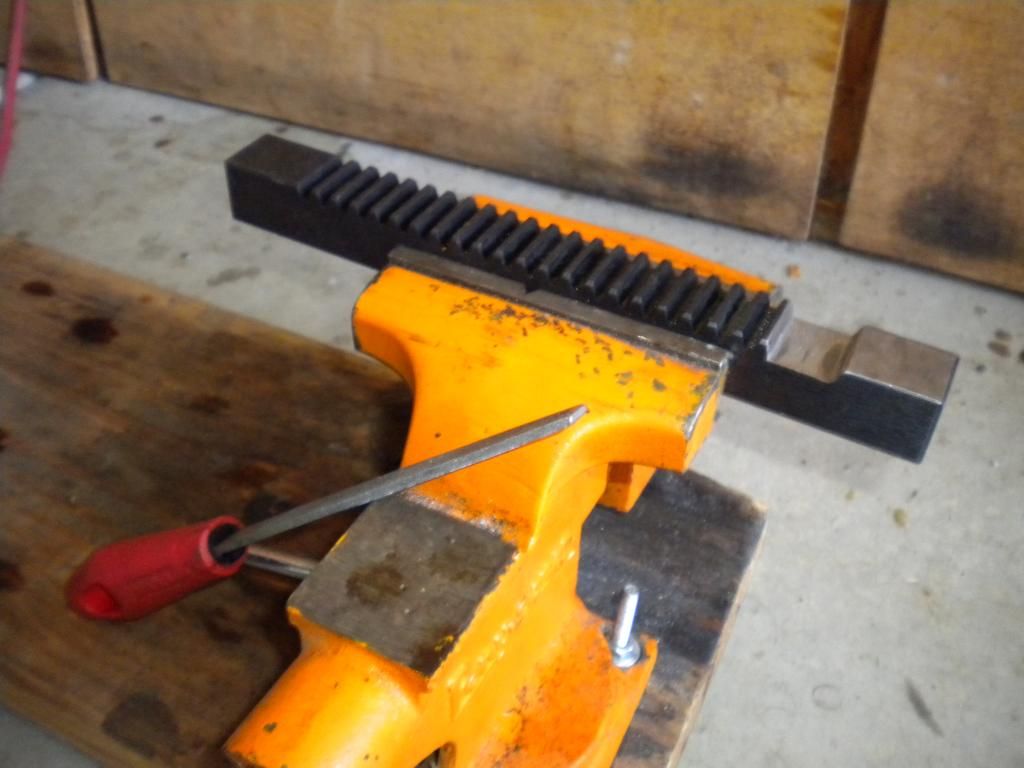
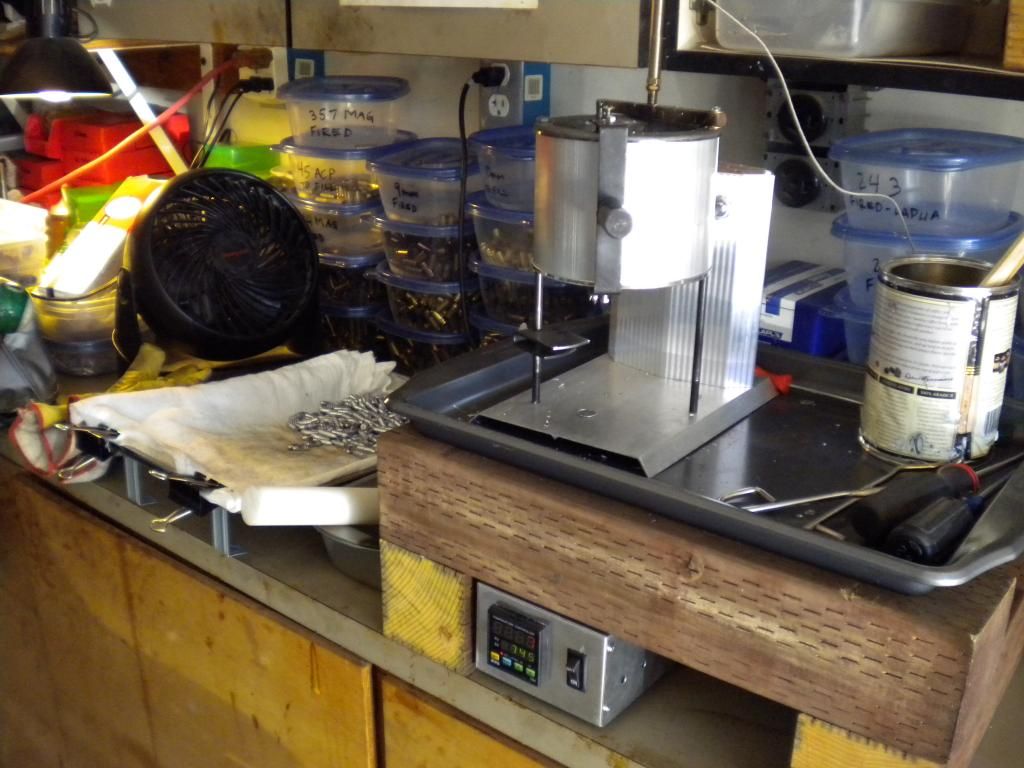
first order of business is to get the arbor press setup, i bought the enco model pictured above several posts ago... it cost me a little more than the HF similar press, but this model has a 1/2" hole bored in the ram, and it was worth it to me to go ahead and get it just for this... i dont have the tooling or skill to drill a hole on the bottom of the ram and get it centered axially... the press comes out of the box like a greased pig and it must be disassembled and degreased, so i took a small container of mineral spirits to it and a paint brush and shop rag and got it all cleaned up:
one mod that i thought was a good idea is to grind off the first two teeth on the ram, what this does is it enables the handle to be positioned wherever needed to gain maximum leverage... this ole boy does a real good job explaining it:
the bore is drilled out to 1/2", but for this project i will use 3/8" grade 5 bolts for the draw down punches, so i needed to make a sleeve so it would fit snug in the ram... also, i drilled and tapped a 1/4-20 hole for a set screw to keep the punch secure (bad pic, but this is all i could do):
finally, here is the arbor press all put together with the mods, i will have to set some bolts on my bench to hold down the back part of the base, other than that it is almost good to go:
last thing to do is the make a base for the draw down inserts... i have some 1" x 2" 1018 coming in so i can attach it to the base of the arbor press, drill a hold in it and use set screws to snug in the dies... i will do this over the next few weeks... the draw down will be the second hardest part of this project, so getting it done in the next few weeks will put me in a good place to pick this project back up again in a few months...
Looks good. I would have never thought that an arbor press would generate enough pressure, but I noticed someone (ForrestR IIRC) else said they use a 1ton press for drawing down the 9mm. I would have thought you would need the camming action of a reloading or swage press. I figured you'd have these 30 cal dies knocked out over a 3 day weekend.
That's a good mod being able to get the handle in the area to generate the most leverage.
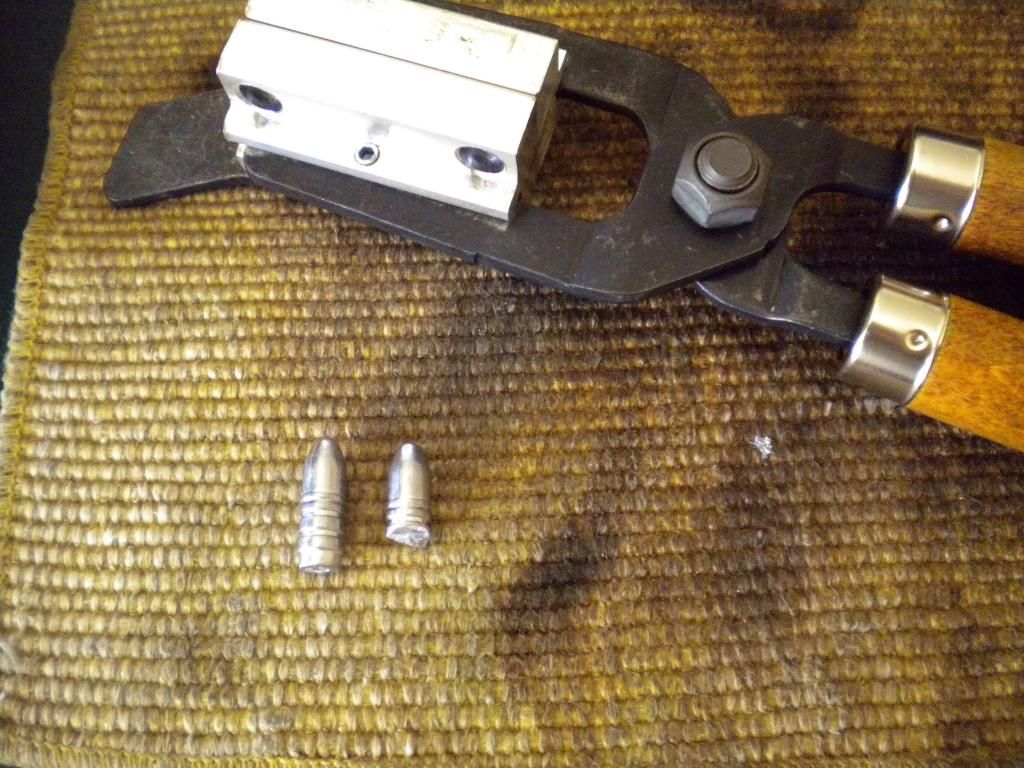
i got a chance to cast some of these 7mm-130gr boolits to use as cores, this inexpensive Lee mold did a pretty decent job as they dropped at 0.285 and 132gr, not bad! the original 130gr bullet on the left, and how much it needs to be trimmed to get 90gr on the right... i used some tin snips here just to get an idea how far to trim, but i will run them through my bullet trimmer you can see on this link:
http://castboolits.gunloads.com/show...=1#post2263498
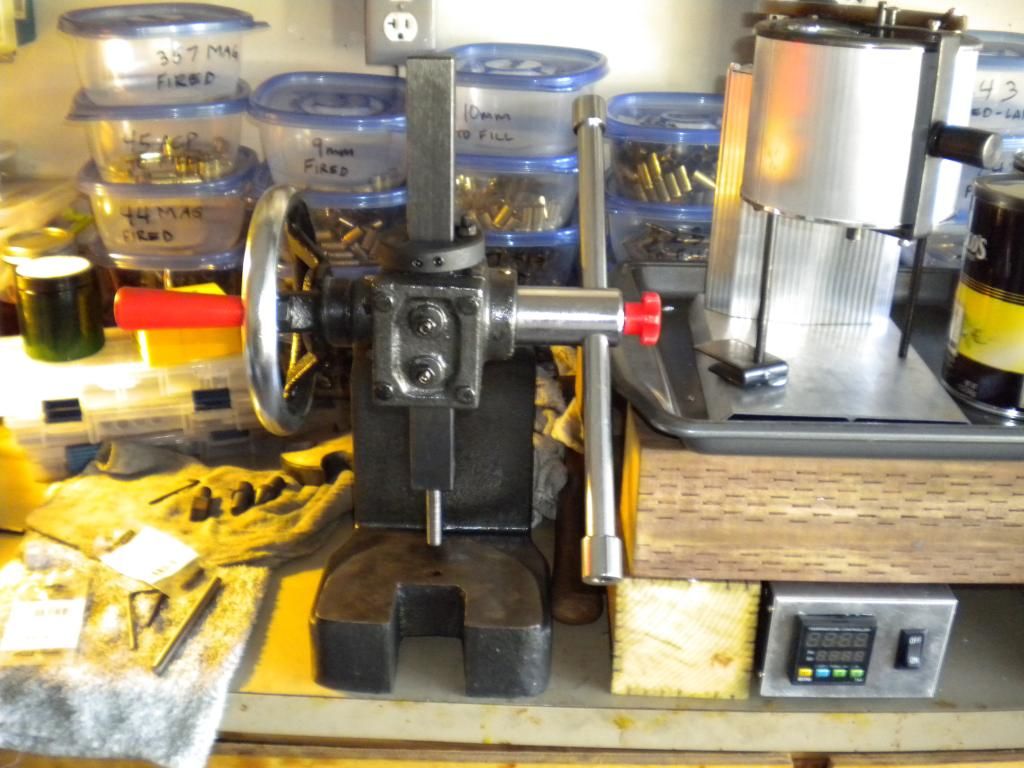
here is my casting setup, i like to crib up the pot so i can see underneath while i stand when casting, i also got a cookie sheet for containment in case my Lee drip-o-matic decides to let it all go... the PID i made for about $90 and it has been awesome and highly recommended... also one great tip i got here on CB was to use a paint roller pan to drop your bullets in:
here is another great tip i got from runfiver, place a tuna can on top of your mold when you preheat it on the electric burner, i put some ceramic insulation inside just because i had some from another project... i know if i put the burner on 'medium' and let it sit for about 15' the mold gets preheated where i need it, set and forget...
i will make a 0.265 sizing insert and see how these cores size up, and hopefully they are a small enough diameter to drop right into the 0.305 drawn 9mm cases... still waiting for some 1018 steel to come in, but hopefully it will come in next week and i can start drawing jackets
I noticed the Lee pot in last post and the PID. Mines been sitting in the box for a couple of months now. I've seen on some of the other sections that the PID's are highly recommended by some, others say not so necessary. I'll try it without first, as I am only casting cores. Still need to get busy and smelt that 70# of roofing lead I bought also. Something else that needs done.
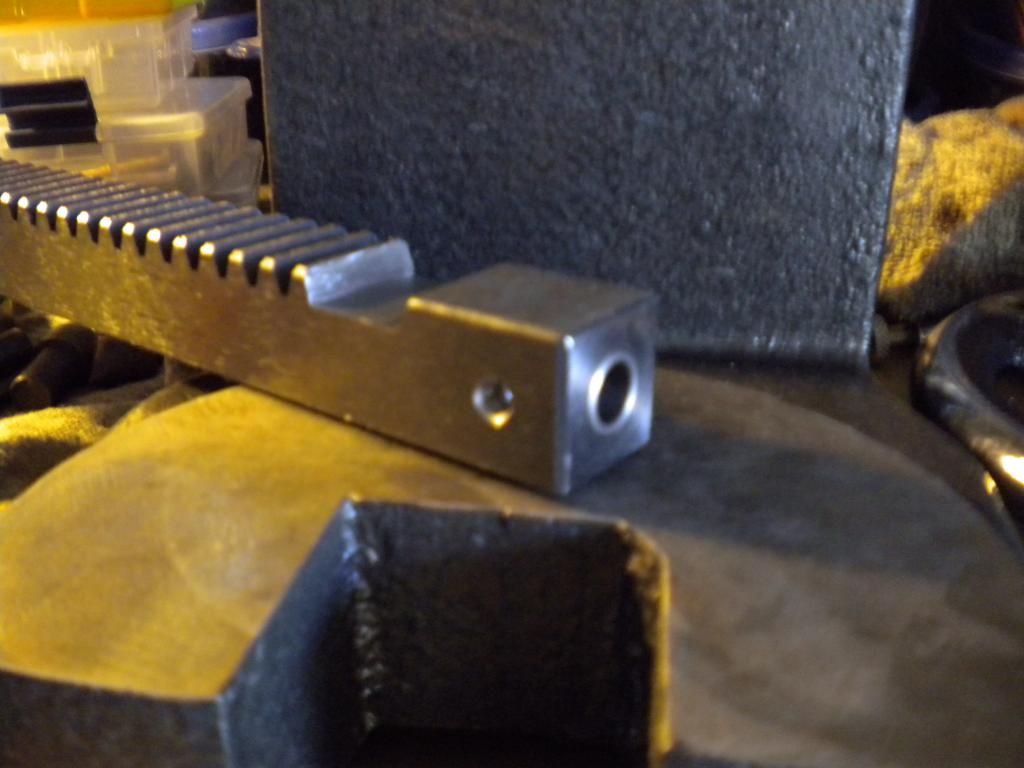
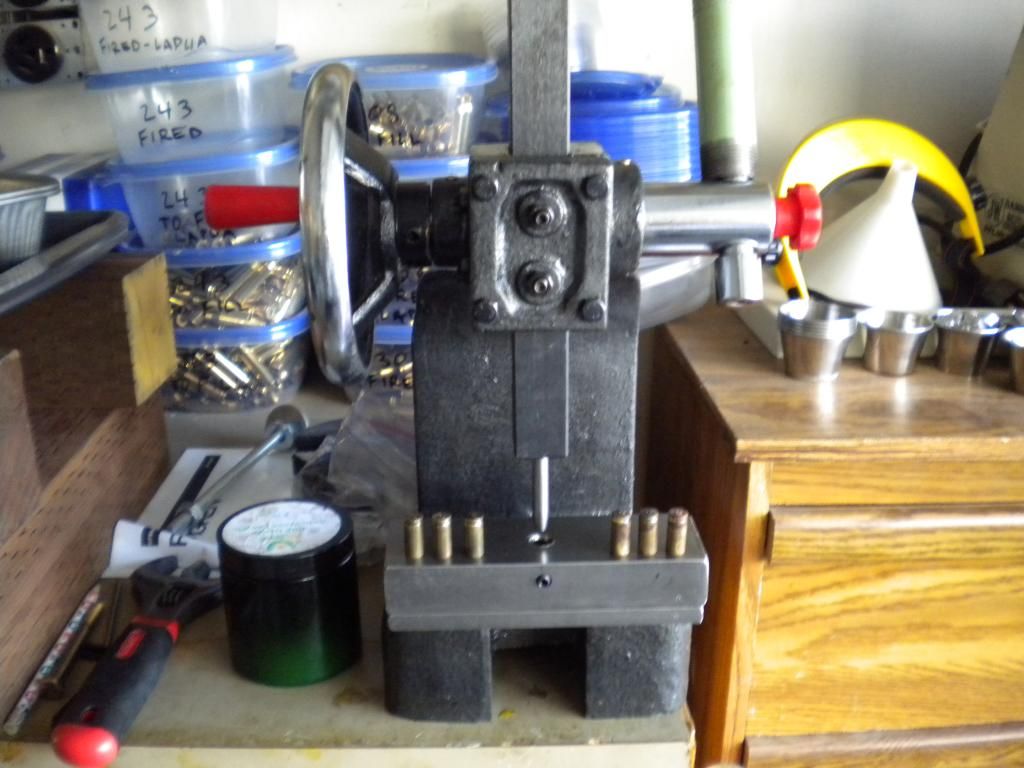
got around to drawing cases today... made my die holder and a draw down die to go from 0.390 to 0.356 and it worked pretty well after a few adjustments:
first case i tried to draw down was a disaster, mangled it up inside the die, had to punch it out with a bolt... then i realized i had to make a few changes
-had to have a punch diameter 0.030 to 0.040 smaller than the die size, before i did this the case would get stuck in the die... after i sized the punch properly the case pushed right through
-the nose of the punch had to be tapered because the case would stick to it, after i tapered to nose the cases dropped right out
-didn't take too much force to pull the handle down and push the case through the die, about the same force as derimming 22LR on a swage press, then i added a 30"piece of 3/4" water pipe to the handle and the cases went through easy, too easy... so much so i think i can get this thing done in only 2 draws now instead of 4 or 3 like i first thought...
-tried cases that were annealed to orange with a torch, and cases that were annealed at 825F for 1 hour in my Lee 4-20 pot, and i liked the latter better as they seemed to hold up better than the flamed cases (less deformation on the head), here are three:
lessons learned:
-mandatory to get the punch lined up on center with die, otherwise the head will not be square
-the cases hold up better to the draw down if they are annealed in the Lee pot at 825F for 1 hour (they clean up better too in the vibratory tumbler without getting 'sparkles' on the tips)
-punch needs to be the right diameter and the nose tapered back
-the arbor press can do this job easily... i was thinking i might need to make a hydraulic press but after adding the pipe extension to the press arm this wont be necessary now...
-only needed one bolt on the back of the arbor press to hold it down, worked like a champ
tomorrow i am going to make a 0.346 draw down die as the 1st draw, and then a 2nd at 0.305 to see if this can be done in 2 steps...
Last edited by Cane_man; 08-31-2013 at 07:21 PM.
Pretty nice setup and write-up.
Mike
Politicians should be limited to two terms.
1 in office. 1 in prison.
Sweet, looks like you'll finish .30's before I get my .224. No shop time today.
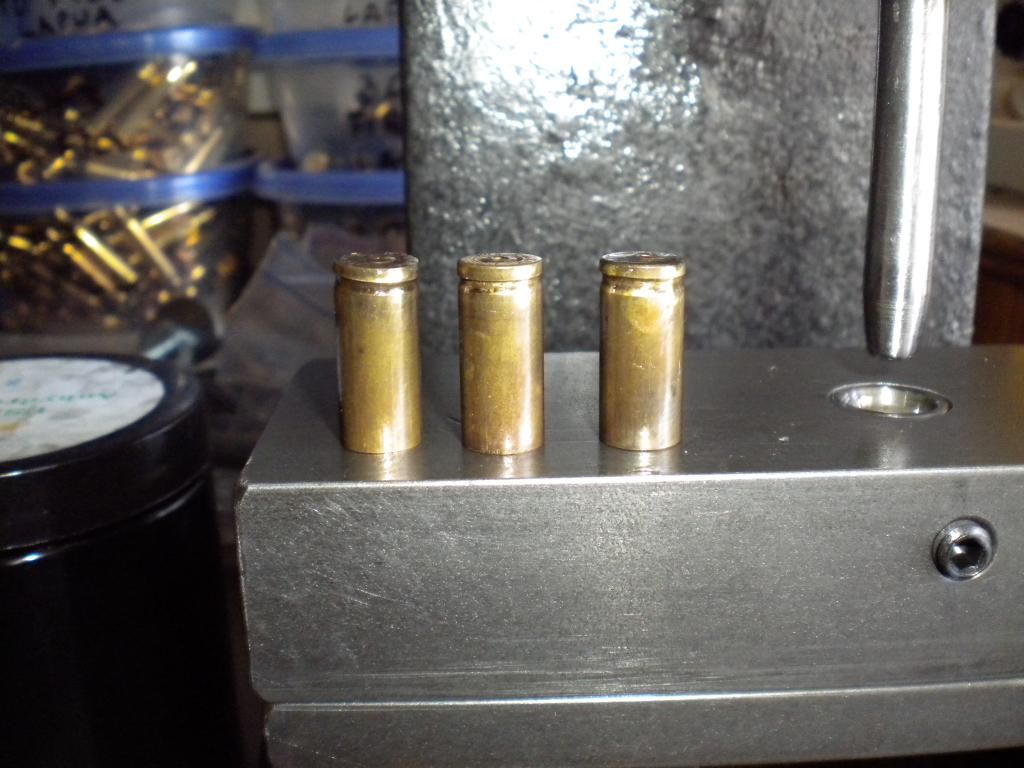
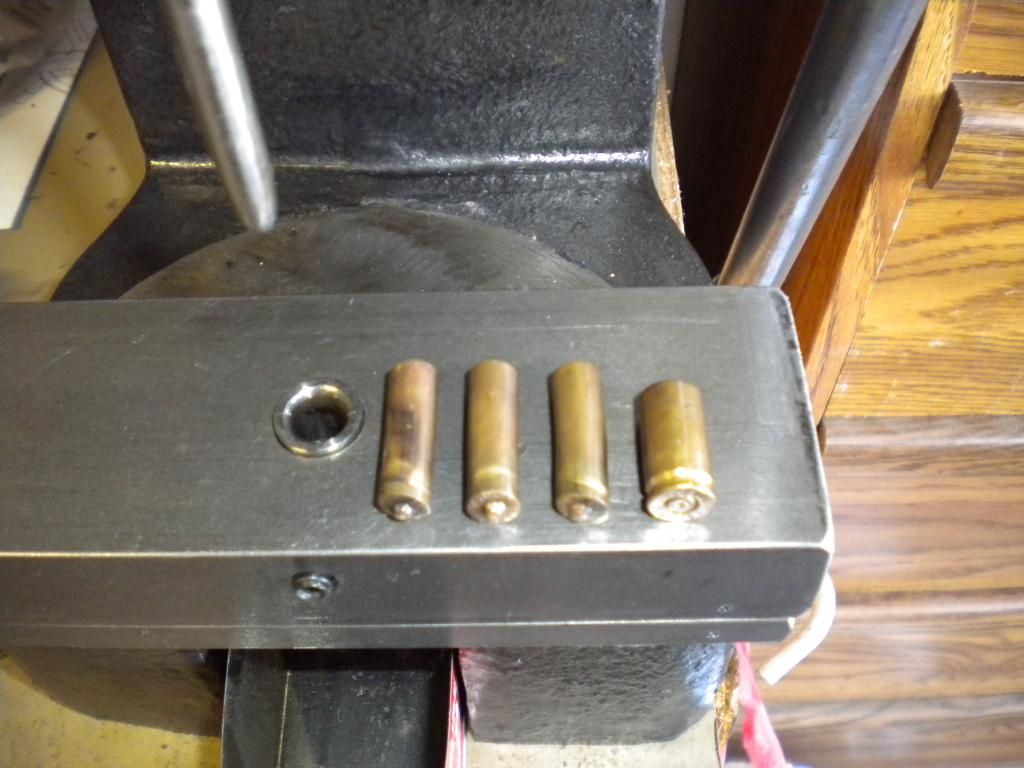
got a chance to finish up some draw dies yesterday, here are the preliminary 3 draws from 9mm fired to 0.357, 0.345, 0.324, 0.308... not very pretty, and i am not sure if they are even usable (all three are the same final size):
i need to play around with it with different sequences of draw downs, annealing etc.
the 2 draw process would not work, i was trying to draw from 9mm to 0.345, to 0.308 and it was too big a draw to work well... i think at a minimum 3 draws are needed, but i experimented with four above...
i may make a rough core seating die this weekend that will fit in the arbor press block and see if seating the core squares up the case, otherwise if it does not then the process i am using now is not going to work...
Just trying to figure out what is causing the bend. Is the punch diameter close to the ID of the final drawn down cases? Is that much "rounding" of the tip necessary? I know you commented once before on it, just didn't know if you could get by with less? Are the cases twisting to the same side of the die, when they exit the die? If so it might be a problem with the finish or one side could be slightly longer than another. I guess it could even be how evenly they are annealed?
Just some food for thought.

i think what could be causing your bend. "a guess" is that your not starting square. If you had a short diameter to center the case in the draw die it will start square and probably help that. Also misalignment of die to punch will cause that.
Cane, It looks like you're going to have to put centering pins on your punches like I did. With punches that have to be smaller than the inside of the case, they can move off center and cause the bases to do that. The centering pins go through the primer flash hole, and help keep the pressure of the punch in the middle. It helps quite a bit, but I still get some that the bases aren't perfectly square. Cutting the rims off the cases seamed to help some too for some reason. The primer flash hole shrinks when you draw it also, so the centering pins have to be smaller than the hole; or it will get stuck on the pin.
Never in history has there been a situation so bad that the government couldn't make it worse.
A foolish faith in authority is the enemy of the truth.
thanks for the suggestions guys... centering, this is it for sure... the case 'floats' on top of the draw die and is hard to make it stable and centered so i will have to figure out some way to get them square/centered in the die before and as i push them thru... hmmmmmm, something to work on this weekend

Very good cm, you've come a long way in a hurry!!!!
A couple of things to ponder:
Did 4 draws & 2 anneals to draw my 9mm cases down to .304, the initial annealing & annealed again for the final draw.
Used 1/2 (.250) core.
Used loooong slender draw dies made from 3" bolts, drill bit & taper pin reamers (#7 & #6).
The loooong draw dies worked better keeping the bases square/true than the short draw dies. The 2nd annealing of the brass for the final draw helped keep the bases square/true.
I believe the problem comes from the bases having too much brass (too thick). The more they're drawn down the thicker the base becomes. The thinker the brass, the more pressure it takes to swage them. As with anything that is under pressure, it will take the least path of resistance.
I started playing with 32acp brass (smaller/thinner web) & then got busy with work/casting/reloads & most importantly range time. What I was thinking of doing/trying was to cut the base of the drawn bullets off/down after the 2nd draw with a hf saw. I've cut/trued the bases of the cases I've drawn to .304 with no problem. The swaging die will true the base to the body of the bullet during the swaging process. It's just easier to do without 1/4" to 3/8" of solid brass in the base of the swaged 9mm cases.
Just something to think about.
worked on a prototype last night and it lead to another evolution... what i need to do is:
1) make a bushing, like a drill bushing, that fits on top of the draw die that will support the case before it is drawn and keep it centered while going into the die
2) turn a small point on the bottom of the punch, much like what you see on a decapping pin, that will just fit inside the flash hole, and perhaps this will help keep the case on center as well...
i am thinking that it is a waste of time to turn the diameter of the punch to the ID of the drawn case, so i am going to play around with using a 1/4" grade 8 bolt and see where that takes me...
edit: forrest i feel ya on those taper pin reamers, if this next evolution doesn't work out then i will get the #6 and #7 and go from there... i try to taper them with a small file but it goes slow and doesn't work all that well...
edit/edit: reload, i am going to make an alignment punch also i can start out with the die/punch aligned with the ram...
thanks for the help guys, i am thankful i have a group of great folks who will help on something like this, i think i see the light at the end of the tunnel on this part of the project... really, this will be the hardest part, as i can see core seating pretty straight forward and the pointing die is what it is and it is a challenge for any caliber...
Last edited by Cane_man; 09-05-2013 at 01:42 PM.
 Posting Permissions


| BP | Bronze Point | IMR | Improved Military Rifle | PTD | Pointed |
| BR | Bench Rest | M | Magnum | RN | Round Nose |
| BT | Boat Tail | PL | Power-Lokt | SP | Soft Point |
| C | Compressed Charge | PR | Primer | SPCL | Soft Point "Core-Lokt" |
| HP | Hollow Point | PSPCL | Pointed Soft Point "Core Lokt" | C.O.L. | Cartridge Overall Length |
| PSP | Pointed Soft Point | Spz | Spitzer Point | SBT | Spitzer Boat Tail |
| LRN | Lead Round Nose | LWC | Lead Wad Cutter | LSWC | Lead Semi Wad Cutter |
| GC | Gas Check |

 Reply With Quote