WidenersReloading EverythingLee PrecisionRepackbox
Load DataInline FabricationRotoMetals2Snyders Jerky
MidSouth Shooters Supply Titan Reloading
Page 18 of 32 FirstFirst ... 8910111213141516171819202122232425262728 ... LastLast
Results 341 to 360 of 625

Thread: Automated Master Caster

  1. #341
    Boolit Grand Master jmorris's Avatar
    Join Date
    Aug 2007
    Posts
    5,289
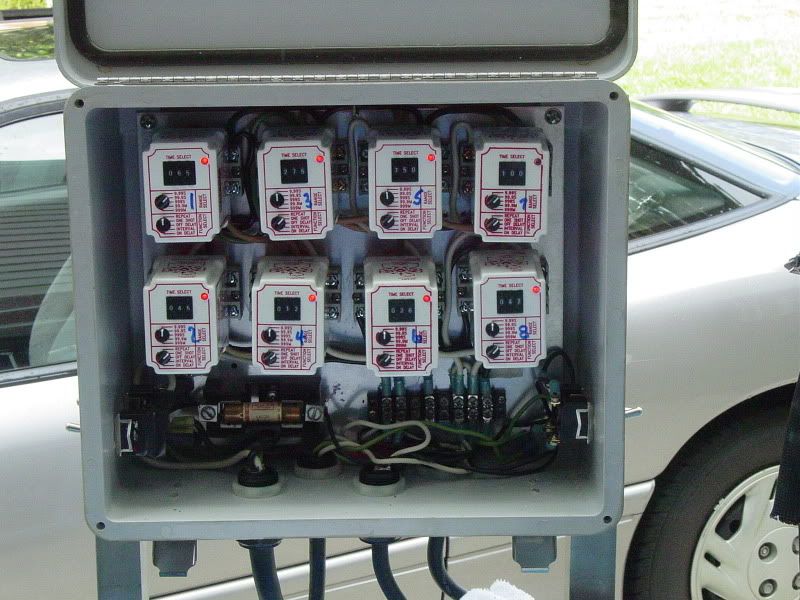
    In this video you can see the switch in the back that is hit by the crank off of the motor when the mold is ready for lead.

    The other one on the side with the ground clamp connected to it triggers the cool down timer but it was set to zero at the time.

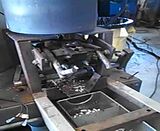
    Click the photo to play.

  2. #342
    ADMIN


    HATCH's Avatar
    Join Date
    Sep 2008
    Location
    Lexington, SC
    Posts
    6,748
    Your got way too much free time and skills.
    Don't like being hammered by the Cast Boolits Staff, then don't be a nail.
    The rules are simple to follow.

  3. #343
    Boolit Mold
    Join Date
    Dec 2011
    Location
    Onida Sd
    Posts
    13
    Hello. I have been reading this thread for quite awhile. I have a master caster set up with air power. The mechanical part is easy for me the computer programming not so much. Do you think it would work to use a timer that flash on and off continually to cycle the machine. I would still use the micro switch to signal the lead pour at the top of the stroke. Thanks

  4. #344
    Boolit Master
    Join Date
    Oct 2013
    Location
    Brisbane, Australia
    Posts
    1,775
    sdharley - there is no reason why you couldn't do it with timers. Hatch's brother, i believe his name on the forum is No.1, automated his with a hydraulic ram and multiple timers. Hatch has pointed out timers will do the job without an issue, the they are expensive.

    The setup jmorris did uses timers as well, but he used a cheap 555 timer IC, but his was not air powered like you have rigged up.

    I'm hoping to give mine a go on Tuesday, if it works, it proves someone with moderate electronic skills can get it going. I mounted the ram position switches yesterday, it just needs wiring up *fingers crossed*

  5. #345
    ADMIN


    HATCH's Avatar
    Join Date
    Sep 2008
    Location
    Lexington, SC
    Posts
    6,748
    I will sit down and sit what it takes for relays.
    Don't like being hammered by the Cast Boolits Staff, then don't be a nail.
    The rules are simple to follow.

  6. #346
    Boolit Buddy hagel's Avatar
    Join Date
    Aug 2013
    Location
    Athens Ohio - pretty rural area
    Posts
    230
    Can't wait to see how yours runs. Also anxious to hear Hatch's assessment on the timers setup. Nothing is set in stone for MC#3 except that it is going to be closer to the design for the beta tester batch. Still like the idea of the arduino but if there is a cheaper, easier and reliable alternative it would probably appeal to a lot of the folks on here. Guess there isn't any reason not to come up with multiple kits except that it probably just gives me more chances to loose my *** on the financial side. I can't afford to loose too much on the stuff that goes out the door.

    No micro circuit experience at all on this end other than plugging a few things into desktop computers. I've soldered up wires on motorcycles before. That's way bigger than working on boards. The Innovation Center has a prototype lab and someone who runs it. Gonna ask this Friday if they could maybe do a little hand holding on the first few circuits.
    Quote Originally Posted by Tazza View Post
    sdharley - there is no reason why you couldn't do it with timers. Hatch's brother, i believe his name on the forum is No.1, automated his with a hydraulic ram and multiple timers. Hatch has pointed out timers will do the job without an issue, the they are expensive.

    The setup jmorris did uses timers as well, but he used a cheap 555 timer IC, but his was not air powered like you have rigged up.

    I'm hoping to give mine a go on Tuesday, if it works, it proves someone with moderate electronic skills can get it going. I mounted the ram position switches yesterday, it just needs wiring up *fingers crossed*

  7. #347
    Boolit Grand Master jmorris's Avatar
    Join Date
    Aug 2007
    Posts
    5,289
    I think that was the point Hatch was making, once you have a PLC program things are fast and easy. You have to do the "work" once, after than you just load the same work into the next PLC.

    The way I did it was likely the least expensive but the most amount of work.

  8. #348
    Boolit Mold
    Join Date
    Dec 2011
    Location
    Onida Sd
    Posts
    13
    Thank you hatch I would appreciate your help

  9. #349
    ADMIN


    HATCH's Avatar
    Join Date
    Sep 2008
    Location
    Lexington, SC
    Posts
    6,748
    exactly.

    There are dozens of ways to automate a master caster.

    It can be relays, or PLC, or mini-computer, or a mix between.

    I used a PLC because it offered the MOST flexibility on design for the least amount of time and money.
    Hell to be honest, I had my control panel built and wired before the program was even written.
    There are only so many control points that you have to deal with (inputs and outputs) so as long as you have those points covered in wiring then your good to go.

    I wanted a design that anyone could build and since currently there about 10 people that have Automated Master Casters using the Wyman-Hatch method, I would say that part is a success.

    I didn't want to build a circuit, I wanted off the shelf parts.
    Sure i could do what Morris did, but I doubt anyone else would copy it because hell they can't even build a standard panel with a PLC and thats easy.

    I am not a machinist, or even a mechanic. I am just a old computer nerd that builds electrical panels for a living.


    The CHEAPEST method (control side) is to use the IC timers that Morris did.
    The hardest method would be what Kayak1 (think that is how you spell ur handle) did with the micro computer.

    Kayak1 would be the best method if he makes that little control board he posted up. That way most of the hard work is done.

    On 100% relays, I am still thinking on this one.
    I know my brother did 8 relays


    One relay is the master timer. Everything is based off of that relay.
    One is for lead pour.
    He also originally set it up to stop 1/2 way under the fan so I am sure a relay for that.
    So I am thinking he has
    Master timer
    time at top
    Lead pour
    lead cool timer
    timer to 1/2 way point
    timer to bottom
    time at bottom
    return to top
    Thats just a guess, maybe he will pipe in here and clarify this.

    What I am thinking on relays is this (yeah I thought this up as I typed)

    Time at top prior to lead pour (i call this the oh poop pause)
    Lead pour
    Lead cool
    cycle to bottom
    time at bottom

    those are the points that have to be covered.

    Delay on make relay
    Delay on make relay
    One shot relay - lead pour
    Delay on break

    Four relays
    First delay on make relay is the 'pause' - this would be set to 1 second. This also can be factored as the mold cool timer as well.
    Second delay on make relay is the lead cool relay.
    One shot is the timer for lead pour
    and lastly the delay on break relay is what kills the cycle

    So the limit switch sends power (120v) to relay 1
    It is a delay on make - it waits 1 second then closes.
    Once it closes it sends power to both the lead pour (one shot) and the lead cool (delay on make)
    After the lead cool closes, it sends power to the cycle relay (delay on break)
    it will move the mold to the bottom. The amount of time on this relay will be how long the mold sits open under the fan.

    I will have to play around with wiring to figure out the best way for it to be wired since once the last relay starts the power from the limit switch goes away.
    Also with relays you give up double tap feature (well its harder to do)

    Also as I reread that I just posted (prior to making it public), there might need to be one more relay.
    This relay would be the one that triggers the delay on break.
    It would be a delay on make.

    I am still thinking on this.
    I guess I will call my local vendor and have them send me 5 relays as samples.
    We get a bunch of free stuff for R&D so I guess this will be another little project.
    I am going with 120v as it doesn't require a power supply.
    Also I will order in 2 120v air switches too.
    Last edited by HATCH; 03-24-2014 at 09:54 AM.

  10. #350
    Boolit Mold
    Join Date
    Dec 2011
    Location
    Onida Sd
    Posts
    13
    Thank you very much hatch. From my very limited knowledge of the relays the part I hadn't figured out was what happens when the limit switch open as you had noted. I'm just a simple farm boy who has been keeping things running my whole life but am not very knowledgeable about automation am not to. Once rented about the speed would just like it to be able to run by itself as my neck and arm don't work as good as they used to

  11. #351
    ADMIN


    HATCH's Avatar
    Join Date
    Sep 2008
    Location
    Lexington, SC
    Posts
    6,748
    Got 5 relays coming. They aren't cheap. List price is $100 each. I am sure there is a cheaper one but this is the same as what I use on the star sizer too
    Don't like being hammered by the Cast Boolits Staff, then don't be a nail.
    The rules are simple to follow.

  12. #352
    Boolit Grand Master jmorris's Avatar
    Join Date
    Aug 2007
    Posts
    5,289
    Yeah, it would be nuts to use $400 worth of relays when you can get a PLC for under $100.

  13. #353
    Boolit Buddy hagel's Avatar
    Join Date
    Aug 2013
    Location
    Athens Ohio - pretty rural area
    Posts
    230
    Just a quick heads up on a couple of items:

    1. I'm meeting with the ME students tonight. We're going to run MC #1 for a while and they are going to teach me what they have learned about it before they have to tear it down for painting and such.

    2. There is 60,400 lbs of lead blanket shielding up for auction by the Government: Event ID 9380 Lot Number 5400. This is located in Portsmouth VA. It's on 26 pallets and the closing time for the auction is 03/27/2014 05:00PM Eastern Time. The current bid is $225. This link should take you to it:

    http://www.govliquidation.com/auctio..._source=Eloqua

  14. #354
    ADMIN


    HATCH's Avatar
    Join Date
    Sep 2008
    Location
    Lexington, SC
    Posts
    6,748
    All scrap under this contract requires mutilation by the buyer prior to removal if allowed at the location or mutilation must be witnessed and certified by DOD Surplus personnel at the buyer s facility.*
    Don't like being hammered by the Cast Boolits Staff, then don't be a nail.
    The rules are simple to follow.

  15. #355
    Boolit Buddy
    Join Date
    Apr 2012
    Posts
    251
    The bid isn't $225 anymore . Will be fun watching this one.

  16. #356
    Boolit Master
    Join Date
    Oct 2013
    Location
    Brisbane, Australia
    Posts
    1,775
    I hooked up the arduino to my MC last night, it works exactly as it should, but the air solenoid i had doesn't have enough flow for it to work properly, so i'll need to hunt down one with a higher flow rate. The problem is, most of the ones on ebay don't quote how much air they are capable of moving. The other solenoid i was given would do it easily, but it uses pilot pressure to activate the spool, i can't seem to figure out how to plumb it.

    Pictures will follow when i sort out the air solenoid.

  17. #357
    Boolit Buddy
    Join Date
    Apr 2012
    Posts
    251
    Try the surplus center in Nebraska .

  18. #358
    Boolit Master
    Join Date
    Oct 2013
    Location
    Brisbane, Australia
    Posts
    1,775
    I didn't think of them, i'll have a look to see if they have anything suitable. I have dealt with them a few times.

    Thanks for the idea.

  19. #359
    ADMIN


    HATCH's Avatar
    Join Date
    Sep 2008
    Location
    Lexington, SC
    Posts
    6,748
    What control voltage?
    Don't like being hammered by the Cast Boolits Staff, then don't be a nail.
    The rules are simple to follow.

  20. #360
    Boolit Master
    Join Date
    Oct 2013
    Location
    Brisbane, Australia
    Posts
    1,775
    12v or 240v would be ideal, but if needed i can use different voltages by adding a transformer.

    The other one i have has 3 larger ports, 2 smaller exhaust ports and is 24v. The problem is that I can't work out which port needs pilot pressure to operate the main spool. None seem to be a dead end and the model number isn't fully readable.

    The other issue is that i'm in .au, so they do tend to ream us on prices for most things if you buy them locally.

    Sadly Surplus center doesn't have what i was after.

    I think this solenoid would be ideal, it's not as cheap as i'd have hoped if i could get it from hong kong:
    http://www.ebay.com.au/itm/1-4-Inch-...item1c34310ad4

Posting Permissions

  • You may not post new threads
  • You may not post replies
  • You may not post attachments
  • You may not edit your posts
  •  
Abbreviations used in Reloading

BP Bronze Point IMR Improved Military Rifle PTD Pointed
BR Bench Rest M Magnum RN Round Nose
BT Boat Tail PL Power-Lokt SP Soft Point
C Compressed Charge PR Primer SPCL Soft Point "Core-Lokt"
HP Hollow Point PSPCL Pointed Soft Point "Core Lokt" C.O.L. Cartridge Overall Length
PSP Pointed Soft Point Spz Spitzer Point SBT Spitzer Boat Tail
LRN Lead Round Nose LWC Lead Wad Cutter LSWC Lead Semi Wad Cutter
GC Gas Check