Really would like to add a TIG to that list.Originally Posted by Ausglock


|
   
   
|


|


Really would like to add a TIG to that list.
"What makes you think I care" ........High Plains Drifter
Rick C.


Yeah. I have just added a TIG, plasma cutter and a press brake. Now I need an extension in my shed. It is 21' x 55' x 12' high and still too small.
Hooroo.
Regards, Trevor.
Australia


Excellent set up and results.
You really went the whole way to ensure good results as you have obtained.
Now, you have to start producing commercial volumes and hobby will become rewarding.
I have had many tell me, that they enjoy coating so much, that they can hardly wait to get home from work and start making.
It seems that the hobby becomes addictive, as it seems, that all spare time becomes production time.
Would be interested in how shooting them has turned out.
Looking forward to your posts.
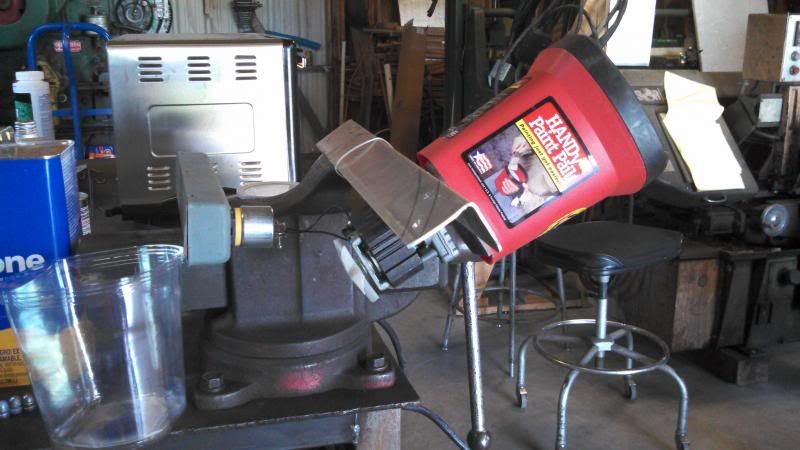
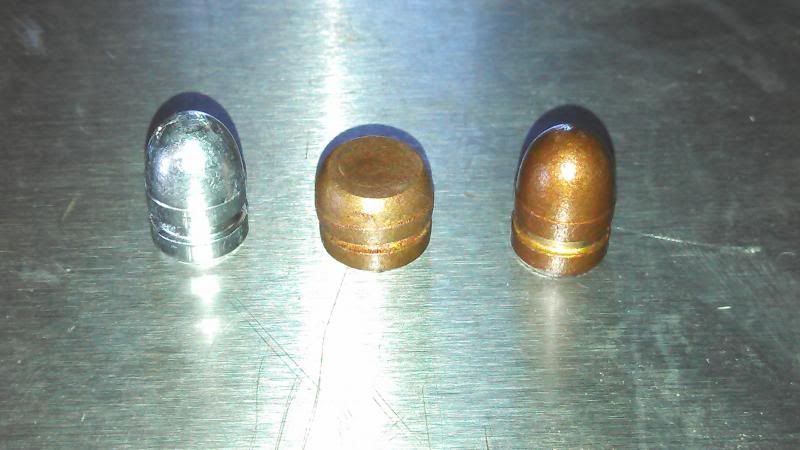
OK... this is for the doubters out there that the HI-TEK coating is too delicate and will scratch off.
Tonight I loaded some 357Sig rounds to test the new 168gr bullets from the Accurate Mold. These bullets were coated with 2 coats of the Kryptonite Green. My 357Sig rounds get a very heavy crimp to prevent bullet setback.
I wanted to see if this heavy crimp would damage the coating. So I used the Kinetics bullet pulling hammer to pull a few.
As you can see. The crimping has placed a groove in the bullets, but the coating is fine. No scratching or ripping of the coating in any way.
Firing a few 100 of these tomorrow in this.

Hooroo.
Regards, Trevor.
Australia
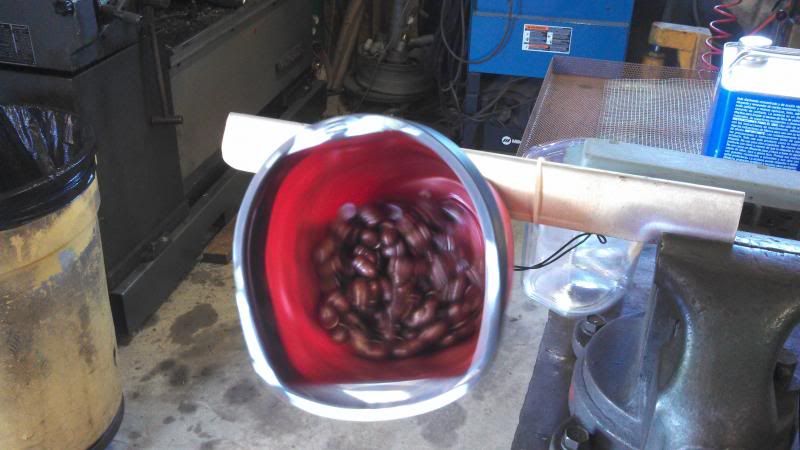
cast up 20# of 9mm 135 gr, 20# of 40 180 gr and 20# of 200 gr 45swc today. Coating them gold tomorrow. I figure about 2500 boolits cast today. Will coat and size tomorrow and then load this week. Was a busy day. Time to smelt some more ingots!
Last edited by kweidner; 11-30-2013 at 04:53 PM.
Our house is protected by the Good Lord and a gun and you might meet them both if you show up here not welcome son!
It sure doesn't take long to cast a few 1000.
I am running 3 6 cavity molds at once.
Cast from a Lee 20lb pot with the Lee 10lb pot mounted over the top to pre-melt ingots and then use this to top up the 20lb pot.
I can then cast continuesly with no stopping.
You sure go through a lot of ingots this way.....
Hooroo.
Regards, Trevor.
Australia

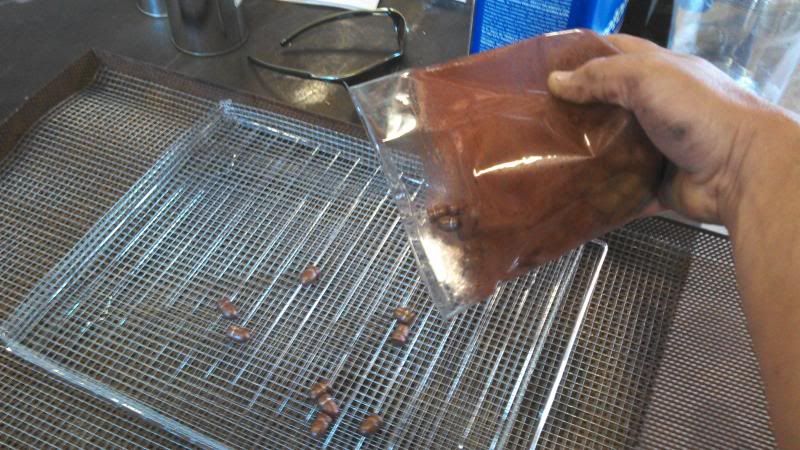
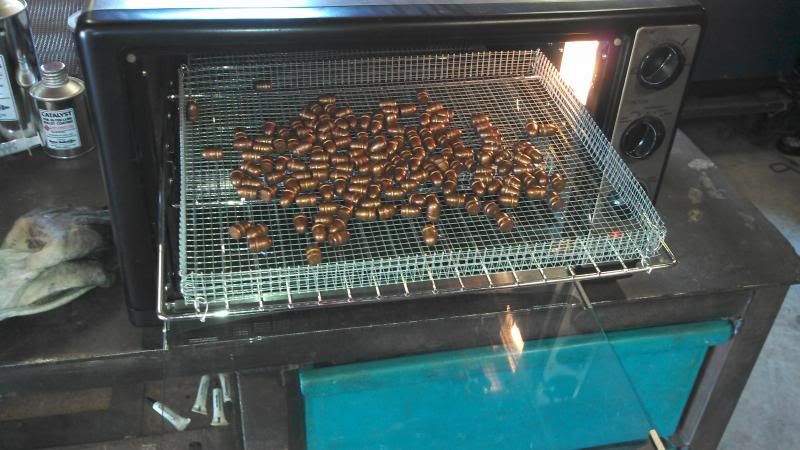
I noticed that the thermostats in 2 of my ovens were varying quite a bit after an hour or so of baking. These are the resistance type like the Lee pots and hot plates use. So I built 2 more PID controllers and bypassed the thermostats. A trial run of each oven went well so the coating of about 4,000 boolits is scheduled for tomorrow.
Just tried two different batches and the first came out great.
The second was really clumpy and had less color.
I'm using 5 parts color one part harder and 5 parts acetone.
Using red copper if that makes any difference.
Is this normal or not?
1,000,000 peso man
Hi Magana559.
Generally, you should be using 5 1 7 mix. 5 parts coating one part catalyst and 7 parts Acetone.
With Red copper, it is better to place a couple of 45's into container, and shake well before decanting, as the material really settles well and requires good mixing.
"Clumping" can be caused by numerous reasons, and I need more detailed advice of your coating process to try an diagnose what is happening.
Photo of your described problem may also help.
If it helps, please send me a PM so I can concentrate on diagnosing things.
One area that is common, is that when mixing coatings with catalyst and solvent, there can be a curdling type effect of suspension which then settles quickly.
Simply mix this mixture occasionally, and, as the particles will "recondition" in mixture, the curdled particles will re-separate back into correct suspension by aging a little while, with occasional mixing.
You can premix your coating mixture, and use the next day, so any "curdling", that initially formed, can sort itself out after the mixing process, and particles become as they were designed as a fine suspension..
Hope this helps...
I definitely think I'm getting a curdling effect, it definitely happens when I add the catalyst.
Everything is measured by cc units so it can't be a uneven mixture.
I also followed your instructions on using two boolits and shaking for 5 min.
I'll pm you tomorrow as its 2:10 AM here.
1,000,000 peso man
Thanks for quick reply. It is 9.30pm here.
The curdling effect, after adding catalyst is normal. Catalyst temporarily alters mixture and after adding, and occasionally mixing, the "aging" reverses agglomeration, and all should be OK.
Some folk, add Catalyst to Acetone first, then adding to coating whilst mixing, reduces the agglomeration somewhat but there is really no damage done to coating mixture aside from temporary coagulation, which sorts itself out with a little time and occasional mixing.
If you simply mix your blend, then occasionally mix, and leave, and return later and do it again, all should be OK for coating, when you see particles become very fine suspension again.
I add catalyst first, Then the acetone and lastly the coloured resin,
This prevents the condition you are getting.
It is normal to have this happen, Just shake the schit out of the mixed coating. Let sit for 5 to 10 minutes, then shake it again and coat.
Hooroo.
Regards, Trevor.
Australia
It's GOOD we keep learning LITTLE TIDBITS of information about the process.
Trevor, Good shooting the 357 Sig today I hope.
Report back Please.
I need to load up a few COATED PILLS this morning myself.
The coating takes 40 minutes to be "dry" when it is 38 degrees F in the garage. Bake times did not change.
Now all that I need to do is to figure out how to totally remove ALOX form 12,000 cast bullets! I found Hi-Tek after i had sized and lubed these!
May the Peace of God Be With You!
and to ensure it, Keep Your Powder Dry!
NRA Endowment Member
Life Member 1957
NRA Member since 1954
NRA Training Counselor: Rifle . Pistol. Shotgun. Metallic Reloading. Shotshell Reloading, Personal Protection In the Home, Home Firearms Safety, Chief Range Safety Office
DrBill33"Where is John Gault?"castmine:
Leadman,
Please tell us more about the PID you build?
Thanks,
Rich
Last edited by RDP; 12-01-2013 at 06:18 PM.

DrBill - I just used gasoline, removed most all of it, even Recluse lube. Easier than boiling.
Whatever!
Simple. I just went through the same process. First you throw them in the casting pot, then you turn on the heat
Yeah, I recast all my .45's that I had lubed with alox. Man that alox leaves a mess in your pot!
Looks like all is well today. Definitely back to normal.
Coated some and put them in the oven. Seems like its blotchy but will work.
1,000,000 peso man
For measuring the components I use aluminum kitchen measuring spoons. I measure out the color first, then 3 parts acetone, then 1 part catalyst, then the rest of the acetone. I have no issues with curdling. I use the acetone to clean the spoon with between the color and catalyst.
I'll post some pictures of my PID units I build later. I bought the parts off E-Bay and assembly was not difficult at all. I do think my oldest oven is in need of replacement as the temperature varies even with the PID hooked up. This is a very old toaster oven so I will look for another convection oven.
I did notice today with temperatures in the high 60s that the coating did not dry as well as when it is over 100 degrees. I increased dry time to 20 minutes and also set a couple of the racks on the top of the ovens at the end of the time to help them dry.
 Posting Permissions


| BP | Bronze Point | IMR | Improved Military Rifle | PTD | Pointed |
| BR | Bench Rest | M | Magnum | RN | Round Nose |
| BT | Boat Tail | PL | Power-Lokt | SP | Soft Point |
| C | Compressed Charge | PR | Primer | SPCL | Soft Point "Core-Lokt" |
| HP | Hollow Point | PSPCL | Pointed Soft Point "Core Lokt" | C.O.L. | Cartridge Overall Length |
| PSP | Pointed Soft Point | Spz | Spitzer Point | SBT | Spitzer Boat Tail |
| LRN | Lead Round Nose | LWC | Lead Wad Cutter | LSWC | Lead Semi Wad Cutter |
| GC | Gas Check |

 Reply With Quote