I recently read a couple of articles about "cut" and slug rounds made from cheap 12ga birdshot shells. Seemed like a fun experiment with potentially useful results, so I thought I'd try my own take and see what could be learned.
I started with a box of Remington "Game Load" 3 1/4 dram 1oz #7.5 shells. Pretty standard Walmart stuff. I have a Mec press and a Lee 12ga hand loading kit, but I avoided using the shotgun loading tools, to see if these could be made expediently in the field or under adverse conditions. Key to this was not using a traditional crimp, and cutting off the existing crimp. I tried various methods of cutting off the crimped portion of the shell. A simple flush cut saw or sharp knife works well enough, but it was tough to get an even cut all the way around the circumference. A bandsaw worked really well and gave a nice, even cut. The finished shells worked either way, so it's just a question of appearance. With the Remington shells, it's possible to cut just the very top ridge of the crimp, with the crimp folds stills staying in place. This prevents the birdshot from spilling out while you cut. Then, a simple pry with a knife tip pops the folded portion of the crimp out. The birdshot can be poured out and saved for later casting.
For loading a 1oz Lee slug, the wad in the Remington shell doesn't work. It has vertical ridge lines on the inside face of the wad petals that won't allow the slug to seat. I pulled the wad out and instead use a Win WAA12 wad that has smooth petals. The slug seats into the new wad, and the wad/slug assembly fits snugly into the hull. The new slug round is complete. It's tight enough that no cover is needed. If weatherproofing is a concern, there are a variety of potential solutions (see Buckshot notes below).
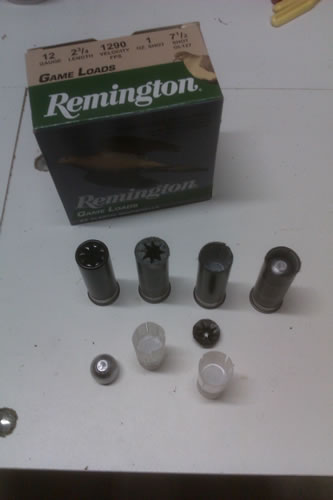
I apologize for the quality of the picture (cell phone). In the picture below, from left to right:
1) Original shell, unharmed
2) Shell, cut at the roll crimp
3) Crimp fold popped off, shot poured out
4) Completed slug round, with Win WAA12 wad substituted for Rem wad.
Next up, I experimented with buckshot. The buckshot is from a Lee .310 round ball mold (approximately #0 buckshot). Works for fitting stacks of 3 within the confines of the wad petals.
Unlike the slug, the buckshot is going to need something to hold it in the shell. The included Remington wad will hold 9 #0 pellets, weighing at around 7/8 oz, but leaving no room for a crimp. That's ok, since I didn't want to use a shot shell tool. Hot glue right atop the buckshot works, as does an overwad card (also with some hot glue). Wax or chewing gum should work fine, in a pinch.
I tried one variation that I liked a lot: I substituted a short Federal R12 wad for the Rem wad, which left some space at the top of the hull. I made use of the discarded Rem wads by cutting off the bottom of the wad and using it as an overwad for these shells, hot gluing them in place. Made for a neat, finished shell.
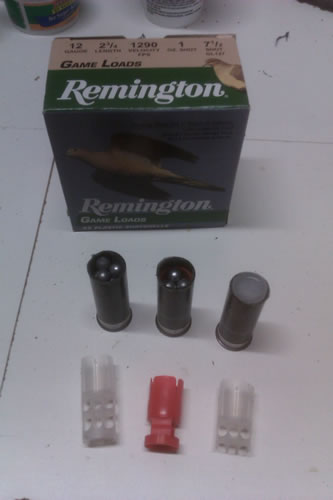
Shown below:
1) 9 #0 buckshot pellets with the standard Rem wad
2) 9 #0 buckshot pellets with the R12 wad (note additional space)
3) R12 wad, 9 pellets, capped with the cut off base of the Rem wad.
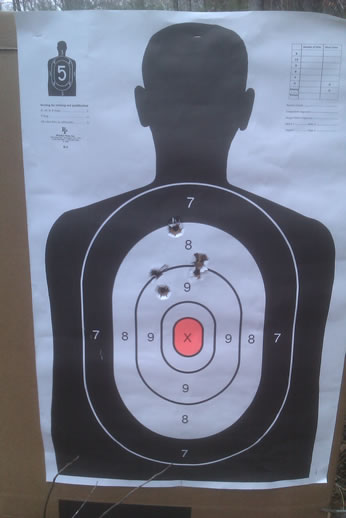
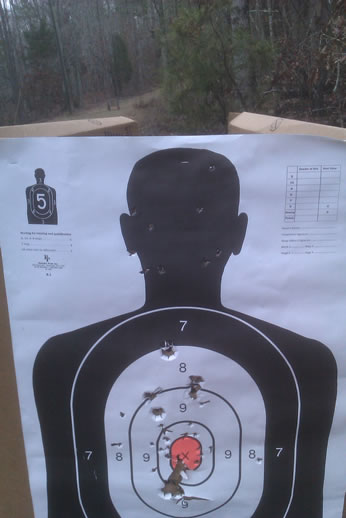
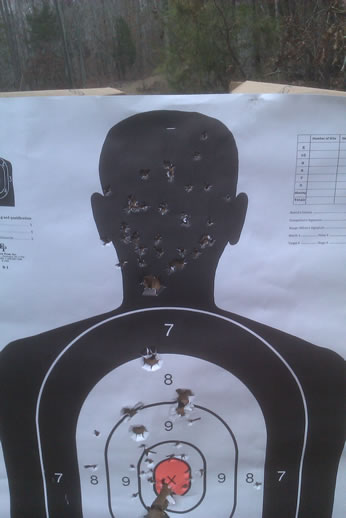
OK, big deal, you say. Get to the important stuff: How do they shoot?
See the next post.

|
   
   
|


|

 Reply With Quote