Cool little bench there RE.

|
   
   
|


|


Cool little bench there RE.
TEAM HOLLYWOOD
NRA- LIFE TSRA-LIFE SASS-LIFE


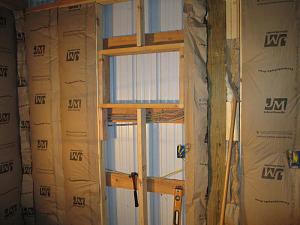
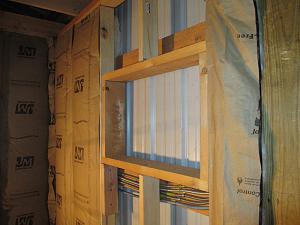
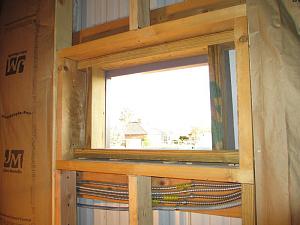
Here's an update from post #1284 on page 65. One difficulty was mounting a window AC unit through the interior new construction and the surrounding metal sided building. I found nothing after much searching on the Internet on installing a window unit in a steel building so decided to post my solution. The depth from the front of the new framed up wall to the steel wall without sheetrock is 6". The window unit could only tolerate 5" of mounting depth and that was if I mounted it with the fabricated flanges in a less than ideal location. The photos show the 2x6 framing and a second smaller frame within it made of 2x4s. The secondary 2x4 frame solved that problem. The steel wall was cut out with a sabre saw and metal cutting blade after drilling at the corners. It was trimmed on the outside with commercial window trim from a metal building supply company. Aluminum angle was attached to the cover of the AC unit at the same angle off of plumb (for proper draining) as the original mounting hardware would have been and screwed to the top and both sides of the 2x4 framing. It was foamed in place from the outside and insulated with fiberglass from the inside. If I have to replace the AC unit with a slightly larger one years down the road this mounting design will allow changes without having to rebuild the wall. No drafts were detected in a New Mexico windstorm.
The insulation, electrical wiring and communications (phone/tv/internet) cabling are all in place and the sheetrock is being hung. The Internet says a professional 2 man crew should be able to rock a 12x16 room in a little over an hour. Good for them! I'll be happy if I complete the remainder in a day. The taping and floating and texturing I can handle pretty well, though. The room with sheetrock started on the ceiling is a little over 11 feet square and will be for casting and reloading and there will be a general household repairs/ rc airplane workbench as well. I hope to be taping this weekend and hanging sheetrock in the second room which will be the gunsmithing shop in a week or so.
David
Sometimes life taps you on the shoulder and reminds you it's a one way street. Jim Morris

Good work all. Gives me something to work towards. My reloading area is getting a face lift and I will post pictures when it is done.
Also, I believe the Folgers container has overtaken the empty Cool Whip container as the best "free" storage unit.
Last edited by LC Press; 04-28-2013 at 07:06 PM.
My bench is just about done. A few more days and I should have some Pictures. Now if my dillon order would start showing up...
Thanks, LAH. The room above is now completely gilded in beautiful sheetrock. Taping and texturing begin tonight. BTW- the room is a little over 11x11' and we ran the AC as soon as the ceiling rock was screwed in place. Even going in and out the makeshift "door" (blanket over the opening that didn't reach the floor), running halogen work lights inside and no insulation on the ceiling we were able to keep it COLD on a 90 degree day. Once it's tight and fully insulated I have no concerns about being able to keep it meat locker cool on the hottest summer days with the 6000 BTU AC unit.
David
Sometimes life taps you on the shoulder and reminds you it's a one way street. Jim Morris
It's good to be cool when you load & cast.
Here is my set up started out loading on the Lee and now have a Dillon .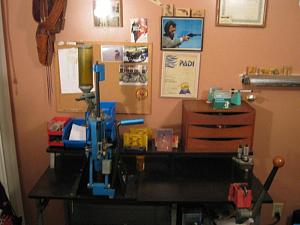
Always do right. This will gratify some people and astonish the rest.
Mark Twain
Nice setup Trailblaster.
Growth is good!
TEAM HOLLYWOOD
NRA- LIFE TSRA-LIFE SASS-LIFE

Here's a pic of my benches as they are currently. Left to right, Hornady LNL AP, Redding T7, Rock Chucker.
This is my trimming station directly in front of the reloading benches, so I can just turn around when I need it.
I'm planning to redo the benches this summer. There are several presses that aren't mounted in the photo above that I need the ability to swap in and out. The bench on the right is a little light duty for some of the work and the one on the left has some fundamental design problems. Ah, the evolution of reloading.

This is my new reloading bench. It was a throw away counter from our church renovation. It is extremely heavy which makes it a great reloading bench. I rebuilt and added drawers where there were cabinet doors. I included a pic of my new die drawer, I really like having them handy right under the press.
Malcolm
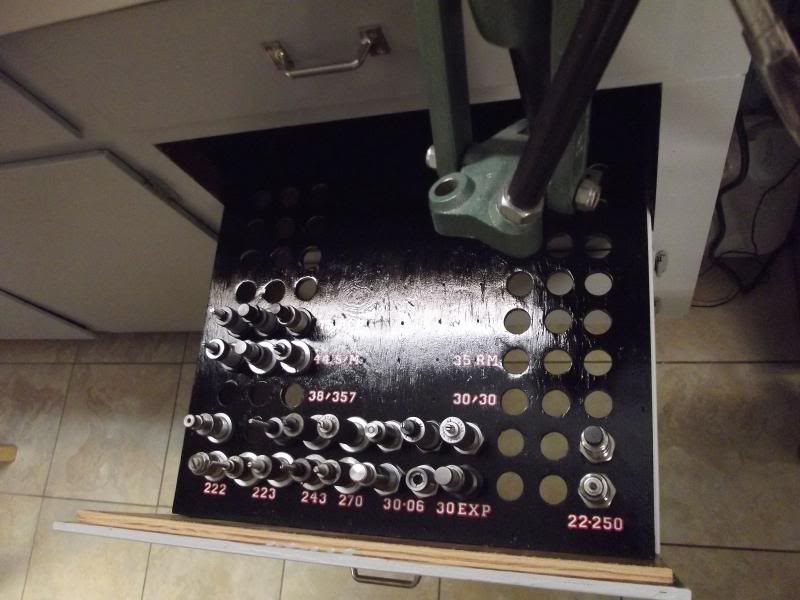
Pretty Slick die set up there B L!
TEAM HOLLYWOOD
NRA- LIFE TSRA-LIFE SASS-LIFE

This is the bench I've been using for about 10 years. It was an old kitchen counter that I put a 3/4 inch plywood top on. Not at all fancy but it works for me.
The Rock Chucker II is mounted on 2 plys of 3/4 inch ply and secured to the bench with 3 threaded knobs that screw into "T-nuts" on the bottom of the benchtop. I can switch out the RCBS for my Dillon SDB or a MEC 600 with the same mounting system.
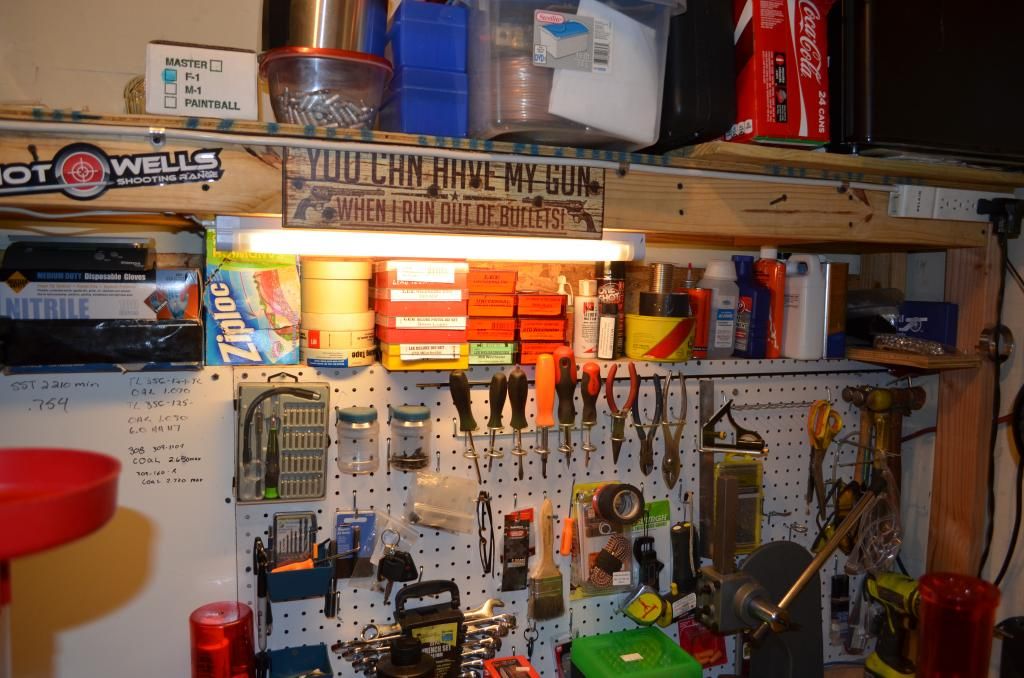
I just put up the shelves last week, really helped clear off the bench and organize some of my gear.
Don in Ohio
Couple quick pictures of my bench
Very neat setup .I really like the die storage drawer idea .Originally Posted by Brother_Love

Always do right. This will gratify some people and astonish the rest.
Mark Twain
Here is where I spend a lot of time, prpbably too much time.
Here's mine multiple companies represented.
How you guys keep such a clean work space? Mine looks like a dump.
Don't feel alone, mine is the same way.
Just finished my room this weekend after about a month of total gut and renovation in the cave!! Still have to stain and finish the shelf units.
Mike

 Posting Permissions


| BP | Bronze Point | IMR | Improved Military Rifle | PTD | Pointed |
| BR | Bench Rest | M | Magnum | RN | Round Nose |
| BT | Boat Tail | PL | Power-Lokt | SP | Soft Point |
| C | Compressed Charge | PR | Primer | SPCL | Soft Point "Core-Lokt" |
| HP | Hollow Point | PSPCL | Pointed Soft Point "Core Lokt" | C.O.L. | Cartridge Overall Length |
| PSP | Pointed Soft Point | Spz | Spitzer Point | SBT | Spitzer Boat Tail |
| LRN | Lead Round Nose | LWC | Lead Wad Cutter | LSWC | Lead Semi Wad Cutter |
| GC | Gas Check |

 Reply With Quote


