Titan ReloadingInline FabricationRotoMetals2Lee Precision
Load DataSnyders JerkyReloading EverythingMidSouth Shooters Supply
Repackbox Wideners

Thread: Loading bench pics

  1. #2141
    Boolit Master
    metricmonkeywrench's Avatar
    Join Date
    Apr 2016
    Location
    Virginia
    Posts
    1,108
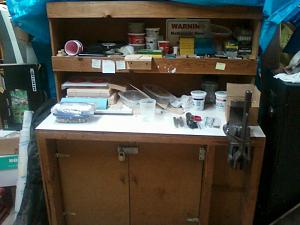
    Thanks for the kind words, this will be an upgrade from the hand me down bench located in the unheated workshop out back. My next step is to figure out the correct ratio of pegboard and shelves along the back wall for dies and cleaning gear stowage. Above that will be 2~3 kitchen cabinets and bookshelves.

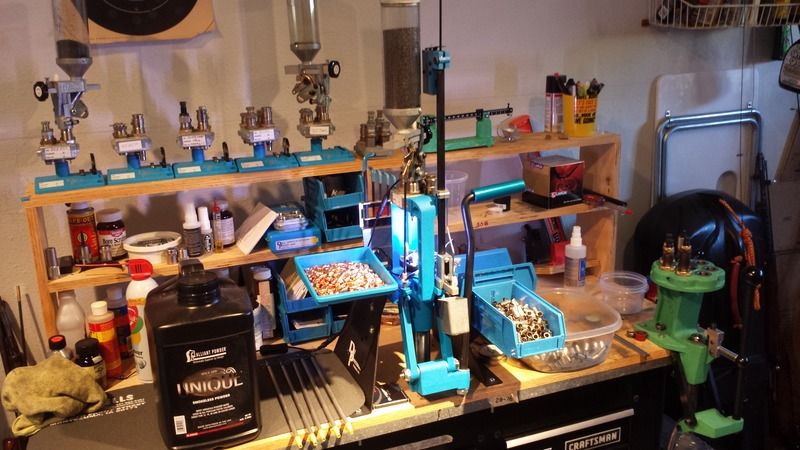
    I got a good deal on the Herters press mounted to the old bench, so the plan so far is the tumbling/de-priming dirty work goes on outside in the workshop and the case prep and loading happens inside along with gun cleaning and maintenance work.

    Click image for larger version. 

Name:	Bench 1.jpg 
Views:	103 
Size:	51.9 KB 
ID:	181178
    Last edited by metricmonkeywrench; 11-21-2016 at 08:19 PM.

  2. #2142
    Boolit Bub
    flyin brian's Avatar
    Join Date
    Apr 2014
    Location
    Calaveras County, CA
    Posts
    63
    Here's mine... it's always a mess and I have another bench with the trimmer, RCBS Chargemaster and case prep center.


  3. #2143
    Boolit Man
    HeavyHev's Avatar
    Join Date
    Jun 2016
    Location
    North America
    Posts
    77
    Do you find not having a backing to your shelves that you lose things from falling behind?

  4. #2144
    Banned
    Join Date
    May 2008
    Location
    In the Gopher State of Minnesota
    Posts
    6,711
    My wife recently passed away so there is no longer anyone to direct my paths along the straight and narrow. That means I have time to shoot guns, therefore I am taking up reloading again. I had stopped when we got married as her care took all my time.

    I see a bolt action rifle and two custom chambered revolvers in my future. But till that day there is an M1a and two auto pistols that need feeding. Thus I had to get back into reloading.


    Back somewhere around page 7 or so I posted a picture of my original bench. I still have it in the garage but cannot use it for reloading, at least very well. I am excited. Got a small bench put together this week that I had made up with a remaining piece of the original bench top. It fits the layout of the fully finished basement and does not look too out of place.


    Deciding which tools to use was a bit more challenging. 308 requires a relatively modern press, and I like progressive linkage. So I settled on a pre-production RCBS Model B. Powder measure can be anything that works thus the Modern Bond, 2nd gen. Dies are Simplex, they are the best I have on hand. Primer tool is 1st gen. RCBS/Lachmiller. Trickler is not branded, might by home made. Scale is the Webster RWC, it weighs to 1/20th of a grain. Pacific funnel and Herter's case block.

    To me the fun factor of reloading beats mass production, always.

    Ken
    Click image for larger version. 

Name:	IMG_5089.jpg 
Views:	175 
Size:	57.8 KB 
ID:	181797

  5. #2145
    Boolit Master brassrat's Avatar
    Join Date
    Feb 2012
    Location
    conn.
    Posts
    983
    Sorry to hear of your wife, good times ahead with all your knowledge and gear.

  6. #2146
    Boolit Bub
    Join Date
    Dec 2007
    Posts
    57
    Ken, sorry to hear of your lost. I always look forward to your posts. Glad you're getting back into reloading and using a unique set of tools to do it. After a fire last year that had us pretty much starting over at 73, the simple tasks of loading was a welcome relief to clear my head. Best of luck Ken.

  7. #2147
    Boolit Buddy Sur-shot's Avatar
    Join Date
    Dec 2006
    Location
    Florida
    Posts
    223
    Thought I had replied to this thread, but I do not see the new shop / reloading room. This is a specifically designed 1800 sq ft, foam insulated, heated and cooled shop building with a 20x25 reloading room. The window is barred and looks down a 250 yard rifle range. The bench on the upper left is the shot shell reloading bench, it has a 410 and 28ga reloader on it now. This is a retirement project.

    The cabinets are unfinished Oak, with sander sealer, the bench top is made of a double 2x12 with a 1x2, wood glued between, all setup in pipe clamps. Then a 2x8 was glued and screwed to the back to for a strong back and back splash. The 2x8 was then screwed to the wall with 3.5 inch deck screws, every 16 inches into a stud.

    I thought about this setup for a long time. One interior wall is the concrete wall of the 16x10x10 vault.
    Ed
    Attached Thumbnails Attached Thumbnails Reloading Room L 10-23-15.jpg   Reloading Room R w top 10-23-15.jpg   Reloading room E wall w top 10-23-15.jpg   Cabinets open Center to S end.jpg   Cabinets open center.jpg  

    Cabinets open N end.jpg  
    "Let us speak courteously, fairly, and keep ourselves armed and ready."
    Teddy Roosevelt, May 13, 1903

  8. #2148
    Boolit Master kmw1954's Avatar
    Join Date
    Mar 2016
    Location
    SE Wisconsin
    Posts
    1,448
    Sur-shot that is some serious stuff you got there. Compared to mine, mine wouldn't even qualify as a hobby.

  9. #2149
    Boolit Buddy

    3jimbo3's Avatar
    Join Date
    Apr 2012
    Location
    S.E. Tennessee
    Posts
    258
    Very nice Sur-Shot
    What if..... you woke up today with only the things you thanked God for yesterday?

  10. #2150
    Boolit Master

    lefty o's Avatar
    Join Date
    Dec 2012
    Posts
    2,187
    Quote Originally Posted by Sur-shot View Post
    Thought I had replied to this thread, but I do not see the new shop / reloading room. This is a specifically designed 1800 sq ft, foam insulated, heated and cooled shop building with a 20x25 reloading room. The window is barred and looks down a 250 yard rifle range. The bench on the upper left is the shot shell reloading bench, it has a 410 and 28ga reloader on it now. This is a retirement project.

    The cabinets are unfinished Oak, with sander sealer, the bench top is made of a double 2x12 with a 1x2, wood glued between, all setup in pipe clamps. Then a 2x8 was glued and screwed to the back to for a strong back and back splash. The 2x8 was then screwed to the wall with 3.5 inch deck screws, every 16 inches into a stud.

    I thought about this setup for a long time. One interior wall is the concrete wall of the 16x10x10 vault.
    Ed
    nice set up. i use the same cabinets, though not nearly as many ( i wish). i put a thin coat of watco light walnut danish oil on mine. looks good, just adds a touch of color, and is easily touched up if needed.

  11. #2151
    Boolit Master
    Join Date
    Feb 2007
    Location
    Communism running rampant!
    Posts
    4,756
    Well, I must say that Dthunter did a fantastic job on his bench renovation!

    Gorgeous does not even touch it!

    I for one would be very reluctant to start punching holes in that baby ....... I rank his product as furniture as another member alluded to! Outstanding SIR!

    Shur-shot has a great room going there as well! What storage!!! Wow!

    Not reflecting on what others have done and the many pages in this thread but myself ......... I am a CLUTTER BUG! You give me a flat spot ........ and I'll have a ton of **** piled on it in no time ........

    We put in an insulated steel barn a few years and with in an enclosed lean to my wife and I each have our own rooms ...... her's ..... a woman cave is her tack etc. and mine is for loading.

    Within the main barn we had built a wood cabinet for my storage and we are going to build some more of them. After 40+ years of accumulating things it takes a one pile of storage!

    For a guy like me ....... the actual work space needs to be limited!

    Right now I am working off a steel framed wood decked table I built that's working as an island.

    My plan is to build a bench however and I'll likely go steel for the frame as I have a bunch of 4X4" angle saved that will do a nice job. I am planning on an L shape with a section for casting.

    The use of unistrut imbedded in the top is something I am strongly considering .... I think one track for the far side of the presses and a docking system that can be placed along the front of the bench, attaching to the unistrut on the far side and hooking over the front and the angle iron under the front of the bench.

    I have been using C-clamps with my island and the idea of moving presses in and out .......... I have a lot of them ........ works better me (the clutter bug I am) than a much larger bench with everything I may use mounted all the time.

    Best regards

    Three 44s

  12. #2152

  13. #2153
    Boolit Master
    Join Date
    Nov 2011
    Location
    Alberta, Canada
    Posts
    505
    Thank you for the kind words "three 44s"!

    Here is a bit of an update on my bench renovation project.

    I completed some camouflage accents for the bench. Applied some camouflage to the inside of the bench top cabinet, and side panel.

    When I was arranging and attaching my gun smithing tools on my cabinet the other day, the mounting hooks just didn't look right to me!

    So I shopped around and found some strong magnets and mounted, and camouflaged them as well. This way the tools easily mount on the cabinet surface, but the mounting system is clean, streamlined and litterally camouflaged. It seemed a little more appropriate for the bench set up.

    I only had to install mounting hooks for two of the tools. One tool was too heavy for any magnets I could find at this time, and the other tool was non ferrous.

    I applied a roll of black mac-tac material to the bench top for further scratch resistance, and it can be rolled out of the way in seconds to expose the shiny bench surface for reloading.

    I decided to mount magnets to my press as well, to attach my stubby die wrenches. Keeps everything right handy at the work site, but neatly out of the way. The camouflaged press is just an experiment to see how it looks for now. I am in a camouflage mode right now! LOL! I have been spending allot of time down in my room trying to think of little enhancements for the bench. I am really enjoying the new room now!


    Here is a few pictures of the few small changes I made recently. Hope you like these pictures.


    Here are a few pictures of how the magnets are mounted on the press frame.
    Sorry if some of you don't like the camouflage job on the press, but I am just trying to see how I like the look of it before I get the press frame hydro dipped.


    Last edited by Dthunter; 12-05-2016 at 09:21 PM. Reason: additional information

  14. #2154
    Boolit Master flyingmonkey35's Avatar
    Join Date
    Apr 2014
    Location
    Utah
    Posts
    1,414
    So my old er. Bench broke when i was swaging primer pockets on 223. And got a itch.

    Making me a man cave reloading room.

    8x 5

    Wiring it up


    Optied for plywood for walling so i can mount stuff anywhere.


    2x4 screwed into studs with 4 inch for the back plate f the bench top.


    Going to go for a 16 to 18 inch depth for the bench. Any more the that and i run out of sitting room as it will be a wrap around bench.


    Debate now is bench top material. Solid 1/4 pine × 2 layers glued and screwd?

    And vertical legs or horizontal and mounted to the wall at the studs? Or 4x4 in key spots?

    Also going to paint it white.

    Sent from my LGLS991 using Tapatalk

  15. #2155
    Boolit Master kmw1954's Avatar
    Join Date
    Mar 2016
    Location
    SE Wisconsin
    Posts
    1,448
    For the bench top I would use 3/4" ply. Interior grade would work and look for the most ply's as you can find and 2 layers. A good glue like TiteBond 3 and just clamp it together until it cures.

  16. #2156
    Boolit Master


    NavyVet1959's Avatar
    Join Date
    Mar 2014
    Location
    409 area code -- Texas, ya'll
    Posts
    3,775
    Quote Originally Posted by Dthunter View Post
    Sorry if some of you don't like the camouflage job on the press, but I am just trying to see how I like the look of it before I get the press frame hydro dipped.

  17. #2157
    Boolit Master


    NavyVet1959's Avatar
    Join Date
    Mar 2014
    Location
    409 area code -- Texas, ya'll
    Posts
    3,775
    Quote Originally Posted by flyingmonkey35 View Post
    So my old er. Bench broke when i was swaging primer pockets on 223. And got a itch.

    Making me a man cave reloading room.
    If you might ever consider casting in there, now is probably the time to install the vent ducting and inline fan...

  18. #2158
    Boolit Master flyingmonkey35's Avatar
    Join Date
    Apr 2014
    Location
    Utah
    Posts
    1,414
    Quote Originally Posted by NavyVet1959 View Post
    If you might ever consider casting in there, now is probably the time to install the vent ducting and inline fan...
    I considered it. But i want to keep that a completely separate process. I have a place to cast indoors that is vented.

    Sent from my LGLS991 using Tapatalk

  19. #2159
    Boolit Buddy

    3jimbo3's Avatar
    Join Date
    Apr 2012
    Location
    S.E. Tennessee
    Posts
    258
    Quote Originally Posted by kmw1954 View Post
    For the bench top I would use 3/4" ply. Interior grade would work and look for the most ply's as you can find and 2 layers. A good glue like TiteBond 3 and just clamp it together until it cures.
    I just reconstructed my bench. I used 2 x 6's for the frame. For the top I used 2 x 12's cut 18 inches long , glued and nailed for a solid top. The I covered it with 3/4 inch plywood and trimmed out the edges with trim molding. You could park a truck on it and it wouldn't give any.

    Sent from my SM-G900V using Tapatalk
    What if..... you woke up today with only the things you thanked God for yesterday?

  20. #2160
    Boolit Master
    metricmonkeywrench's Avatar
    Join Date
    Apr 2016
    Location
    Virginia
    Posts
    1,108
    Flyingmonkey, Just recently went through this doing my benchtop and something to think about. I mounted the lower layer first glued and screwed to the wall cleats and supporting structure. I also took an extra step and routed in a steel plate where the press would go. Then before I joined the two pieces of 23/32 plywood together with several tubes of construction adhesive I made a 6 x 6 cardboard template and drilled 1/8in holes every 6 inches starting about 2 inches in from the exposed edges. When the adhesive was applied and the top put in place I was able to come up from underneath and screw the top layer down from the bottom and ensuring good contact between the two pieces, given the amount of adhesive that leaked from the exposed joints I may have gone a little overboard but its probably the closest to 100 % contact between the two layers I could get without a ton of clamps.

Page 108 of 128 FirstFirst ... 8589899100101102103104105106107108109110111112113114115116117118 ... LastLast

Posting Permissions

  • You may not post new threads
  • You may not post replies
  • You may not post attachments
  • You may not edit your posts
  •  
Abbreviations used in Reloading

BP Bronze Point IMR Improved Military Rifle PTD Pointed
BR Bench Rest M Magnum RN Round Nose
BT Boat Tail PL Power-Lokt SP Soft Point
C Compressed Charge PR Primer SPCL Soft Point "Core-Lokt"
HP Hollow Point PSPCL Pointed Soft Point "Core Lokt" C.O.L. Cartridge Overall Length
PSP Pointed Soft Point Spz Spitzer Point SBT Spitzer Boat Tail
LRN Lead Round Nose LWC Lead Wad Cutter LSWC Lead Semi Wad Cutter
GC Gas Check