MidSouth Shooters SupplyTitan ReloadingWidenersLee Precision
RotoMetals2RepackboxReloading EverythingSnyders Jerky
Load Data Inline Fabrication
Page 33 of 39 FirstFirst ... 2324252627282930313233343536373839 LastLast
Results 641 to 660 of 768

Thread: Project - PID on Lee Pro 4 20 furnace

  1. #641
    Boolit Master

    Mike W1's Avatar
    Join Date
    Nov 2008
    Location
    Rural Sumner, IA
    Posts
    1,317
    Without knowing which PID you have my best guess is you didn't wait long enough for it to get trained. Think they have to go through the over/under cycle at least 3 times before the unit sets the PID values. At a guess I'd say that'll take at least on the order of 15-20 minutes to accomplish. Once you set AT let the thing kick itself out of AT. At least that's the way my SYL-2352 and Rex C-100 operate. They over/under shoot by quite a bit till they're trained.
    Mike

    Benefactor Member NRA
    Life Member Iowa Firearms Coalition
    US Army Vet

    There are two ways to conquer and enslave a nation.
    One is by the sword. The other is by debt.”
    John Adams 1826

  2. #642
    Boolit Buddy
    Join Date
    Jan 2013
    Location
    Beattie, TX
    Posts
    254
    Thanks, Mike. I've got the Auber 2352 and 25A SSR. Do you set the AT to 1 or 2? The way I understand it, 1 lets you start the AT cycle by hitting the A/M button. It ran for about an hour, running the temp up and down. I just sat there and watched it do it's thing. How do you know when it has finished the AT cycle? I started the pot in MAN and switched it to AUTO after the pot heated up, then left it in auto the entire time. I probably just need to use it a couple of more times before figuring it all out.

  3. #643
    Boolit Master

    Mike W1's Avatar
    Join Date
    Nov 2008
    Location
    Rural Sumner, IA
    Posts
    1,317
    I usually set mine to 2 as it'll automatically go into AT mode by it self. You'll see the SV screen alternate between saying the SV and AT. When it's done it'll return to just the SV. Actually the reason I use 2 is if you use the 1 setting you have to hit another key (A/M?) and I never remember which one it is.

    Just reread your post and I'm assuming you're cycling the SET key till you get to the part for the AT. The sequence's on my 2352 and the Rex don't resemble each other all that much and both my units are out in the shop where I cast. I did find it useful to make a list of those sequences and also record the PID values for reference.
    Mike

    Benefactor Member NRA
    Life Member Iowa Firearms Coalition
    US Army Vet

    There are two ways to conquer and enslave a nation.
    One is by the sword. The other is by debt.”
    John Adams 1826

  4. #644
    Boolit Buddy
    Join Date
    Jan 2013
    Location
    Beattie, TX
    Posts
    254
    So setting the AT = 2 will make it flash between SV and AT? OK, I remember mine doing that but it isn't doing it now - I'll have to recheck my settings. Yes, I was hitting A/M to enter the training mode but I'd rather have it start automatically. Also, yes, I am cycling the SET key to move through the settings. I used a programming list I found elsewhere in this thread and made a copy to keep with the PID but I keep adding notes to it. I can see not remembering any of this stuff six months from now and that list will come in handy.

    Marshall

  5. #645
    Boolit Buddy borg's Avatar
    Join Date
    Nov 2005
    Location
    The Hog State
    Posts
    322
    Well, I finally had some time to put this together, I assume that I have it wired right, no smoke.
    However, when I turn it on, all I get is a flashing PV 2393 and orAL, and the SV flashing 50 and orAL.
    I thought it would at least come up where I could adjust the temp.
    I have been through this thread a couple of times and don't see anything about getting to that point, the instructions seem to assume that it will come up to where you can adjust it.
    I have the Auber 2352 and the K type TC.

  6. #646
    Boolit Master

    Mike W1's Avatar
    Join Date
    Nov 2008
    Location
    Rural Sumner, IA
    Posts
    1,317
    Getting' late right now and probably somebody will look into before I get back on here tomorrow AM. In the meantime you might sort through some notes I've picked up here and there. I have the 2352 also and MAY be able to help a little then.


    Start by removing the input as a source of the error.
    At the PID unit, remove the TC leads and use a short piece of copper wire
    to jumper the input terminals together.
    The Unit should now read nothing but ambient temperature.

    Do you still have an error and if so how much?

    The PID unit itself has a input error of 0.3% of range.
    For a K type that is ~2500º about +-7.5º of acceptable error in the unit
    itself.
    However, in practice the error is rarely more than half that.

    The K type TC itself has an error also. This is due to small impurities in the
    metal used to make it
    Depending on temperature, that error is a few degrees (max of about 4º)

    Irregularities in forming the 'normalized junction' that is the sensor itself can
    also cause problems.
    (I'm suffering from that with my TCs from 'TOKO', I'm getting a 8% failure
    rate and it can't be found without bring the TC up to operating temp.)


    As theperfessor mentions, how you wire the TC up matters.
    One thing that can cause rather large errors is to reverse the wire types
    from the jack/plug connection to the unit.
    Not using TC wire for that connection is a big error source as well.

    FYI
    You Can get away with a screw type connector that is not for TCs.
    This is because the screw, at the 2 points it contacts the wires and therefor
    the metal to metal junctions, is at the same temperature.

    No, when you jumper the terminals #5 and #6 together, the unit reads just like
    a thermometer.
    The upper display is what the unit thinks the ambient temp is; in this case 73º.

    If you are sure the room temp is 58º and that the unit is at that temp, then the
    "cold junction compensation" circuit is bad.
    Holding the unit in your hand can warm it up, be sure it has had a chance to
    cool back to room temp before testing.

    The unit 'knows' what the ambient temp is by the reverse leakage current
    across a diode.
    If you look at the end of your Auber unit, you will see 2 open slots (no terminal screws).
    One of those 'holes' should have a small diode in it. That is the CJC diode and
    that is what reads ambient temp.


    A K type thermocouple is inherently inaccurate.
    It has a rather wide average margin for error +- 2º IIRC.
    That and 'cheap' PIDs are only good to around .3% of the thermocouple
    range of ~ 2200º or ~ 7º of error.

    A K type that holds with in 3º of 0 - 100 C is doing pretty good.
    The other issue with The K type is, it is Most inaccurate at the temps we
    use to cast.

    Why do we use them if they are so bad, you might wonder.
    Well, 1. they are cheap and available, 2. they don't rust, and 3. they work
    in the range we need.
    J type is a more accurate choice for our temps but it has to be shielded - it's
    iron and rusts.
    B,R, and S types would work except they are made from rare metals
    (platinum) and are rather expensive.


    The best you can do is what Lee recommends: replace the faulty TC and
    set the PID for Ambient temp.

    The other problem you're seeing is 'drift'. As that enclosure doesn't vent,
    the heat builds up inside.
    In other words what the controller 'sees' as ambient is higher than actual.
    While it may not cause failure it is effecting the function.
    Look at the terminal end of that Auber unit, see the small glass package
    'diode' in one of the open holes?
    That is the cold junction compensator. That is what reads ambient temp.

    <edit> Is your PID sitting on it's side?? Do you mount he box on the wall?
    There is a reason there are vent slots in the top and bottom of the PID unit
    you know </edit>
    Mike

    Benefactor Member NRA
    Life Member Iowa Firearms Coalition
    US Army Vet

    There are two ways to conquer and enslave a nation.
    One is by the sword. The other is by debt.”
    John Adams 1826

  7. #647
    Boolit Buddy borg's Avatar
    Join Date
    Nov 2005
    Location
    The Hog State
    Posts
    322
    When I connect the jumper, it stops flashing and gives the PV reading 72, and the SV 50, so 22 degs.
    Does that tell me that the TC is bad?

  8. #648
    Boolit Buddy borg's Avatar
    Join Date
    Nov 2005
    Location
    The Hog State
    Posts
    322
    When I connect the jumper, it stops flashing and gives the PV reading 72, and the SV 50, so 22 degs.
    Does that tell me that the TC is bad? I checked the wires and they are correct.
    Right now it's sitting in the open air waiting for me to put into an ammo box.
    I have the TC panel mount, so shouldn't be dissimilar metals causing the flashing.

  9. #649
    Boolit Master

    Mike W1's Avatar
    Join Date
    Nov 2008
    Location
    Rural Sumner, IA
    Posts
    1,317
    Quote Originally Posted by borg View Post
    When I connect the jumper, it stops flashing and gives the PV reading 72, and the SV 50, so 22 degs.
    Does that tell me that the TC is bad? I checked the wires and they are correct.
    Right now it's sitting in the open air waiting for me to put into an ammo box.
    I have the TC panel mount, so shouldn't be dissimilar metals causing the flashing.
    Just checked mine. With nothing plugged into either the TC panel or the power outlet I get similar flashing results. When I plug the TC in then I get my SV reading and the PV reading. If you're sure all wiring is correct I'd suspect something with either the TC or it's wiring.

    If you have any doubt about your connections shoot me an PM with your email address and I'll send you a couple wiring diagrams that helped me out when I did mine.
    Mike

    Benefactor Member NRA
    Life Member Iowa Firearms Coalition
    US Army Vet

    There are two ways to conquer and enslave a nation.
    One is by the sword. The other is by debt.”
    John Adams 1826

  10. #650
    Boolit Buddy borg's Avatar
    Join Date
    Nov 2005
    Location
    The Hog State
    Posts
    322
    Found my problem.
    Had a RCH crossing over in the panel mount. All seems to work OK now.
    Thanks a million.

  11. #651
    Boolit Master

    Mike W1's Avatar
    Join Date
    Nov 2008
    Location
    Rural Sumner, IA
    Posts
    1,317
    Quote Originally Posted by borg View Post
    Found my problem.
    Had a RCH crossing over in the panel mount. All seems to work OK now.
    Thanks a million.
    Glad you found it. Does that RCH mean what I'm sure it does?
    Mike

    Benefactor Member NRA
    Life Member Iowa Firearms Coalition
    US Army Vet

    There are two ways to conquer and enslave a nation.
    One is by the sword. The other is by debt.”
    John Adams 1826

  12. #652
    Boolit Buddy borg's Avatar
    Join Date
    Nov 2005
    Location
    The Hog State
    Posts
    322
    LOL, Yes. It was one strand of copper wire grounding, looked like a RCH to me.

  13. #653
    Boolit Bub
    Join Date
    Mar 2015
    Posts
    62
    I really didn't want to build one of these, but I just couldn't help myself.

    Its been fired up and appears to be learning, I'll get my casting on tomorrow!

    Thanks for everyone who contributed to the thread!
    Attached Thumbnails Attached Thumbnails image.jpg   image.jpg  

  14. #654
    Boolit Master dikman's Avatar
    Join Date
    May 2013
    Location
    Sth Oz - A Land Downunder
    Posts
    2,087
    Well done . (I was the same, now I've built three ).

  15. #655
    Boolit Bub
    Join Date
    Mar 2015
    Posts
    62
    Quote Originally Posted by Mal Paso View Post
    So as not to be outdone in the Computer Recycling or SSR Cooling I present this.

    The Intel CPU Cooler had been on my desk for at least 3 years, too nice to throw out with a solid copper core around a very cool aluminum extrusion. Never used, it was upgraded before I put the computer together with some fancy Heat Pipe aftermarket cooler. It looks cool even though totally unnecessary. At least I got it off my Desk.
    How did you hook up your fan, if its hooked up?

  16. #656
    Boolit Mold
    Join Date
    Oct 2013
    Location
    North Little Rock, Arkansas
    Posts
    19
    ended up redoing mine..


  17. #657
    Boolit Master

    Join Date
    Mar 2005
    Location
    Peace River, Alberta
    Posts
    2,121
    Quote Originally Posted by dikman View Post
    Well done . (I was the same, now I've built three ).
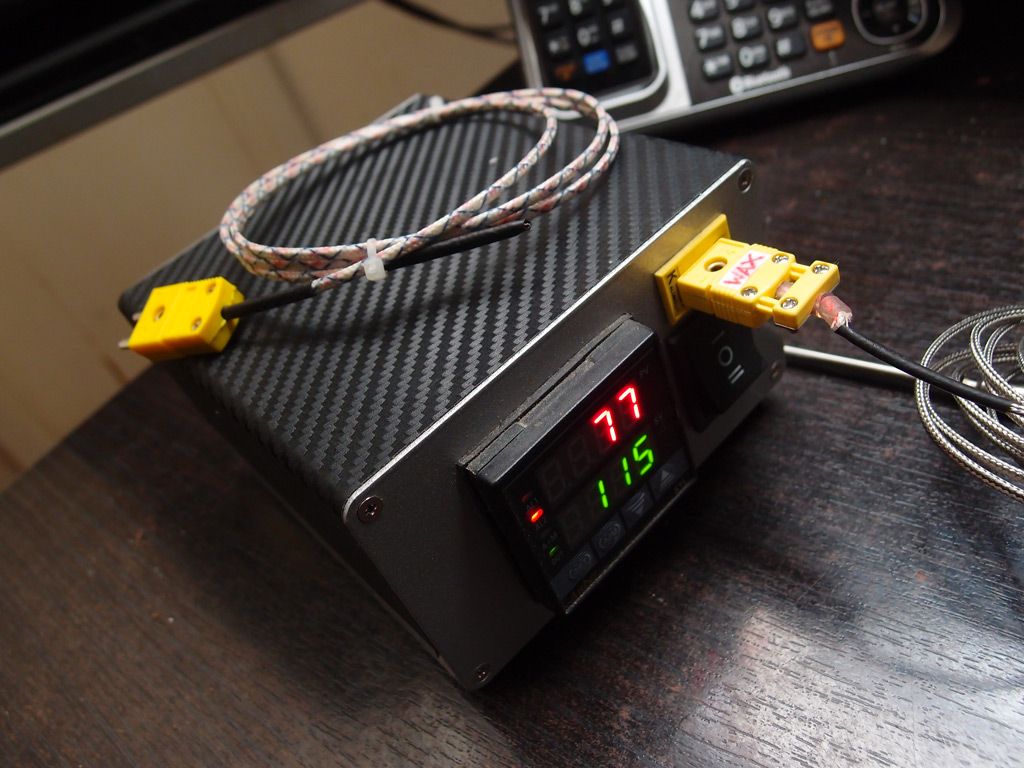
    The first PID is not enough...
    Go now and pour yourself a hot one...

  18. #658
    Boolit Buddy
    Join Date
    Mar 2013
    Location
    Bear, Delaware
    Posts
    129
    Can anyone give me a link to the parts needed to build a PID? I would like to build mine in a metal box with a socket to plug my Lee pot into? I just don't know what I need or where I should get it. Please help me out guys!

  19. #659
    Boolit Master

    Join Date
    Feb 2006
    Location
    WNY
    Posts
    1,523
    mookie, all the info you need is here: http://castboolits.gunloads.com/show...ol-temperature
    "We take a thousand moments for granted thinking there will be a thousand more to come. Each day, each breath, each beat of your heart is a gift. Live with love & joy, tomorrow is not promised to anyone......"

    unknown

  20. #660
    Boolit Master

    Join Date
    Feb 2006
    Location
    WNY
    Posts
    1,523
    OK, I finished building the kit I got from jconn (http://jconninv.com/kit.shtml), but there's no joy. When I switched it on, nothing happened. No lights, no hum, nothing. I double-checked the wiring to make sure it was right and checked for shorts. Anyone have any troubleshooting ideas? It's a Mypin TA4.
    "We take a thousand moments for granted thinking there will be a thousand more to come. Each day, each breath, each beat of your heart is a gift. Live with love & joy, tomorrow is not promised to anyone......"

    unknown

Page 33 of 39 FirstFirst ... 2324252627282930313233343536373839 LastLast

Posting Permissions

  • You may not post new threads
  • You may not post replies
  • You may not post attachments
  • You may not edit your posts
  •  
Abbreviations used in Reloading

BP Bronze Point IMR Improved Military Rifle PTD Pointed
BR Bench Rest M Magnum RN Round Nose
BT Boat Tail PL Power-Lokt SP Soft Point
C Compressed Charge PR Primer SPCL Soft Point "Core-Lokt"
HP Hollow Point PSPCL Pointed Soft Point "Core Lokt" C.O.L. Cartridge Overall Length
PSP Pointed Soft Point Spz Spitzer Point SBT Spitzer Boat Tail
LRN Lead Round Nose LWC Lead Wad Cutter LSWC Lead Semi Wad Cutter
GC Gas Check