Lee PrecisionTitan ReloadingLoad DataInline Fabrication
RotoMetals2MidSouth Shooters SupplyReloading EverythingWideners
Repackbox Snyders Jerky
Page 12 of 39 FirstFirst ... 2345678910111213141516171819202122 ... LastLast
Results 221 to 240 of 768

Thread: Project - PID on Lee Pro 4 20 furnace

  1. #221
    Boolit Master

    Join Date
    Mar 2008
    Location
    Missouri, in the Ozarks
    Posts
    509
    I finally got my PID controller finished today, and took it for a test run. Works pretty well, but the temp drops from the set value of 725 down to about 685 whenever I add an ingot to the pot. The ingots are roughly 1lb and preheated on the hot plate to about 365 degrees. I was surprised at that much of a temperature drop with a preheated ingot going into the pot. Recovery of set point temperature was fairly quick. The PID seemed to regularly overshoot temp by about 5 degrees. I noticed that the output voltage was turned off below the set point, so it may just be something to do with the pot itself.

    Overall, I'm pleased with the results as the temperature of the pot seems more stable. The next test will be with the Lee 4-20 using the ladle.
    "Great danger lies in the notion that we can reason with evil." Doug Patton


    Converting lead into gold

  2. #222
    Banned

    Join Date
    Jul 2009
    Location
    The Great Land
    Posts
    998
    No that is how it's supposed to work.

    I have one I trained to 3/4 of a pot.
    From dead cold and set at 700º, it'll shut off ~ 620º and 'coast' to within a few degrees of 700, usually about 702.

    You can get you're PID to do it too.
    Reset the AT parameter to 'learn'. (It locks itself each time it finishes). Bring your pot up to temp.Have about an "average" amount of lead in it (like I said I used 3/4 full).
    Now press on hold the AT button until AT flashes on the display.
    Walk away for about 30 minutes. when you come back it'll amaze you how accurate the thing is! It'll stay that accurate as long as the amount of lead is around the 'average'.

  3. #223
    Boolit Buddy boltons75's Avatar
    Join Date
    Jan 2012
    Location
    Flint, Mi.
    Posts
    495
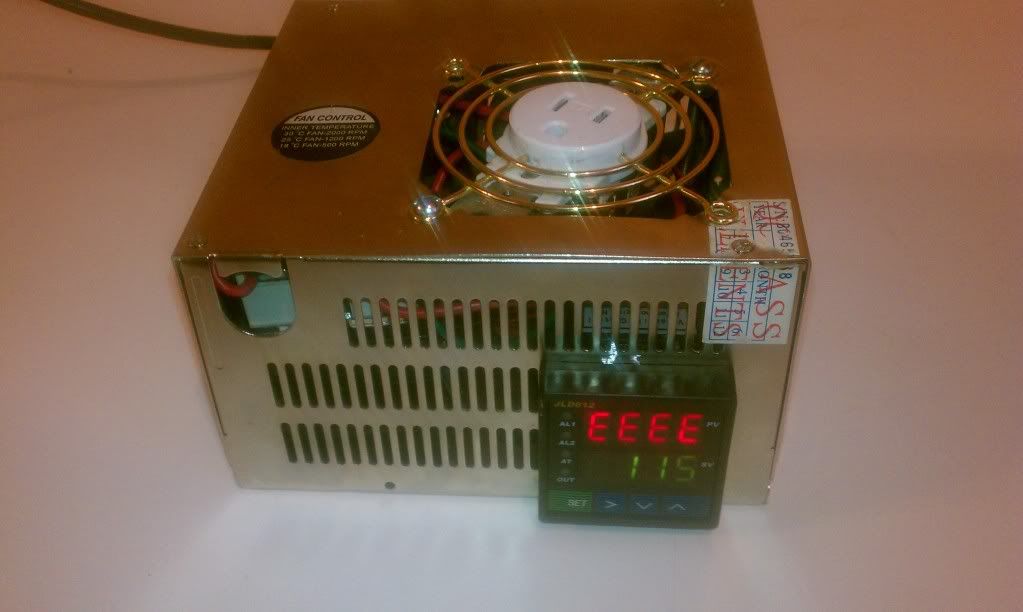
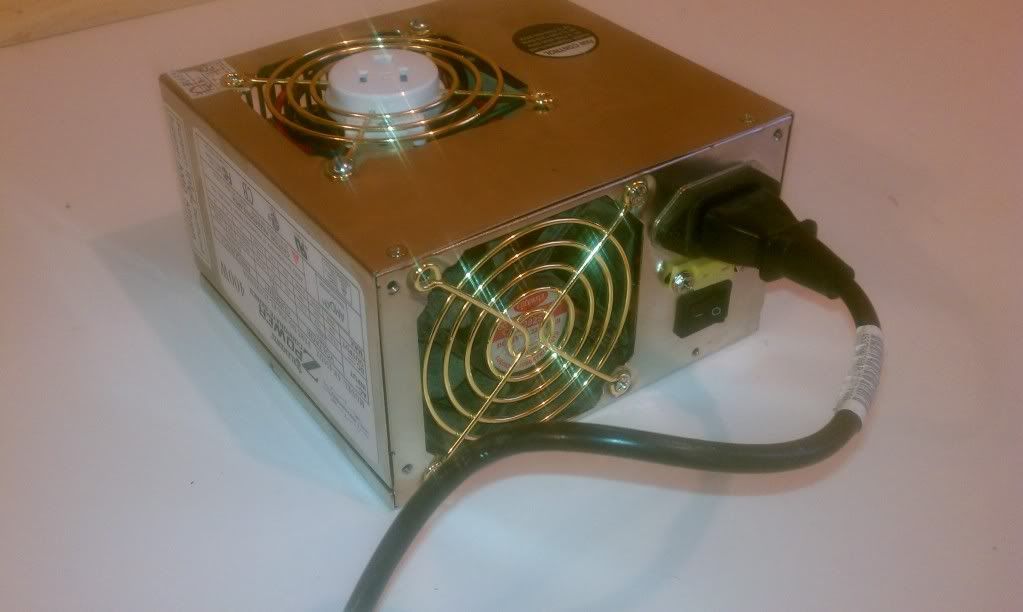
    Got mine wired up today to make sure all was working well. So far so good, now I just need to tidy it up a bit, and wire in the fan to the power and it'll ready to go. Thanks for the idea of using the computer power supply, it worked great, and was free since I had an old tower that was in the toss pile.

    Always carry, never tell.

  4. #224
    Boolit Master
    Jailer's Avatar
    Join Date
    Sep 2010
    Location
    Ithaca, MI
    Posts
    1,847
    Well, I finally jumped on board. Just ordered everything I need for my PID project.

    Now the waiting game until it all arrives.

  5. #225
    Boolit Buddy boltons75's Avatar
    Join Date
    Jan 2012
    Location
    Flint, Mi.
    Posts
    495
    Here's my pid controller, took an idea from someone here and gutted a computer power supply for the case. It has a thermocouple plug on the back, I'm using it for my lead pot and my lam2 heater.


  6. #226
    Boolit Master
    Jailer's Avatar
    Join Date
    Sep 2010
    Location
    Ithaca, MI
    Posts
    1,847
    Quote Originally Posted by Jailer View Post

    Now the waiting game until it all arrives.
    Talk about fast shipping!!!

    Got all my stuff today and threw it all together. Works like a charm.

    I can't believe how much easier this makes casting not having to keep one eye on the thermometer to keep the temp in check.

    Thanks Cranium for posting on this. Every day I'm amazed at the multitude of helpful things I find on this site.

  7. #227
    Boolit Mold
    Join Date
    May 2011
    Posts
    9
    Thanks Cranium, you helped me find yet another use for an ammo can, but more importantly thanks for posting the idea, setup and everyone's great input.

    One pointer to everyone, if you plan to source a cheaper PID on Ebay, make sure you check that it displays the units you wish to work with. Many of them show Celsius and not Fahrenheit, with no ability to convert between them. I learned the hard way, (had to buy 2) My second one, I ended up going with the easy to work with Aubriens PID which you can display both.

  8. #228
    Boolit Mold
    Join Date
    May 2011
    Posts
    9
    Picture of my new ammo can
    Attached Thumbnails Attached Thumbnails PID ammo can.jpg  

  9. #229
    Boolit Buddy boltons75's Avatar
    Join Date
    Jan 2012
    Location
    Flint, Mi.
    Posts
    495
    Nice case there.

  10. #230
    Boolit Buddy
    Join Date
    Mar 2008
    Posts
    340
    The electrical plug looks surprised...

  11. #231
    Boolit Master
    Mal Paso's Avatar
    Join Date
    Jun 2010
    Location
    Carmel, Ca
    Posts
    4,121

    Way Over Cooling

    So as not to be outdone in the Computer Recycling or SSR Cooling I present this.

    The Intel CPU Cooler had been on my desk for at least 3 years, too nice to throw out with a solid copper core around a very cool aluminum extrusion. Never used, it was upgraded before I put the computer together with some fancy Heat Pipe aftermarket cooler. It looks cool even though totally unnecessary. At least I got it off my Desk.
    Attached Thumbnails Attached Thumbnails PIDcooler1.jpg   PIDcooler2.jpg  
    Mal

    Mal Paso means Bad Pass, just so you know.

  12. #232
    Boolit Mold shotgun sherry's Avatar
    Join Date
    Nov 2009
    Location
    Ca.
    Posts
    16
    I want to thank every one here. If it wasn't for all of your posting here I would have never got
    My PID working. Thanks again

  13. #233
    Boolit Bub
    Join Date
    Jul 2007
    Posts
    33
    Okay, about to order some parts and build one of these. If I use an old extension cord for the external wiring, what do I do with the ground wire? Should I ground the case I'm using? Should I just ignore it? The wiring diagrams only show the live and neutral wires.

  14. #234
    Boolit Master
    Mal Paso's Avatar
    Join Date
    Jun 2010
    Location
    Carmel, Ca
    Posts
    4,121
    Quote Originally Posted by dave_g View Post
    Okay, about to order some parts and build one of these. If I use an old extension cord for the external wiring, what do I do with the ground wire? Should I ground the case I'm using? Should I just ignore it? The wiring diagrams only show the live and neutral wires.
    If the case is metal attach the ground to it. As well as the output socket ground if it has one.
    Mal

    Mal Paso means Bad Pass, just so you know.

  15. #235
    Boolit Bub
    Join Date
    Jul 2007
    Posts
    33
    Thanks, the case I got is metal. I'll hook wire it up as soon as the PID shows up.

  16. #236
    Boolit Mold Ultravox's Avatar
    Join Date
    Apr 2011
    Location
    Minneapolis, MN
    Posts
    19
    Well I have to say there are some great ideas here. I got half way through the thread and stopped to order a PID, thermocouple, and SSR.

    I have a bunch of old PC power supplies around and that looks like a great enclosure.

    I'll do a write-up and post it here when I'm done.

    Thanks for all the info!
    Come check out my custom 1911 grips and other wooden items at my Etsy store.

  17. #237
    Boolit Man
    Join Date
    Oct 2011
    Location
    Aurora, CO
    Posts
    90
    Can one of you electrical/PID geniuses explain what settings I need for the PID. I'm trying to get my two neon lights to light up when my alloy is too hot or too cold. Besides that I would like to get my PID to control the temp as accurate,y as possible. I've tried reading over the manual but clearly I'm not smart enough to decipher what I need between all the different settings (a, t, pb, ep2, lock,etc, etc, etc) any help would be greatly appreciated.
    Respectfully,

    Powell

  18. #238
    Banned

    Join Date
    Jul 2009
    Location
    The Great Land
    Posts
    998
    What Controller are you using?? Auber 2352?

    The actual PID settings are pretty good from the factory. But you need to train the unit.

    I assume you have the alarm circuits wired correctly.

    from the top of SET mode.

    ALm 1 = absolute high limit alarm (I set at 900)

    ALm 2 = absolute low limit alarm (I set at 500)

    HY-1 = deviation high alarm (I set at 5) this is how far above set temp to trigger alarm 1

    HY-2 = deviation low alarm (I set at 5) this is how far below set temp to trigger alarm 2

    HY = hysteresis best at 0.3 unless you Must change it.

    At = learn mode. if set to 3 you can't train the unit. Set to 1 to enable training mode. You must make this change every time you want to retrain the controller

    I =
    P =
    d =
    don't change these let the unit it make changes by training it.

    Sn = input type - should be 0 (zero) for a K type TC

    dP = decimal point displayed - set to 0 as you really don't need temp displayed to less than a degree.

    P-SL =
    P-SH =
    don't change unless needed.

    Pb = input offset, put TC in Ice water use this to zero the displayed temp to 32º.

    op-A = no changes

    OUTL = 0 - allows unit to turn off.

    OUTH = 100 - allows unit to run at 100% on

    AL-P (default = 17) alarm options. set to 21 to enable both high alarms on ALM1 and both low alarms on ALM2.

    COOL (2=disable alarms until set temp reached), (8 = degrees in Fahrenheit)
    10 (2+8) = degrees F and disable alarms. 2 = disable alarms and degrees C
    I prefer the alarms active from startup and degrees F so I use 8 as the setting.

    You can ignore the resr of the settings.

  19. #239
    Boolit Man
    Join Date
    Oct 2011
    Location
    Aurora, CO
    Posts
    90
    Frozone, you are the f-ing man! THANK YOU!
    Respectfully,

    Powell

  20. #240
    Boolit Man
    Join Date
    Oct 2011
    Location
    Aurora, CO
    Posts
    90
    Ok so I played around with it a little bit but I still cant seem to get the neon lights to light up. Just for testing I have the target temp set at 80 so I can use body heat and ice water to manipulate the temp. I've got my lights hooked up to terminals 1, 13 for alarm 1 and 13,14 for alarm 2. The small lights for AL1 and AL2 located on the PID unit work just fine but my other neon lights do not. Suggestions?
    Respectfully,

    Powell

Page 12 of 39 FirstFirst ... 2345678910111213141516171819202122 ... LastLast

Posting Permissions

  • You may not post new threads
  • You may not post replies
  • You may not post attachments
  • You may not edit your posts
  •  
Abbreviations used in Reloading

BP Bronze Point IMR Improved Military Rifle PTD Pointed
BR Bench Rest M Magnum RN Round Nose
BT Boat Tail PL Power-Lokt SP Soft Point
C Compressed Charge PR Primer SPCL Soft Point "Core-Lokt"
HP Hollow Point PSPCL Pointed Soft Point "Core Lokt" C.O.L. Cartridge Overall Length
PSP Pointed Soft Point Spz Spitzer Point SBT Spitzer Boat Tail
LRN Lead Round Nose LWC Lead Wad Cutter LSWC Lead Semi Wad Cutter
GC Gas Check